

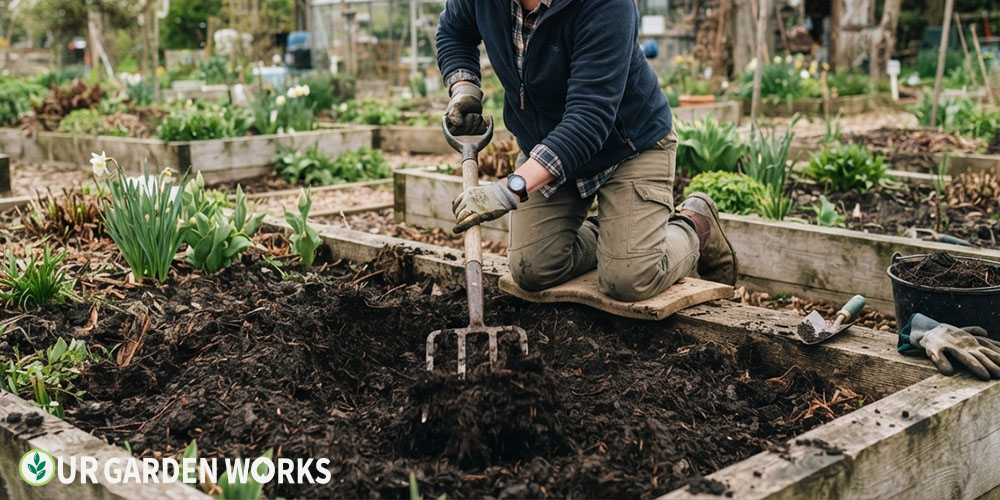
Every great garden season starts in February or March, not May. The gardeners who are harvesting armfuls of tomatoes and zucchini by July are the ones who spent a few hours in early spring getting their beds ready before the planting rush. It’s not glamorous work — but it’s the most rewarding investment of time you’ll make all year.
The good news: spring bed preparation doesn’t require expensive amendments or complicated tools. Eight straightforward steps, done in order, get your beds into the best shape they can be for whatever you’re planting.
Quick Answer: The 8 steps to prepare garden beds for spring: clear winter debris, pull early weeds, test your soil, loosen compacted soil, add 2–3 inches of compost, apply balanced fertilizer if needed, edge the bed, and mulch after planting. Start at least 3–4 weeks before your last frost date.
When to Start Preparing Your Garden Beds
The timing depends on your zone. You want to begin preparation as soon as the soil is workable — meaning it no longer freezes overnight and doesn’t compact into a muddy ball when squeezed. Working wet soil damages its structure and undoes months of organic improvement.
| Zone | Start Bed Prep | Planting Window Opens |
|---|---|---|
| Zone 3–4 | Late March–April | May–June |
| Zone 5–6 | Early–Mid March | Late April–May |
| Zone 7–8 | February | March–April |
| Zone 9–10 | January–February | February–March |
💡 The squeeze test
Grab a handful of soil and squeeze it. If it crumbles apart when you open your hand, it’s ready to work. If it holds a muddy ball or smears, wait another week. Working wet soil compacts it into dense clods that take months to break up naturally.
Step 1 — Clear Winter Debris
Start by removing everything that overwintered in the bed: dead plant stems, fallen leaves, frost-killed annuals, and any row cover or plant supports left from last season. Don’t leave these in the bed — dead plant material harbours fungal spores and overwintering pest eggs that will re-infect your first spring plantings.
What to compost: healthy dead stems, leaves with no signs of disease, frost-killed vegetable plants. What to bag and discard: anything with visible mold, black or brown spotted leaves, or stems that show rot. Diseased material in your compost pile creates an inoculant for next year’s problems.
Step 2 — Pull Early Weeds Before They Set Seed
Early spring weeds — chickweed, hairy bittercress, henbit, and annual bluegrass — are already growing before you notice them. They germinate in late winter when soil temperatures barely crack 40°F, and they’ll set seed before your first vegetable transplant goes in.
Pull them now when the soil is moist and roots release cleanly, not in May when they’ve already dropped seed for next year.
The key is getting the roots, not just the tops. A hori hori knife or soil knife slides under taprooted weeds like dandelions cleanly.
For shallow-rooted annual weeds, a stirrup hoe run just below the soil surface cuts them off without bringing buried weed seeds up to the light.
Step 3 — Test Your Soil
A basic soil test ($15–25 from your local cooperative extension or any garden center) tells you your soil pH and major nutrient levels.
This single step prevents the single most common vegetable garden mistake: adding fertilizer to soil that doesn’t need more of that nutrient, while missing the one deficiency that’s actually limiting your plants.
The most important number: soil pH. Most vegetables grow best in the 6.0–7.0 range. Below 6.0 and nutrients become chemically unavailable even if they’re physically present. Above 7.5 and iron and manganese deficiencies appear.
If your pH is off, correct it before adding any other amendments — because those amendments won’t work until pH is right.
- pH below 6.0: Add garden lime (dolomitic) — 5–10 lbs per 100 sq ft depending on how low it is
- pH above 7.5: Add elemental sulfur or acidifying fertilizer
- pH 6.0–7.0: No pH correction needed — proceed to compost
Step 4 — Loosen Compacted Soil
If your bed has not been worked in a season or was heavily walked on, run a garden fork through it to break up compaction and improve drainage.
Push the fork in to its full depth, rock it back slightly to lift and fracture the soil, and move systematically across the bed. You’re not turning the soil upside down — you’re aerating it.
For raised beds: if you can push a finger easily 6 inches into the soil, it doesn’t need loosening. If it resists past 2 inches, it does.
⚠️ Avoid rotary tilling every year
Annual rotary tilling destroys soil structure, kills earthworms, and brings weed seeds up from depth where they germinate. Use it when establishing a new bed from compacted ground — not as an annual maintenance practice. A fork or broad fork is better for established beds.
Step 5 — Add Compost
This is the single most important amendment for any vegetable garden. Spread 2–3 inches of finished compost across the surface and work it into the top 4–6 inches with a fork or tiller.
Compost does more than add nutrients — it improves drainage in clay soils, improves water retention in sandy soils, feeds soil microorganisms, and buffers pH extremes.
What counts as finished compost: dark brown, earthy-smelling, crumbly material with no recognisable original material. If yours still has identifiable vegetable scraps or smells ammonia-sharp, it’s not ready — it will tie up nitrogen as it finishes composting in your bed.
If you don’t have your own compost, bagged garden compost, mushroom compost, or well-aged manure from a garden center all work. One cubic yard covers approximately 100 square feet at 3-inch depth.
Step 6 — Apply Fertilizer Based on Your Soil Test
With compost added, most garden beds only need a balanced granular fertilizer worked into the top few inches — something like 10-10-10 or a balanced organic option at the label rate.
Don’t over-fertilize: too much nitrogen produces lush leafy growth at the expense of fruit, and excess phosphorus runs off and damages waterways.
If your soil test showed specific deficiencies:
- Low nitrogen: Blood meal or feather meal (fast) or composted manure (slow)
- Low phosphorus: Bone meal or rock phosphate
- Low potassium: Greensand or wood ash (use sparingly — raises pH)
- Low calcium: Gypsum (doesn’t affect pH) or garden lime (raises pH)
Step 7 — Define and Edge Your Beds
Before planting, sharpen the edges between your bed and the lawn or pathway.
A clean edge cuts off grass rhizomes attempting to creep into the bed and makes the season’s weeding significantly easier — most lawn grass invasions come from the edges, not from seed. A flat spade or half-moon edger creates a clean vertical cut.
Do this once in spring and touch up monthly and your beds will stay defined all season.
Step 8 — Pre-Warm the Soil If Planting Early Crops
If you’re planting frost-tolerant crops soon (lettuce, spinach, peas, broccoli), consider laying black plastic or dark-coloured landscape fabric over the prepared bed for 1–2 weeks before planting.
It captures solar heat and raises soil temperature 5–10°F, which accelerates germination and root establishment significantly in cold spring soil.
Alternatively, a cold frame or row cover over prepared beds does the same job while also protecting early transplants from late frosts. For the complete guide on protecting early plantings, see our seed starting timing guide and frost dates tool.
Spring Bed Prep Checklist by Bed Type
| Task | New Bed | Established Raised Bed | In-Ground Bed |
|---|---|---|---|
| Clear debris | ✅ | ✅ | ✅ |
| Pull early weeds | ✅ | ✅ | ✅ |
| Soil test | ✅ Essential | Every 2–3 years | ✅ Annual |
| Loosen soil | ✅ Deep till | Fork if needed | ✅ Fork |
| Add compost | ✅ 4–6 inches | ✅ 2–3 inches | ✅ 2–3 inches |
| Fertilize | Based on test | Light balanced | Based on test |
| Edge | Define bed shape | ✅ Annual | ✅ Annual |
| Pre-warm soil | Optional | Optional | Optional |
Why the Order of These Steps Matters
The sequence of these 8 steps isn’t arbitrary — each one creates the conditions the next step depends on. Clearing debris before weeding means you can actually see what’s in the bed.
Testing soil before adding amendments means you don’t accidentally add nutrients that are already at surplus. Loosening compaction before adding compost ensures the compost works into the soil rather than sitting on top of a hardpan layer.
The biggest mistake most gardeners make with spring bed prep is doing all 8 steps in a single afternoon. Some of them need time between them.
Soil test results take 1–2 weeks to come back. Compost should sit on the surface for a few days before you work it in. Pre-warming soil with plastic takes 2–3 weeks to raise temperature meaningfully.
Staggering these steps across 3–4 weeks before your last frost date gives each one time to actually work rather than just going through the motions.
Frequently Asked Questions
Can I prepare beds when there's still a chance of frost?
Yes — frost doesn’t damage prepared soil. You’re getting the soil ready before planting, not planting itself. Frost only matters for the plants you put in. Preparing beds 3–4 weeks before your last frost date is ideal — the soil settles and microorganisms begin working the compost before your transplants go in.
Do I need to add compost every year?
In vegetable gardens, yes — annual cropping removes significant organic matter from the soil. Each growing season, a productive vegetable bed depletes roughly 1–2 inches of organic matter.
Annual compost addition replaces what the season removes. Ornamental beds with established perennials need less frequent additions — every 2–3 years is typically sufficient.
What if my soil is extremely compacted and clay-heavy?
Heavy clay soil needs multiple seasons of improvement, not one spring fix. Start with deep forking to break compaction, add 3 inches of compost, and also add coarse perlite or coarse sand at about 25% of the total volume to permanently improve drainage.
Plan to repeat this for 2–3 seasons. The improvement from year one to year three is dramatic. For a detailed guide on breaking up compacted soil, see our compacted soil guide.
Should I water my beds immediately after adding compost?
A light watering after applying compost helps it begin integrating with the soil surface rather than drying into a crust. You don’t need to saturate the bed — just enough to dampen the compost layer. If rain is forecast within a day or two, that works even better than hand watering.
Is it worth preparing beds in fall instead of spring?
Fall prep has real advantages — compost added in autumn has months to break down and integrate before spring planting rather than a few weeks. If you have the time, adding compost and loosening soil in fall makes spring prep much faster.
You still need to do a quick weed pass and assessment in spring regardless, but the heavy soil work is largely done.
Related Articles in Our Vegetable Gardening Guide
- USDA Hardiness Zone Finder – Find Your Zone by ZIP Code
- 10 Effective Tips On How To Get Rid Of Weeds In Your Flower Beds
- How to Start a Garden from Scratch: A Step-by-Step Guide
- How to Grow a Vegetable Garden: Complete Beginner’s Setup Guide
- How to Grow Vegetables in Raised Beds – Complete Setup & Planting Guide
- Garden Soil Guide: Fix Your Soil, Grow Better Plants
- Vegetable Gardening Guide
Final Thoughts
We hope these 8 steps take the guesswork out of spring prep and give you a clear starting point before your first seed packet opens. The work you put in now — especially the compost — pays dividends in every harvest from May through October.
For your planting dates by crop and zone, our seed starting calculator gives you the exact timeline. Once your beds are prepared and frost risk has passed, our when to plant tomatoes guide shows the right transplanting window for every warm-season crop.
For all our vegetable growing guides, our vegetable gardening guide links to every article we have published.
Share this with a fellow gardener who is staring at their winter garden right now wondering where to begin — and leave a comment below telling us which method worked best in your garden. Happy growing!
