

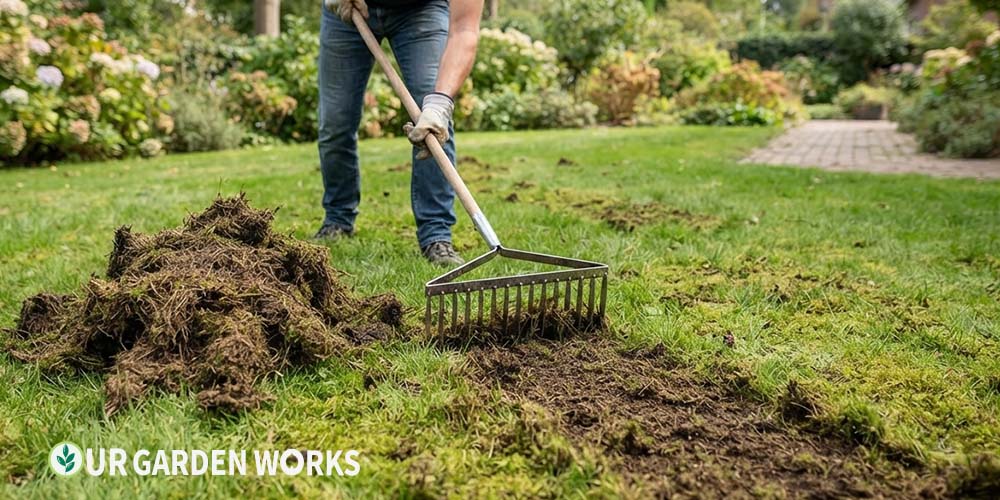
Scarifying is often confused with simple dethatching, but it’s a more intensive process — cutting into the soil surface itself to remove thatch, moss, and dead grass debris that have built up over time, rather than just lightly raking the top layer.
For a lawn that’s gone spongy, moss-covered, or stopped responding to fertilizer, scarifying is often the single most effective intervention available.
How to Scarify a Lawn – Quick Guide: Scarify when thatch exceeds ½ inch thick or moss covers a meaningful portion of the lawn — typically once a year for high-thatch grass types, every 2–3 years otherwise. Mow short first, scarify in two directions (lengthwise then crosswise) using a scarifying rake or machine, then overseed and fertilize immediately afterward to recover the disturbed turf.
Why Scarifying Goes Further Than Dethatching
Dethatching, in its lightest form, removes loose debris sitting on top of the soil surface using a spring-tine rake or light dethatching attachment.
Scarifying uses blades set to cut slightly into the soil surface itself, severing surface roots, slicing through compacted thatch layers, and physically removing moss that’s rooted into the thatch rather than just resting on top of it.
This deeper action matters because thatch above roughly ½ inch thick begins blocking water, air, and nutrients from reaching the soil and grass roots beneath it — a problem light raking alone often can’t fully correct once thatch has compacted into a dense mat.
Moss compounds the problem, since it thrives in exactly the damp, compacted, low-oxygen conditions that thick thatch creates, then further chokes out grass by competing directly for light and space.
Why Thatch Builds Up Faster on Some Lawns Than Others
It’s worth understanding why thatch accumulates at such different rates across different lawns, since this explains why some need annual scarifying while others go years between treatments.
Thatch is largely composed of dead grass stems, roots, and stolons that haven’t fully decomposed, and decomposition rate depends heavily on soil microbial activity, moisture levels, and how the grass itself grows.
Grass types that spread aggressively via stolons and rhizomes — many warm-season varieties and some vigorous cool-season types — naturally produce more of this fibrous tissue and tend to build thatch faster than slower-spreading bunch-type grasses.
Compacted, poorly aerated soil also slows the microbial decomposition that would otherwise break thatch down naturally, which is part of why aeration and scarifying so often go hand in hand in a complete lawn maintenance routine.
A lawn maintained with regular aeration, good drainage, and balanced fertilizing genuinely needs scarifying less often than a neglected lawn growing in compacted soil, since the underlying conditions driving thatch buildup are simply less severe.
Step-by-Step: How to Scarify
Directions
- Mow the lawn shorter than usual (around 1–1.5 inches) before scarifying, to give the scarifying blades clear access to the thatch layer beneath the grass.
- Choose dry conditions — scarifying wet soil is harder on equipment and pulls up more living grass than necessary.
- Pass the scarifier across the lawn in one direction first, then go over it again perpendicular to the first pass. This crosshatch pattern catches thatch that a single direction would miss.
- Rake up and remove all the loosened debris — leaving it on the lawn defeats the purpose and can smother new growth underneath.
- Overseed immediately after scarifying. The disturbed soil surface is now ideal for seed-to-soil contact, and the lawn needs new growth to fill in where scarifying removed thatch and moss.
- Apply a starter fertilizer to support both the recovering existing grass and new seedlings.
- Water consistently for the following 2–3 weeks to support both recovery and germination.
The crosshatch pattern in step 3 is worth taking seriously rather than treating as optional thoroughness.
Thatch and moss don’t always grow in a uniform direction across a lawn, and a single pass in only one direction can leave entire sections of thatch essentially untouched simply because the blades happened to run parallel to where that particular patch had accumulated. The second perpendicular pass catches what the first one missed.
⚠️ The lawn will look worse before it looks better
A freshly scarified lawn looks noticeably rough and thin immediately afterward — this is the removed thatch and moss leaving visible gaps, not damage to worry about.
Recovery typically takes 3–6 weeks with proper overseeding and watering, after which the lawn is measurably healthier than before.
Reading Your Lawn to Decide If Scarifying Is Actually Needed
Before committing to a full scarifying session, it’s worth doing a simple check to confirm the lawn actually needs it rather than a lighter intervention.
Push a finger or a small trowel into the turf at several points around the lawn — if you encounter a soft, spongy layer more than about ½ inch thick before reaching firm soil, that’s thatch buildup significant enough to justify scarifying.
Visible moss coverage across a noticeable portion of the lawn is the other clear signal, particularly moss that’s established firmly enough that simple raking doesn’t dislodge it.
A lawn with only light, scattered thatch and minimal moss may do fine with a simple dethatching pass instead, saving the more intensive scarifying process for when the buildup genuinely warrants it.
Frequently Asked Questions
What's the best time of year to scarify?
Early autumn is generally ideal for cool-season lawns, since cooler temperatures and typically reliable rainfall support recovery without the stress of summer heat. Spring scarifying is also workable but tends to give weeds more opportunity to establish in the freshly disturbed soil before the lawn fully recovers.
Do I need a powered scarifier, or will a rake work?
A manual scarifying rake works fine for smaller lawns and moderate thatch buildup, though it requires real physical effort. For larger lawns or genuinely thick thatch and moss, a powered scarifier (rental or purchase) saves significant time and achieves more consistent depth across the whole area.
How is scarifying different from aerating?
Aeration creates holes or channels into the soil to relieve compaction and let air, water, and nutrients reach the root zone more easily. Scarifying works at the surface to remove thatch and moss.
Many lawn care routines benefit from both — scarifying to clear the surface, aeration to address deeper soil compaction — though they’re typically done as separate passes rather than combined into one.
Can scarifying damage a healthy lawn if there isn't much thatch to remove?
Yes, somewhat — scarifying a lawn with minimal thatch buildup removes more living grass tissue relative to actual thatch than necessary, creating unnecessary stress and recovery time for a lawn that didn’t really need the treatment.
This is exactly why the diagnostic check described above matters; scarifying is a genuinely valuable tool for a lawn that needs it, but it’s not a routine maintenance task to perform on a schedule regardless of actual thatch conditions.
Is it worth renting a powered scarifier for a one-time job, or should I just buy one?
For most homeowners scarifying once a year or less, renting makes more financial sense than purchasing a powered machine that will sit unused for the rest of the year. If you have a larger property or find yourself scarifying more frequently due to a high-thatch grass type, purchasing becomes more reasonable to weigh against ongoing rental costs.
Manual Rake vs. Powered Scarifier — Making the Right Choice
The choice between a manual scarifying rake and a powered machine comes down mostly to lawn size and how severe the thatch and moss problem actually is.
A manual rake works perfectly well for smaller lawns and moderate buildup, though it asks for genuine physical effort across the full crosshatch pattern described above.
For larger lawns, or for thatch and moss that’s built up over several years without treatment, a powered scarifier dramatically reduces both the time and physical effort required, while also achieving more consistent cutting depth across the entire lawn than hand pressure alone typically can.
Most home improvement and garden equipment rental shops carry powered scarifiers specifically because this is a periodic rather than weekly task for most homeowners, making rental the more economical choice for occasional use.
Whichever option you choose, adjusting the blade depth correctly matters more than the power source.
Set too shallow, and the scarifier barely touches the thatch layer, achieving little more than a light rake would. Set too deep, and you risk excessive damage to healthy grass and soil structure beyond what’s actually needed to clear the problem layer.
What to Expect in the Weeks Following Scarifying
Recovery follows a fairly predictable pattern that’s worth knowing in advance, since the lawn’s appearance changes noticeably at each stage.
In the first week, expect the roughest appearance — bare patches, visible soil, and a generally thin look as the removed thatch and moss leave their mark.
By weeks two and three, overseeded grass should be germinating and beginning to fill in, assuming consistent watering has been maintained.
The existing established grass also typically shows renewed vigor during this period, often greening up noticeably as it benefits from improved access to water, air, and nutrients that the thatch had been blocking.
By weeks four through six, most lawns show a substantially fuller, healthier appearance than before scarifying, with the specific timeline depending on grass type, weather conditions, and how thorough the original scarifying pass was.
Related Articles in Our Soil & Fertility Guide
Final Thoughts
We hope this gives you a clear sense of when scarifying is actually the right tool, versus a lighter dethatching pass. A lawn that’s gone spongy or moss-covered genuinely responds to this more than almost any other single intervention.
For the full recovery routine afterward, our soil and fertility guides cover overseeding and fertilizing schedules in depth.
Scarifying can feel like an aggressive step the first time you try it, especially watching all that debris come up off a lawn that looked reasonably green from a distance.
Trust the process through the recovery weeks that follow — the temporary rough appearance is consistently the price of a measurably healthier lawn afterward, not a sign anything went wrong.
Most homeowners who scarify once say they wish they’d done it sooner, particularly once they see how much more readily fertilizer and water seem to take effect once that blocking thatch layer is finally gone.
Share this post with a fellow gardener who’s ready to get growing — and let us know in the comments how much thatch and moss came up when you scarified. Happy growing!
