Let me guess — you’ve tried growing something before, watched it slowly fall apart, and quietly decided that maybe you just weren’t cut out for this gardening thing.
✅ Key Points:
- Avoid the 5 common mistakes — especially planting too much and ignoring soil quality
- Start with 3–5 varieties you’re genuinely excited about growing this season
- 3 containers or a 4×4 bed is the perfect footprint for Year 1 — resist going bigger
- Know your last frost date — the single most important date in your garden calendar
- Follow the 7-day setup sequence — spot, soil, bed, plant, mulch, water, schedule
- Diagnose before you panic — every garden problem has a cause and most have a simple fix
I need you to hear this: green thumbs aren’t born. They’re built. Every experienced gardener you admire killed dozens of plants to get there. The difference between them and someone who gives up isn’t talent. It’s knowing what to try next.
This guide exists because I’ve been that person who gave up. I’ve bought plants at the nursery with the best intentions, watered them faithfully, and watched them decline anyway. I’ve planted the wrong thing in the wrong season in the wrong soil — and wondered why nothing worked.
🌿 Editor’s Note
“Most people who give up on gardening do so in the first 30 days — not because they lack a green thumb, but because nobody told them what to actually expect. That ends here.”
The 5 Mistakes That Kill Every Beginner’s First Garden
Before we talk about what to do, let’s talk about what trips up almost every new gardener — because if you know these in advance, you can sidestep all of them.
Mistake #1: Planting Too Much, Too Soon
I did this in my first season. I ordered 14 varieties of seeds, planned a 20-foot bed, and started 60 seedlings under a grow light. By May I was overwhelmed, half the seedlings were leggy and root-bound, and I missed the transplant window for most of them.
I did this in my first season. I ordered 14 varieties of seeds, planned a 20-foot bed, and started 60 seedlings under a grow light. By May I was overwhelmed, half the seedlings were leggy and root-bound, and I missed the transplant window for most of them. If you’re choosing your first crops, our guide to the 25 easiest plants to grow is the shortcut I wish I’d had.
The fix: Start with 3 to 5 varieties. Give yourself one small bed or 4 to 6 containers. You can always expand next year — and you’ll expand with actual experience behind you.
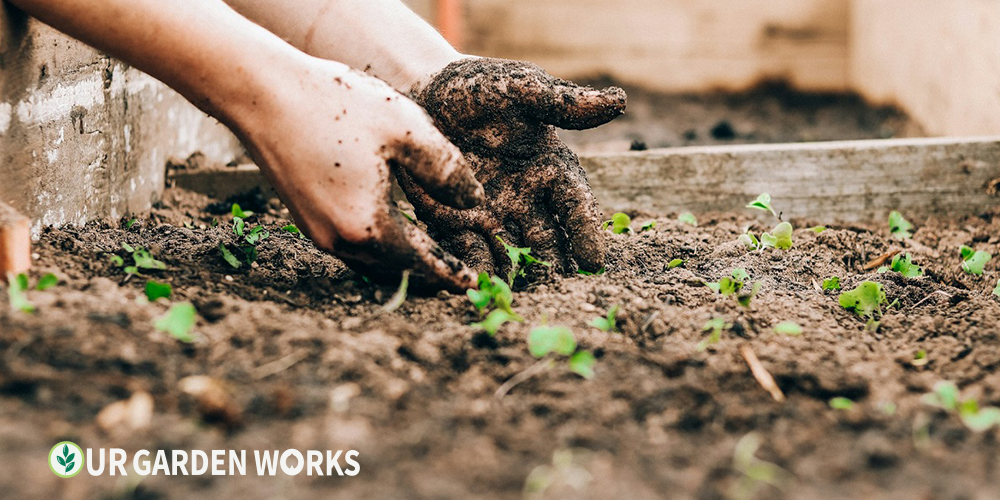
Mistake #2: Ignoring Soil Quality
Seeds and plants don’t fail because of bad luck. In 80% of cases, they fail because the soil isn’t right — too compacted, too sandy, or completely depleted of nutrients. Your plants’ roots need air, water, and food. If the soil doesn’t deliver all three, you’re fighting uphill from day one.
If you’re dealing with heavy clay, we’ve covered exactly which vegetables grow in clay soil and how to work with it instead of against it.
⚠️ Common Mistake
Never use soil dug directly from your yard in a container or raised bed. Garden soil compacts when it dries, suffocating roots. Always use quality potting mix or a raised bed blend instead.
Mistake #3: Inconsistent Watering
Most beginner plants don’t die of drought — they die of inconsistency. Soaked one week, forgotten the next. Vegetables especially hate unpredictable moisture. It causes blossom end rot in tomatoes, splitting in cucumbers, and bolting in lettuce.
The fix: Water on a schedule. Even an imperfect schedule beats a random one. Set a phone reminder for your first season until it becomes habit.
Mistake #4: Wrong Plants for Your Zone or Season
Planting warm-season crops before your last frost date — or cool-season crops in midsummer heat — is a recipe for failure that has nothing to do with your skill level. The plant simply cannot survive those conditions. It’s biology, not bad gardening.
This is why starting your garden from scratch with a proper plan — including your local frost dates — matters so much in that first season.
Mistake #5: Giving Up After the First Failure
A seedling dies. A pest shows up. A tomato gets a weird spot. And the inner voice says: “See? I told you this wouldn’t work.” Every one of those events has a diagnosis and a fix. The gardeners who succeed are the ones who get curious instead of defeated.
What Do You Actually Want to Grow?
Start here before anything else. Most beginners skip this question and jump straight to “what’s easiest” — but motivation matters enormously when forming a new habit. Grow what excites you. If you want a quick win in your first 30 days, radishes are the single fastest crop to go from seed to harvest.
Here’s my honest difficulty breakdown for the most common beginner crops. If you want to harvest sunflower seeds at the end of the season or know how many pumpkins to expect per plant, we cover that in detail in the linked guides:
| Vegetable | Difficulty | Time to Harvest | Why Start Here |
|---|---|---|---|
| Radishes | Easy | 22–30 days | Fastest confidence-builder in the garden |
| Lettuce / Greens | Easy | 30–45 days | Cut outer leaves; keeps producing all season |
| Sunflowers | Easy | 70–100 days | Nearly impossible to kill; dramatic and rewarding |
| Cucumbers | Easy | 50–70 days | Prolific producers; great for containers with a trellis |
| Pumpkins | Medium | 90–120 days | Slow but deeply satisfying — kids love every stage |
| Carrots | Medium | 70–80 days | Need loose soil; trickier but worth the effort |
Recommended Reads:
💡 Pro Tip
If you’re torn between vegetables and flowers, grow both in the same bed. Marigolds planted alongside vegetables actively deter aphids, whiteflies, and nematodes — beauty and pest control at once.
How Much Space Do You Actually Need?
Here’s something the gardening industry doesn’t say loudly enough: you can grow real food in almost any space. A balcony. A patio. A sunny windowsill. You do not need a sprawling backyard to get started. Some vegetables — like carrots and lima beans — can be grown in a single cup or pot on a kitchen windowsill.
Option 1: Containers — The True Beginner Entry Point
Three 12-inch pots on a sunny balcony can give you lettuce, herbs, and radishes from a single season. Containers are low-commitment, easy to move, and forgiving. What you need to succeed:
- At least 6 hours of direct sunlight per day
- Containers with drainage holes — this is non-negotiable
- Quality potting mix, never garden soil from your yard
- A consistent watering habit — containers dry out faster than ground soil
Option 2: A 4×4 Raised Bed — The Perfect Beginner Footprint
If you have any outdoor ground space, a 4×4 raised bed is the single best investment you can make as a beginning gardener. Small enough to manage, large enough to grow meaningful food, and the contained soil makes pest and weed management far easier than in-ground gardening.
If you’re choosing a bed, we’ve reviewed the best raised garden beds for small spaces — there’s a huge quality difference between options at the same price.
Your First Garden, Step by Step
Before we walk through the 7-day sequence, if you want the full deep-dive version with 15 steps, read this first:
🌱 How to Start a Garden from Scratch: A Complete Step-by-Step Guide for Beginners
Here’s the actual sequence — what to do and in what order. Follow this one day at a time and you’ll have a planted garden within 7 days and your first harvest within 30.
Day 1: Pick Your Spot & Document the Light
Go outside at 9am, 12pm, and 3pm and photograph the spot you’re considering. If it’s in full sun at all three times — at least 6 hours total — you’re good to go for vegetables.
Day 2: Test or Choose Your Soil
For raised beds or containers: buy quality potting mix. For in-ground: pick up a simple pH test kit from any garden center and amend generously with compost before planting anything.
Day 3: Build or Buy Your Bed
A 4×4 frame from untreated pine boards, 10–12 inches deep, filled with a 60/40 topsoil-compost blend is everything you need. For containers: 12-inch minimum depth, drainage holes required.
Days 4–5: Plant Seeds or Transplants
Follow the spacing guidelines on the seed packet — the most ignored and most consequential instruction in gardening. Label everything as you plant it. Water in gently but thoroughly.
Day 6: Mulch & Water In
Apply 2–3 inches of mulch around (not against) plant stems. This single step conserves moisture, suppresses weeds, and feeds your soil as it breaks down. Most underrated beginner move there is. And while you’re setting up: if any of your tools are already showing rust, learn how to remove rust from garden tools before you put them to work — a few minutes now saves having to replace them.
Day 7: Set Your Weekly Check-In Schedule
Set a recurring reminder to check your garden at least 3 times per week. A 10-minute check-in three times a week beats an hour of frantic attention once a fortnight every single time.
Recommended Reads:
When Things Go Wrong (And They Will)
Problems in the garden are not failures — they’re diagnostic opportunities. Every wilting leaf, every chewed stem, every yellow patch is giving you information. Your job is to read it correctly and respond calmly.
“Something Is Eating My Plants Overnight”
The damage pattern tells you who’s responsible. Ragged holes with a slime trail nearby? Slugs. Small, round, clean holes punched through leaves? Flea beetles. Leaves stripped to the midrib? Caterpillars or hornworms. Sticky residue and curling, distorted growth? Aphids.
For organic pest management, insecticidal soap and neem oil are the two most effective tools that won’t harm your harvest.
Recommended Reads:
Image Credits: Sandie Clarke