Most of us are more health-conscious due to the pandemic. With that, low-carb alternatives are becoming more and more popular, like pumpkins. Pumpkin is a perfect alternative to high-carb crops like potatoes. It is keto-friendly and a vegetarian and vegan staple.
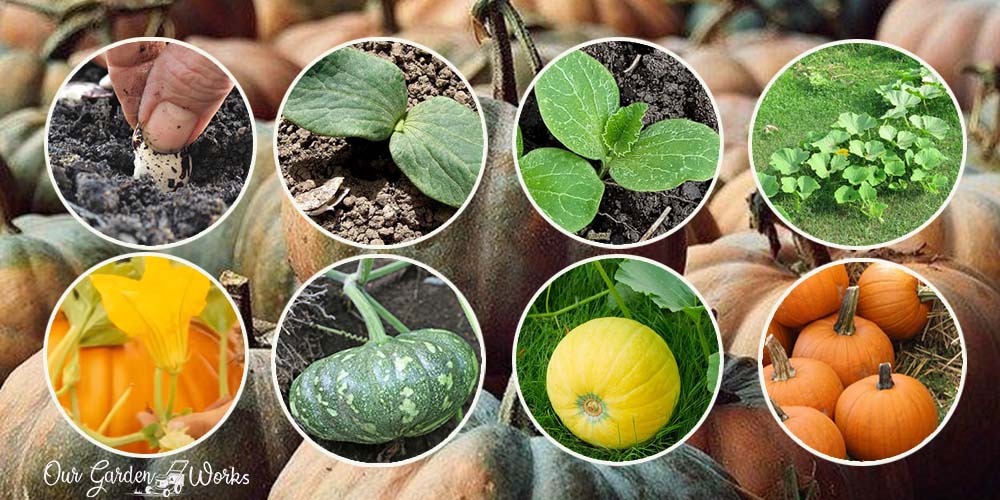
If you want to create pumpkin pies from garden to table, there are eight pumpkin growing stages that you will experience. It pays to know about the process to commit fewer mistakes and achieve more harvest.
Let’s start your journey in growing pumpkins by identifying their classification. Most of us consider pumpkins a vegetable simply because they are part of our dishes.
According to Joe Masabni from Texas A&m AgriLife Service, a pumpkin is a fruit. It follows the definition of fruit because it grows from a flower.
What To Expect in Growing Pumpkins
Pumpkins are sun-loving fruits. They thrive in moderate climates and mature within 3 to 4 1/2 months from seeds to maturity. They are easy to grow even with a small space at home.
Though they grow long vines (20 feet), you don’t need hectares of pumpkin patches. A raised bed or a small area can be enough by choosing the small pumpkin varieties.
The ideal growing temperatures for pumpkins are between 65 F and 95 F. They may thrive in US Hardiness Zones 3 to 7. Though they have thick and firm rinds, they are sensitive to extreme temperatures.
When the fruits are exposed to frost, they may bear some injuries. If they are exposed to too much heat, the fruits may experience stunted or slow growth. Like most fruit plants. Pumpkins need well-draining sandy soil that is slightly acidic or slightly alkaline (pH level 6.0 to 6.5).
If you’re new to gardening, you’re probably wondering if pumpkin and squash varieties are the same. They both have orange flesh and taste almost identical. Yet, there’s more to what meets the eye.
Difference Between Squash and Pumpkin
Pumpkin is a cultivar or variety of winter squash. It is a native and one of the oldest fruits cultivated in North America. Though they come from the same family, they have some distinct differences.
Pumpkins usually have a thick and jagged stem, while squash has light hollow ones. Popular pumpkins during Halloween are the oversized variety of squash called Connecticut field pumpkin. The giant ones are another variety called giant pumpkins which can weigh in tons.
Now, let’s tackle the growing stages of pumpkin and start growing your low-carb and healthy food.
Pumpkin 101: 8 Pumpkin Growing Stages
Pumpkins follow the usual vegetative-flowering-fruition pattern that most fruit-bearing plants have. The journey begins with a pumpkin seed planted in sandy soil.
Note that the growing practices may vary depending on the pumpkin variety. In this post, we will tackle the pumpkin growing stages that occur across all pumpkin varieties.
#1 Sowing The Pumpkin Seeds
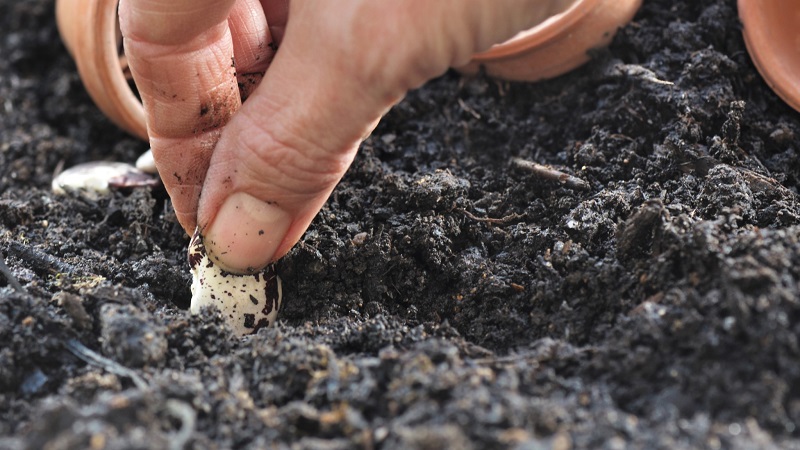
Though you can germinate pumpkins in a seedling tray, it is best to start them in the ground. Sow the pumpkin seeds 1 to 1 ½-inch deep into the soil with the pointy end facing down. Since the vines will take up some space as they grow, you must place a 24-inch or 2-foot distance between each seed.
Take note of the size classification of pumpkins when you buy your seeds. Their growing size will determine the plot size that you need to prepare.
- Small varieties can weigh 2 to 5 pounds
- Intermediate ones are at 8 to 15 pounds
- Large pumpkins can reach 15 to 25 pounds
- Jumbo ones are around 50 to 100 pounds.
Here are some seed varieties to get you starters growing pumpkins:
(1) Small pumpkin varieties
- Baby bear variety: provides fine flesh that is ideal for pumpkin pies
- Small sugar: Provides a heavy yield and best-tasting flesh for pies
(2) Intermediate pumpkin varieties
- Jack-O-Lantern Pumpkin: Ideal for carving and pumpkin soups
- Casper: White pumpkin that also has thick and sweet flesh
(3) Large pumpkin varieties
- Cinderella pumpkin: Easy and fastest to grow pumpkin variety
- Jarrahdale Blue Pumpkin Seeds: Exotic blue pumpkins
(4) Jumbo pumpkin varieties
- Big Max: The popular variety for over-sized pumpkins
- Connecticut Field Pumpkin Seed: Popular variety during Halloween found in most pumpkin patches
#2 Germination Stage
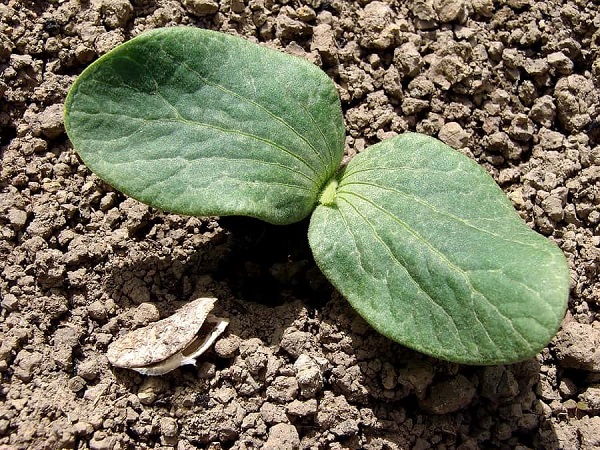
The germination period of pumpkin seeds can last for ten days. The first leaves that sprout from the seedlings are not yet the true pumpkin leaves. These leaves are usually called sprouts which aids with the early photosynthesis process of the plant.
Pumpkin seeds germinate faster if the soil temperature is around 80F to 85F. Yet, they can start sprouting with at least a soil temperature of 65F. Ensure that there’s no threat of frost in the soil before you plant the seeds in the ground. Pumpkins are not fond of the cold in any way.
When is the best time to plant pumpkin seeds?
If you live in a colder region, you should start sowing the pumpkin seeds in mid-May. In warmer states, you can plant the seeds in mid-July. Simply put, you can sow the seeds between May 15 to July 15.
#3 First True Pumpkin Leaves
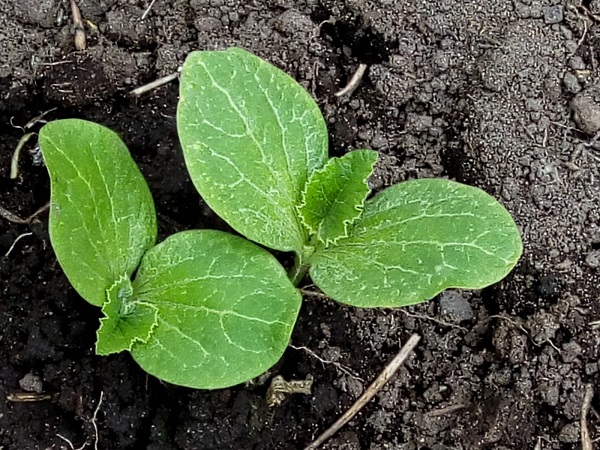
As the pumpkin seedlings mature, the true pumpkin leaves will start to emerge from the middle of the sprouts. The new leaves will have a different shape and look. They have jagged edges, dark green in color, and are heart-shaped.
In a few weeks, the leaves and stem will start to develop. The vine will begin to crawl, and more leaves will emerge. This stage is the vegetation stage, wherein the energy of the plants is directed at root development and leaf production.
#4 Crawling Pumpkin Vines
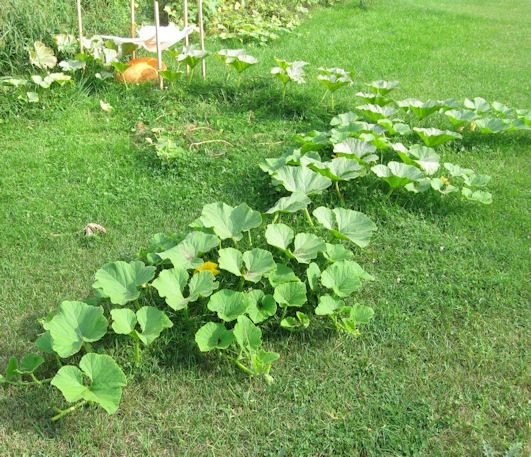
Pumpkins have vines that are notorious for being invasive and untamed. They grow whenever they want, even across your lawn.
Some pumpkin varieties can have approximately 15 to 20-feet of vines. Secondary vines grow from the main vines, which will make them look bushier.
When the secondary vines emerge, you may cut them back to thin the plant. A bushy pumpkin plant may cause a reduction in air ventilation and sun exposure to the baby pumpkins, which can affect their development.
So, pruning the vines can also be helpful, especially as the fruit matures in the latter part of the growing stage.
#5 The Male and Female Flowers
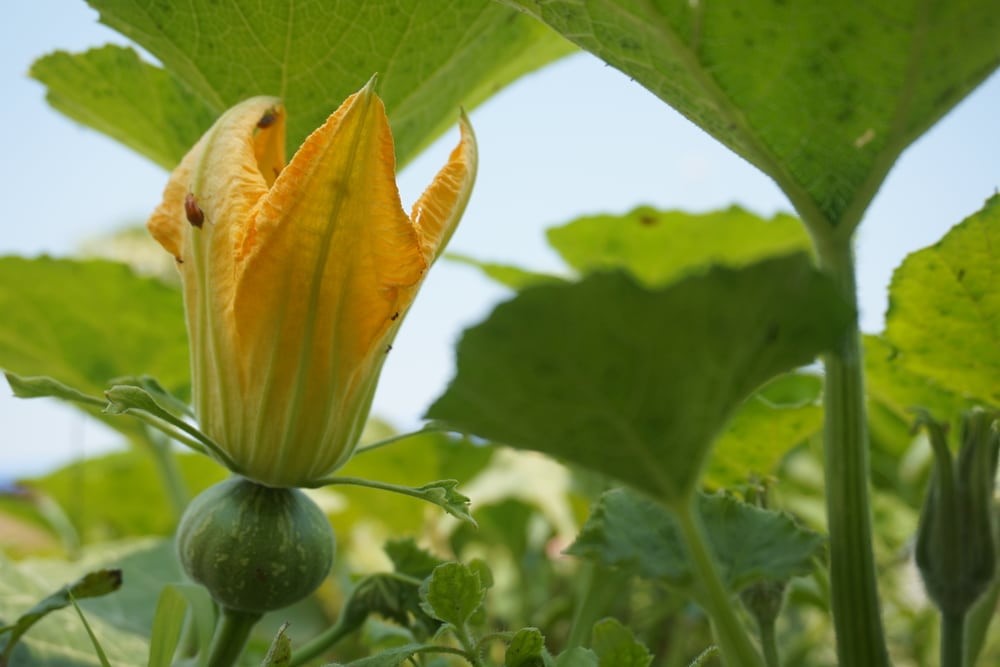
After several weeks, the plant will start developing its first flowers. Pumpkins are monoecious, which means they have their own set of female or pistillate flowers and male or staminate flowers in one plant. The male flowers emerge ten days before the female flowers. These two flowers are crucial for the pollination of the plant.
To know the gender of the pumpkin flowers, you may check some distinct features. Female flowers have an ovary or baby pumpkin at the base of the stem and are usually found at the end of the vine. Male pumpkin flowers grow in the middle of the vine.

Pumpkins do not self-pollinate. They need the help of beneficial insects like bees to transfer the pollen and fertilize the female flowers.
The best time to pollinate pumpkins is when female and male flowers are open. After the male flower blooms for a day, it will die and fall off.
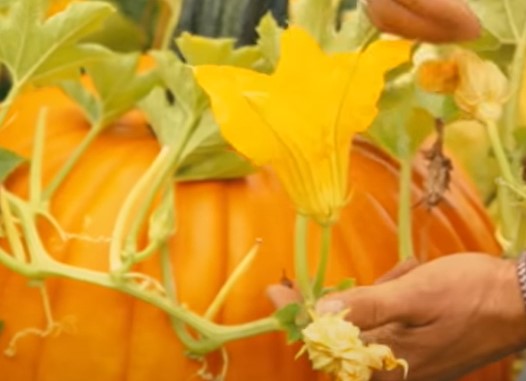
How to hand-pollinate pumpkins
In the absence of bees, you may help your pumpkins by pollinating them on your own. Here’s how to pollinate pumpkin flowers.
Materials:
- Cotton buds
- String
Directions:
(1) Look for a male flower and use a cotton bud to collect the pollen from its stamen. The pollens are the yellow powdery stuff produced by the flowers.
(2) Transfer the pollen to the female flowers by placing the pollen in their pistil from the buds. In some cases, you may also get the stamen of the male flower and directly rub it on the pistil of the female flower.
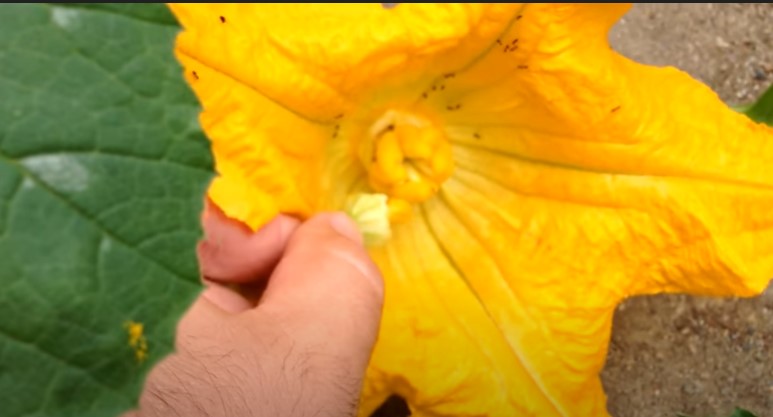
(3) Now that there is pollen on the female flower, some insects might be attracted to steal it and prevent fertilizing the ovaries. You need to cover the pistil until the baby pumpkin starts to develop. First, you have to gather the tips of the petals like you would do with your hair when you ponytail it.
(4) Tie the tips of the flower to protect the pistil. Once the pollination is successful, you will notice that the female flower will fall off the plant, and the baby pumpkin will start to develop.
#6 Baby Pumpkins
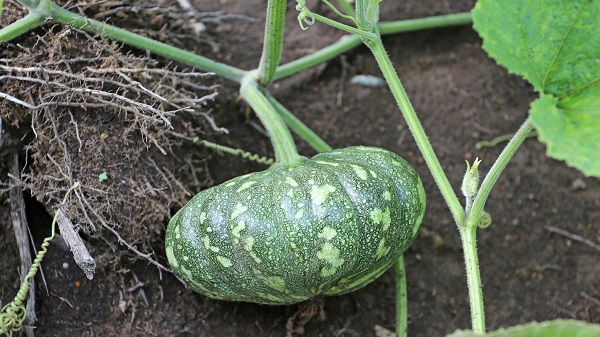
The pollination is successful once the ovary of the flower becomes bigger and turns into a baby pumpkin. At first, the pumpkin will still be green. It will still hang since it is still light. As it gets heavier by the week, you will see the fruit lying on the ground.
The increase in size depends on the variety that you will choose. Some pumpkin varieties are small and are just the size of our heads or even knuckles. Some pumpkin varieties are big enough to be as big as your kid. You may check the pumpkins every week and see how they grow a few inches.
Pro tip: On this pumpkin growing stage, you have the option to remove other female flowers. This process helps divert the energy of the plant to the development of the fruit. Some farmers do this energy diversion process by picking up the first set of female flowers. With that, the plant is urged to produce more leaves before producing fruit.
#7 Maturity of Fruits
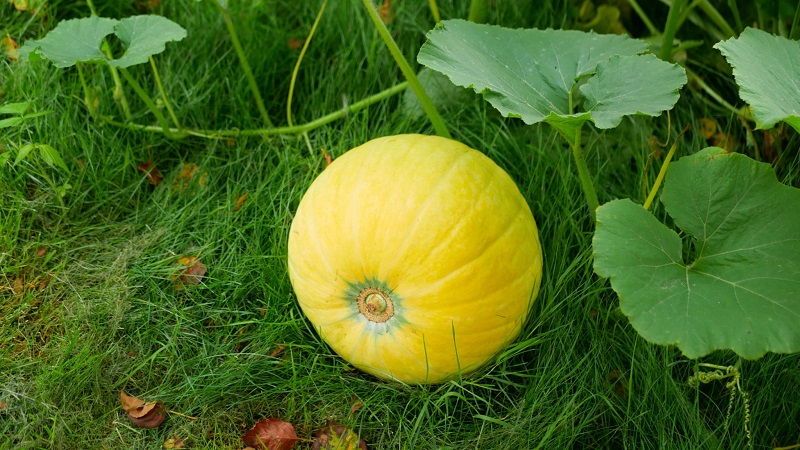
At the end of the growing stage, your pumpkin fruits will start to change in color. One fascinating feature of pumpkins is they change the color of their skin where the sunlight hits. Like onions, they need sunlight to mature and ripen.
To help your fruits ripen and dry well, prune some leaves and vines to let the sunlight get directly onto the fruit. You must rotate the fruits to allow the other side to turn orange. Otherwise, you will end up with a pumpkin with green streaks.
#8 Harvesting Pumpkins
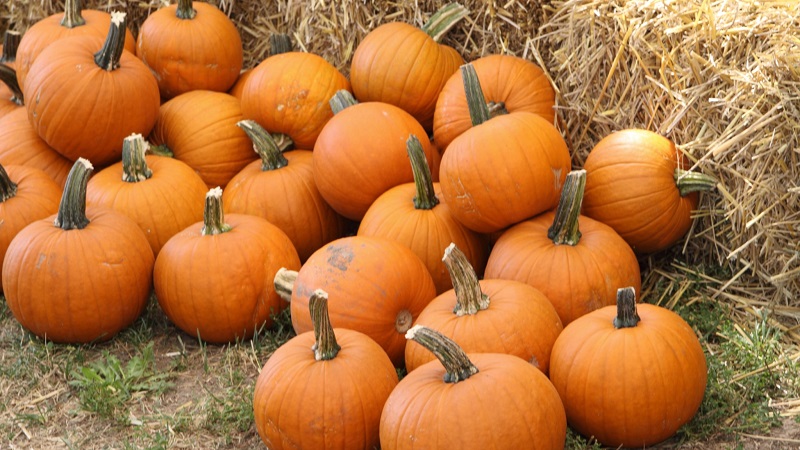
The telltale signs that the pumpkin fruits are ready to harvest are when the vines wither, the fruits change in color, and the rinds are firm and hard. Harvesting soft pumpkins will not do well in the storage since they will wrinkle and rot. They need to dry a few more weeks before harvesting.
Pumpkins can last for several weeks and provide you with enough supply throughout the cool season. They can last in storage for 3 to 4 months.
The best way to store the fruits is by placing them on wooden shelves or piles of hay in an upside-down position. They will rot if left placed on the floor.
Final Thoughts
The eight pumpkin growing stages written on this post aim to help you preview what’s in store for you as you start to plant your seeds. Growing pumpkins are easy and doable as long as you provide them with the right conditions.
Before planting, make sure to check the following data to ensure a smooth pumpkin growing experience:
- Pumpkin variety
- Size of the pumpkin fruits
- Vine reach
- Length of the growing period
- The germination rate of seeds (Ideal is 80%-90%)
We hope that this post has given you a preview of what’s ahead in your pumpkin growing journey. Learning more about your pumpkins puts you at an advantage since you’ll be more knowledgeable and avoid some mistakes along the way.
We encourage you to share your pumpkin growing experience in the comments and let us know how much pumpkin you were able to harvest this growing season.
For more crop guides, our vegetable gardening guide has you covered, and if this is your first season, our beginner gardening guide is worth bookmarking too. Share this post and let us know in the comments how your pumpkins are doing!
If you find this post helpful, fun, and informative, please don’t forget to share this post with your friends. Happy gardening!
Get more updates about the latest content through our social channels like Facebook and Pinterest.