Radishes are nature’s natural tillers. They help loosen up compacted clay soil and improve its structure to be viable to grow new types of plants.
Since they grow in the ground, it can be hard to just pull them out to check. So, when are radishes ready to pick?
Well, several ways can help you tell that radishes are ready to be harvested such as by variety, maturity date in the packaging, and what they look like.
Unlike cucumbers, radishes only produce one fruit per plant, which makes harvesting them crucial and done with full confidence.
Q: When Are Radishes Ready To Pick?
Radishes are ready to pick as soon as they have enough flesh and have developed a good amount of greens. However, it can be hard to tell those qualities if they’re buried in the soil.
So, gardeners use 3 methods to know when to pick radishes, such as:
Maturity by Variety

Radish is classified into two groups: summer and winter radishes.
Gardeners base the harvest time based on these classifications regardless of the type of variety since their maturity dates often fall on the same pattern.
Check out the specific time to harvest each radish group below:
Summer Radishes/Small Red Radishes
Summer radishes should be harvested young while they are crisp, fresh, and delicious. They are usually ready to pick after 3 weeks and are about one inch in diameter.
Winter radish/Daikon
Winter radishes are more versatile because you can leave them in the ground to get bigger before the ground freezes.
They are bigger, contain more flesh, and can be placed in storage for 4 months.
Winter radishes flourish and grow in cold temperatures. You can leave them in the ground and get them as needed before November.
If you leave them in the soil until the temperatures warm up, they will become pithy or can begin plant bolting.
What is plant bolting in radishes?
Plant bolting happens when a plant develops a flowering stalk in an attempt to produce seeds.
The energy of the plant will be diverted to the flower and seed development which will jeopardize the quality of the radish root crop.
Maturity Date in Packaging
Aside from counting the days based on variety, every seed packet contains a guide about the germination rate of the seed and its maturity. It’s probably the most beginner-friendly effort of seed producers.
In case, you’ve thrown away the seed packaging, here are some guides on when to harvest radishes based on their specific variety:
Radishes to harvest after 28 days
- Pearl F1 organic radish
Radishes to harvest after 25 to 30 days
- Easter Egg II untreated radish
- Lollipop Mix untreated radish
Radishes to harvest after 25 days
- Blanka untreated radish
- Crunchy Royal F1 untreated radish
- Diana F1 untreated radish
- Donato F1 untreated radish
- Felicia F1 untreated radish
- Patricia organic radish
- Pink Beauty untreated radish
- Pink Beauty organic radish
- Viola untreated radish
Radishes to harvest after 24 days
- Celesta F1 organic radish
- Celesta F1 untreated radish
- Escala F1 untreated radish
- Escala F1 treated radish
Radishes to harvest after 22 days
- Purpella untreated radish
- Rover F1 treated radish
- Rovee F1 untreated radish
- Cheriette F1 untreated radish
Physical Signs That Radishes Are Ready To Pick
Apart from the technical harvesting signs, gardeners would know if a radish is ready to pick by just looking at it.
Here are some signs to look out for:
Tall and mature leaves
The growth of greens above the soil is usually relative to the growth of root crops below the soil. Therefore, thin greens mean small radish growth.
Most gardeners notice that as soon as the greens reach 6 inches tall and spread wider, it’s a good indication that the root crop is ready to harvest.
The shoulder test
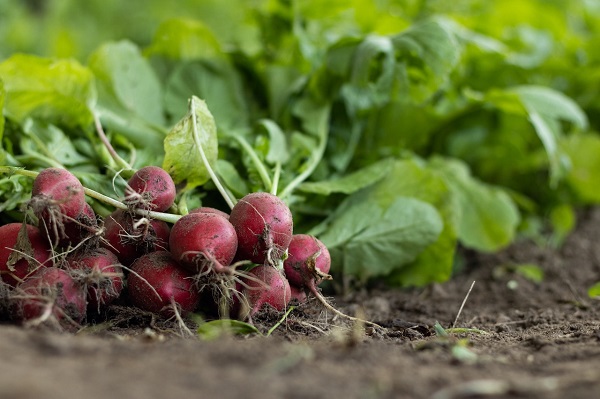
Gardeners call the top part of the radish that extends beyond the stalk as shoulders. Instead of pulling out the root crops, peek at the shoulders of the radish by removing the topsoil through your fingers.
If you see them already developed, then the radishes are ready for harvest. If you are lucky, the shoulders will also stick out on top of the soil which is a total giveaway that they’re ready for harvest.
Total diameter
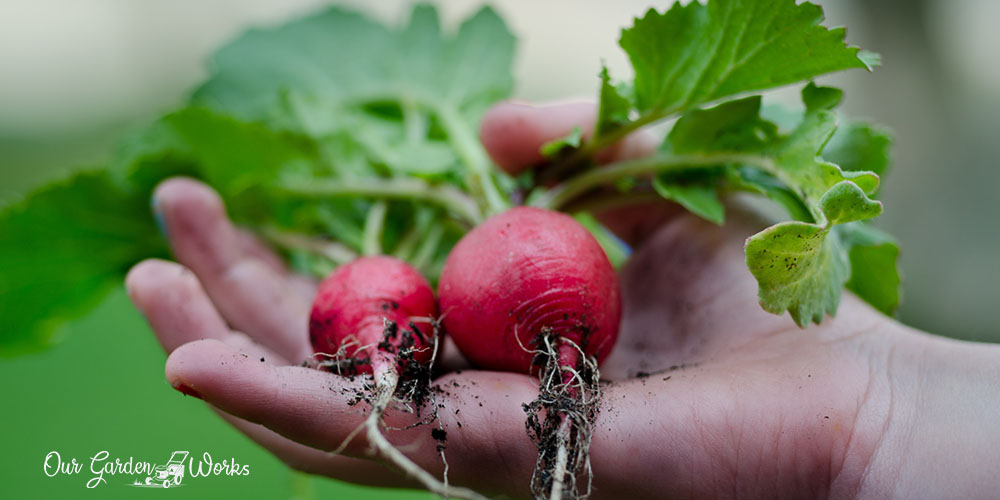
Aside from developing a shoulder, radishes are ready to harvest when their diameter reaches 1 inch and above.
Pull test
Pulling one radish is probably the fastest and most obvious way to know if it’s ready to pick. However, it is also the riskiest.
How Long Can You Keep Radishes in The Ground?
Most root crops can be left in the ground until they are needed in the kitchen like rutabaga. However, radishes beg to differ.
Summer radishes should not be left in the ground after their maturity. They will turn into woody, tough, and too starchy to eat.
As fast-growers, you should monitor radish growth and pick them up as soon as you see some signs of maturity or after three weeks.
Winter radishes, on the other hand, can be left in the ground before the ground freezes. Ideally, you can leave them in the soil until November and store them in a cool and dry place for several months.
How To Harvest and Store Radishes?
Harvesting radishes is a no-brainer. You just pull them up and remove traces of soil. However, in some cases, pulling them out of the soil is challenging on its own, especially with clay soil.
Here’s how to pull radishes planted in rock-hard soil:
(1) Use a trowel to scratch the soil around the radish. If the soil is too hard, you can lightly water the soil to make it more workable.
(2) Gently pull the radish to avoid breaking any of its parts during the process.
(3) Wash the roots and tie them into a bundle. Some people dry radishes without the greens while some hang them in a storage room with the greens intact.
Unwashed radish bulbs will get mushy within days so make sure to store them well to extend their shelf-life.
(4) When storing radishes, remove the leaves and excess roots. You can throw the roots into your compost bin while the greens can serve other purposes (we will discuss this later in this post).
There are several ways you can store radish to prolong its shelf-life:
Freezing: For long-term storage of radishes, freezing would be the best option, including other types of vegetables like carrots and potatoes.
Here’s how:
- Simply cut the radish into pieces and blanch them in boiling water for five minutes.
- Once done, place them in a bowl of ice water to stop the cooking process. Let the radish cool down before straining the water.
- Place the radish in a baking pan and pat them dry with a paper towel. Place them on the tray apart to prevent them from sticking to each other.
- Place the tray in the freezer for 6 to 8 hours. Once the radishes are frozen, you can put them in a zip lock bag and write the date o the bag when it is prepared.
Cold water soak: Radish is a root crop and it stays in good condition when soaked in water. In a small jar filled with cold water, you can place the unpeeled radish to preserve its shelf-life for a week.
Place the jar in the fridge and use it whenever you need it. Make sure that the jar is an airtight container to avoid contamination.
Sand: In ancient practice, placing radishes in a root cellar helps preserve them until they are needed in the kitchen. It helps mimic the soil environment where they can thrive.
If you have a basement, you can place fine damp sand in a sack and bury your excess radishes in there. They can last for a month or two in a root cellar, especially winter radishes which can last for 4 months.
Pickling: Another long-term strategy to store radishes is to put them in fermentation jars and soak them in brine or other spices. Usually, Koreans ferment radish using pepper flakes or add them to kimchi.
Dehydration: If you want your radish to last for months or a year, you can put them in a dehydrator along with other vegetables and fruits like bananas.
Paper towel wrap: For short-term storage, you can place the radish without its greens in a zip lock bag. Cover it with paper or paper towel so it can absorb the moisture in the bag. Then, place it in the crisper drawer of your fridge.

(5) Aside from the root, you can also store the radish greens. They are edible and add a peppery taste to dishes, salads, and dips. Learn how to add radish leaves to your diet from our separate post here.
Tips For Growing and Harvesting Radishes
Radishes are low-maintenance crops that can be your first harvests during the growing season. For a bountiful harvest, here are some tips from professional and experienced gardeners:
- Patience is a key part of growing radish. If you can’t feel the shoulders using your fingers, don’t pull it out yet. Otherwise, you’ll be wasting its potential to grow bigger.
- Thinning the greens and removing dead leaves can help improve the quality of your harvest.
- Since radish is in one seed to one root ratio, you can immediately replace the harvested radish by sowing seeds after pulling the first harvest out.
Frequently Asked Questions (FAQs)
Do radishes grow back after harvest?
No, radish can only grow one bulb or root in its life cycle. So, it’s best to sow seeds in batches one week apart for more harvest and to make the most out of the growing season.
How many radishes do you get from one plant?
You can only get one radish per plant since radish is a root crop in itself. It grows in the tap root which is also the heart of the plant.
Why are my radishes all tops and no bottoms?
Radishes can have lush greens but no fleshy roots due to excessive nitrogen. The role of nitrogen is to push the plant to develop leaves and stems.
Too much nitrogen forces the plant to keep on developing leaves and neglect the root bulb development.
Radishes need a lot of phosphorus to develop both tops and bottoms. Kelp and bone meal are among the best organic fertilizers that can help maintain a vigorous radish root bulb and leaf growth.
Final Thoughts
We hope that this post helped you answer your question about when are radishes ready to pick, and how you can store them to preserve their shelf-life.
They may not be a star in most dishes but they contain a lot of nutrients and anti-inflammatory properties that can heal modern-day illnesses.
Do you love eating radish? How do you prepare them at home?
Let us know your love for radish in the comments below! Also, please share this post with your friends and let them discover the beauty of growing your root crops at home.
