![The Noob Friendly Guide To Blanch Celery: 5+ Ways [and Means]](https://ourgardenworks.com/wp-content/uploads/2020/11/How-To-Blanch-Celery.jpg)
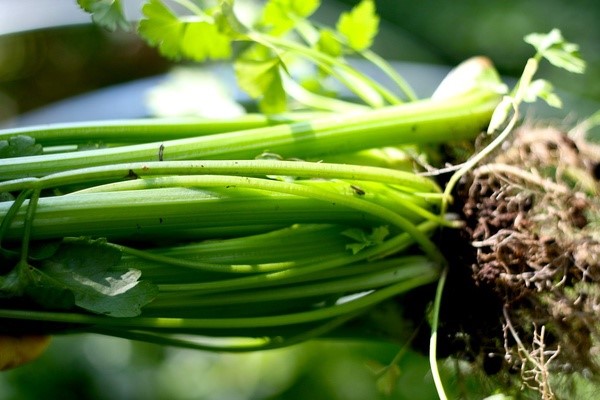
Blanching, a term that comes from the French of “to whiten”, is a process to lighten the dark green color of celery. This can be done in the kitchen after celery is harvested, or in the garden while celery is growing.
If this surprises you, no worries. In this guide, we’ll explain the different ways that you can blanch celery to improve flavor, prep for serving, cooking, or preservation.
You could use the table of contents below to jump to the sections that are most important to you.
Why Should You Blanch Celery?
First, let’s look at some of the practical reasons why celery is usually blanched.
Dark green celery has an acrid, bitter taste that can be reduced by blanching. This is the main reason why many prefer light green celery more than the dark green variety.
In addition, both kitchen blanching and garden blanching procedures are done on celery roots, leaves, and stalks for other reasons that make sense to celery growers, harvesters, sellers, buyers, preppers, cooks, and processors.
Curious for some details? Read on.
1. To Clean and Preserve
Fruits and vegetables contain natural enzymes that, when frozen, makes them harder and, at the same time, destroys their water-soluble vitamins and minerals.
When fruits or vegetables are blanched, they are quickly boiled (scalded) in boiling water or steam and then quickly submerged in ice-cold water (shocked) to destroy microorganisms and reduce the risk of food-borne diseases (e.g., gastroenteritisin chicken salad exposed to non-potable water) as well as mold, fungi, and pathogens such as:
- B. cereus in shredded vegetable pieces
- Cronobacter sakazakii in cut vegetable pieces
- Escherichia coli in vegetable roots irrigated with contaminated creek water
- E. coli and salmonella spp. in vegetable and soil samples in contact with contaminated compost or soil samples
- Feline calicivirus in cut vegetable pieces
- Listeria monocytogenes in ready-to-eat salads that contain celery.
- Listeria inoccua in cut surfaces of vegetable tissues
- Poliovirus in vegetable leaves
- Salmonella Hadar in shredded vegetable pieces
- A virus from artificially contaminated finger pads of fresh vegetable handlers and various bacteria found in fresh vegetable packing houses
(source)
2. To Improve Palatability
While many consider celery good for lowering body fat and blood pressure, improving sex life, many health benefits, and creating tastier soups and dishes, many others dislike celery for its bitterness or its distinctive smell.
Improving saleability and flavor is another reason why we blanch celery to lessen the bitter flavor and improve natural sweetness.
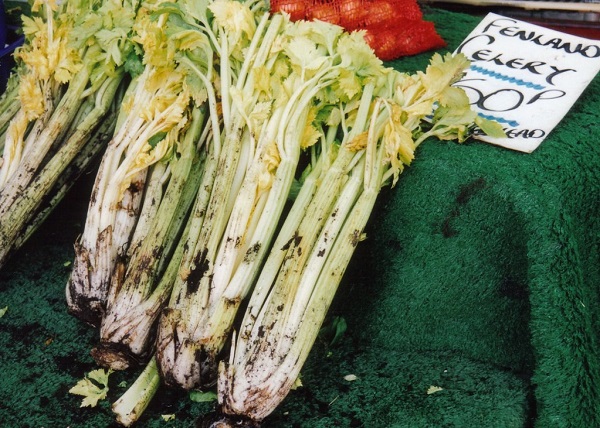
According to a source, “Golden and self-blanching varieties (are) more appreciated in certain markets in spite of their petioles being thin and a little more fibrous, being of lesser quality and taste and having less storage capacity that the green varieties.”
You might like: How to Grow Asparagus in a Container? – The Complete Guide.
3. To Prep Food
Blanching is another term for parboiling (under-cooking) food. The quick heat-and-cold treatment makes it easier to peel, prep, pack or cook fruits or vegetables.
- Before serving: Blanched veggies are softened and easier to peel or process and then serve without further cooking, such as salads, smoothies, or garnishes.
- Before cooking: Blanched veggies only need a quick sauté or stir-fry, so you save on gas or electricity.
- Before preserving: Before you freeze or dehydrate celery for preservation or creating powders or salts, blanching is recommended to stabilize the enzymatic and nutritive elements in the leaves and stalks.
People with allergic reactions to celery find that blanching helps as heat can neutralize allergens.
Be careful though: sometimes, even after blanching, celery may still cause allergic reactions such as eczema and hives.
Related Videos:
Further Reading
- Everything you didn’t even know you wanted to know about celery by David Karp, Los Angeles Times
- How to Blanch and Freeze Celery by Kristin Reichert, Green Leaves and Jam
- Celery Allergy: The Facts by Anaphylaxis Campaign (PDF, 6pp)
What Is Kitchen Blanching?
Whether you’re prepping celery for serving raw, cooking, freezing, dehydration, or canning, it should first be tenderized and sanitized by kitchen blanching (also known as parboiling or scalding) which is, basically, applying heated water or steam for a specific short period of time.
According to The National Center for Home Food Preservation, kitchen blanching should be done right after harvest (as soon as possible) to:
- Preserve: To stabilize color, stop enzyme action that causes loss of flavor, nutrients, and texture. Blanched celery can be frozen for 6 to 12 months, dried, or canned.
- Sanitize: To clean the leaves and stalks of dirt, dust, debris, microbes, and organisms, “removed any entrapped gases, and wilting the tissues of leafy vegetables so that they can be easily put into containers,” according to the Encyclopedia Brittanica.
How To Blanch Celery in The Kitchen?
In this process, you can choose one of three ways: hot water, steam, or microwave.
Method 1. Hot Water Blanching
Let’s now look at how you can blanch celery using boiling water – and the reasons for doing so.
If you don’t blanch, you should eat your celery within a few months if you want to still enjoy it.
Why is that?
Great question.
You see, during storage, vacuoles of plant cells in celery release hydrolytic enzymes such as peroxidase, polyphenol oxidase, catecholase, and benzoquinone-based reactions that cause browning, decay, and deterioration.
Kitchen blanching inactivates these enzymes so that celery can be stored for a long time without much damage. In short, you can still enjoy it after months in the freezer.
Note that blanching time is a very important thing here, and it all depends on the type of vegetables and sizes after prepping.
- Under-blanching: If you make the mistake of under-blanching, you’re stimulating those enzymes I mentioned earlier. Better not try to blanch at all.
- Over-blanching: On the other hand, if you make the mistake of over-blanching, you get limp results with all the nutritious values leached out.
In short, if you want perfect results, use a timer!
How To Blanch Celery By Using Hot Water?
To blanch celery by quick exposure to boiling water, it is preferable that you use gloves and a blancher that comes equipped with a blanching basket and a glass lid for greater control, safety, and economy.
If you don’t have one, use a wire basket or large strainer that can fit into a large pot with a lid, preferably a glass lid (optional).
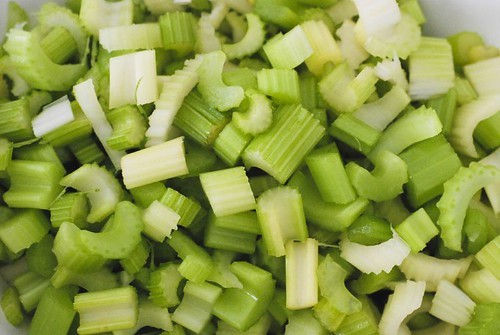
- Step 1 – Prep: First, wash and clean the celery. Then, trim the ends and chop the stalks into 1-inch sections or your desired size.
- Step 2 – Boil: For every pound of prepared vegetables, boil one gallon of water.
- Step 3 – Scald: Put the chopped vegetables in the blanching basket, large strainer, or blanching basket, and that lower into water that’s boiling vigorously. To stop the aforementioned enzymes, the celery must reach at least 180 degrees Fahrenheit.
- Step 4 – Cover: Cover the blancher or pot with a lid. A glass lid can show that, within 1 minute or less, the water should boil again. If that does not happen, you’re using too much celery.
- Step 5 –Time: When the water begins to boil again, start counting the minutes of blanching time. (Here’s a blanching time chart you can use.)
- Step 6 – Shock: Remove the basket of celery from the boiling water. Plunge it immediately into a lot of ice-cold water (enough to submerge the basket).
- Step 7 –Time: Start counting the minutes of your cooling time, which should be the same as your boiling time. Stir a few times.
- Step 8 – Drain: Drain as much water as possible before your next step.
No blanching basket? No worries.
If you don’t have a basket designed for blanching vegetables, you can boil chopped celery in a pot of water. The secret is: don’t cover the pot.
PRO TIP: To preserve a greener color, add salt to the boiling water. If you prefer a browner or more yellowish color, add some lemon juice (or similar acidic condiment) to the boiling water.
Advantages
Of all the blanching methods discussed in this article, the hot-water blanching method is the cheapest. It only needs common kitchen implements and ingredients.
- Preservation: Blanching removes bitterness, stops the enzymes that cause the deterioration of frozen vegetables, as well as preserves the “peak crunch and taste” of celery, says Kathy Maister.
- Ease: It’s an easy process, practically a no-brainer if you’re used to working in a kitchen. All you need is boiling water, ice-cold water, and a timer.
- Prepping: Blanching makes it easy to remove bacteria, stringy sections, peels, modifies the texture, and inactivates enzymes that turn celery brown.
Disadvantages
This procedure needs constant alertness, vigilance, and quick attention. Over-blanching and under-blanching are common mistakes.
- Strict timing: For instance, if you only prepare the cold bath bucket after you’ve blanched the celery, you’re likely to end up with an over-blanched batch. As Anna Aronson puts it: “Make sure to follow directions carefully and blanch the celery for exactly three minutes.”
- Burns: Boiling water is a constant danger, so use heat-resistant kitchen gloves. If possible, use a blanching basket with long, wooden handles. Metal handles can burn your fingers while short handles can expose your hands to very hot steam.
- Power dependence: Finally, this process depends on your having heating and freezing equipment. If the power is out, then you’re out of luck. Best check before you even harvest and prep celery for freezing or dehydration.
- Tissue damage: Hot-water blanching leaches nutrients and water-soluble components, damages tissue cells, denaturizes protein, and affects color.
Related Videos:
Further Reading:
- Vegetable blanching directions and times for home freezer storage by University of Minnesota Extension
- Antioxidant and antimicrobial activity of celery (Apium graveolens) and coriander (Coriandrum sativum) herb and seed essential oils by Hassanen et al (PDF 13pp)
- The Year for Celery by Susan Pelton, University of Connecticut Home and Garden Education Center (PDF 2pp)
Method 2: Steam Blanching
Now, let’s discuss how you can blanch celery by using hot steam instead of hot water – and why you should.
Steam blanching is just like hot-water blanching, except that you allow the celery to have direct contact with hot water vapor instead of boiling water.
And there’s a good reason for that.
Boiling water can leach away nutrients and minerals from vegetable tissues, particularly in over-blanching. This is why hot steam is the preferred method to minimize chemical and nutritive damage.
In addition, steam blanching avoids protein denaturation that happens in hot-water blanching. At the same time, steaming can force-clean most dirt and surface bacteria.
How To Blanch Celery By Using Hot Steam?
Steam-blanching is similar to the hot-water blanching procedure, except for the following differences:
- Step 1 – Prepare: You will need a pot with a tight lid as well as a basket or container with holes to hold the celery at three inches (or more) from the bottom of the pot.
- Step 2 – Boil: Boil an inch or two of water in the pot – but add more if you have a bigger pot, or if you’re steaming more celery.
- Step 3 – Arrange: Arrange a layer of celery in the basket so that all pieces are quickly steamed. Too much celery will mean longer steam-blanching time.
- Step 4 – Steam: When the water boils, put the basket of celery in the pot. Make sure there are at least two inches of space between the celery and the boiling water. Cover the pot and keep the heat high.
- Step 5 – Time: As soon as the pot is covered, start counting your steaming time.
- Step 6 – Remove: When the celery’s color changes to a brighter green, stop the steaming process immediately.
- Step 7 – Shock: To help preserve color and nutrients, submerge the celery immediately in ice-cold water.
PRO TIP: Remember to remove the celery from the steamer while still crisp.
Advantages
The advantages of steam-blanching are the same as in hot-water blanching, except that there is less tissue damage or nutrient loss.
- Preserves: Like other forms of thermal-increase blanching methods, steam blanching “destroys enzymes that catalyze the reactions of food spoilage,”. (source)
- Protects: Compared to hot-water blanching, steam blanching is a much gentler process that helps to protect the water-soluble vitamins in celery.
- Improves: Celery becomes lighter and easier to digest.
- Low-pressure steaming (unlocked cover) also improves the process by reducing the risk of over-blanching.
- High-pressure steaming (locked cover) speeds up blanching time.
- Adjusts: This process is scalable: it can be used for either home-based, low-volume processing, or for labor-saving in high-volume celery processing.
PRO TIP: The use of a multi-tiered steamer allows for fuel savings.
- Keeps: Compared to hot-water blanching, steam blanching damages fewer nutrients because the vegetable is not fully submerged in water. In steam blanching, fewer antioxidants are damaged than in the water-blanching process.
You might like: How To Grow Carrots Indoors – An Easy Guide To Follow
Disadvantages
The two main disadvantages of steam-blanching are that it requires more energy and capital expenditure compared to hot-water blanching.
- Longer time: Steam blanching takes about 1½ times longer than water blanching.
- Equipment: This process requires the use of a steamer or a set of strainer, colander, or steaming basked inside a pot with a tight lid.
Related videos:
Further Reading:
- The Quickest Methods of Dehydrating Celery by Martha Piccolo, Drying All Foods
- How To Dehydrate Celery, Make Celery Powder And Calculate Conversion Amounts by Jennifer Osuch, Seed to Pantry School
- How to dehydrate and rehydrate celery, make celery powder, and celery salt by Darcy, The Purposeful Pantry Library
Method 3. Microwave Blanching
Another alternative to blanching celery is using a microwave oven. It’s easier and safer, too. Let’s look at the how and why.
This process is similar to the water and steam blanching procedures, except that you’re using a microwave oven.
How To Blanch Celery By Using A Microwave Oven?
- Step 1 – Prepare: Prep the celery by cleaning, washing, peeling, slicing or dicing. Put the celery in a microwave-safe container covered with a glass lid. Add water.
- Step 2 – Set: Set power on high. Use the temperature and time for blanching recommended for celery.
- Step 3 – Adjust: Adjust blanching time according to how much water is in the container.
- Step 4 – Blanch: Microwave for 1/2 the time. Stir and check for color and consistency. Drain and discard the hot water, or continue blanching as necessary.
- Step 5 – Shock: Submerge the celery in ice-cold water after blanching.
- Step 6 – Drain: Drain the water with a colander. Remove excess water with paper towels.
Advantages
- Quality: Since there is less contact with boiling water or steam, the more nutritional content is preserved compared to traditional blanching.
- Ease and safety: Using a microwave for blanching is less complicated and safer than blanching with steam or hot water. For instance, no pots, baskets, or fire are involved.
Disadvantages
- No savings: Microwave blanching celery neither saves time nor energy.
- Low quality: Since some enzymes are not inactivated by the lack of actual boiling water, results such as off-flavors, loss of texture, and unstable color should be expected.
- Limited: For best results, small quantities at a time should be blanched when using a microwave oven.
Related videos:
Further Reading:
- How to freeze celery by Grow a Good Life
- The chemical composition of the essential oil of leaf celery (Apium graveolens L. var. Secalinum Alef.) under the plants’ irrigation and harvesting method by E Rozek et al, Semantic Scholar
- Celery in the Garden by Brandon West and Dan Drost, Utah State University Horticulture Extension (PDF 2pp)
- Medical benefits of Apium graveolens (celery herb) by Tyagi et al (PDF 3pp)
- Celery: Apium graveolens var. dulce by Horticulture Innovation Australia Limited (PDF 2pp)
What is Garden Blanching?
Blocking out the sun to prevent enzyme development while the celery grows is called “garden blanching” and takes two (or more) weeks. This requires a lot of walking, bending, and using your hands outdoors.
In short, exercise and fresh air. The purpose: celery that is lighter, less bitter, and with more natural sweetness, says Nikki Tilley, author of The Garden Printer.
Let’s look at the different ways of blanching celery before it is harvested.
How To Blanch Celery in The Garden?
Whether you’re growing celery for private use or as a commercial business, you know that the major complaint of buyers – and eaters – is the bitter flavour. This is related to how much chlorophyll is present in celery that, in turn, is related to how much sunlight it gets while its growing.
Thus, to reduce the bitterness and enhance the natural sweetness of celery, farmers and gardeners explored the idea of reducing sunlight exposure. However, sunlight is required for celery to grow and flourish.
That’s why, over time, these plant lovers and businessmen also found ways and identified the best points of the growing cycle when to reduce chlorophyll.
In this process, we will discuss the two methods of garden blanching, which includes:
- Mounding, the use of soil, mulch or other natural ground elements, and
- Wrapping, which uses covers that are:
- Light-resistant (completely blocks sunlight),
- Water-resistant (not destroyed by irrigation, watering, or rain), and
- Porous (allows the plants to breathe).
Method 1: Mounding
Celery can be made paler, more tender, and taste better by growing it with insufficient light.
PRO TIP: Compared to other methods of post-harvest blanching, mounding celery stalks produces the best flavor and texture, as detailed in a 1925 report by R. B. Harvey.
How To Do It?
- Trenching: One method is to plant celery in trenches that are lower than the rest of the garden. When the plants are almost fully grown a few weeks before harvesting, gradually fill the trenches with soil. This will block out sunlight.
- Mounding: If you’re not using trenches, simply mound up the soil around the base of each celery plant. Aside from soil, you can also use a straw, wood chips, or even leaves.
- Repeat: Every few days, repeat the process and gradually add more dirt to cover up more of the stalks. Do not cover the leaves. The result will be rows of buried celery stalks, with only their leaves showing.
- Check: Every few days, if you need to keep up with plant growth, check the mounds and build them up again as necessary.
PRO TIP: Celery grows best in direct sunlight, with compost-enriched soil that does not drain too quickly, and with a pH level between 5.8 and 6.8. Best daytime growing temperatures are 60 to 70 degrees Fahrenheit and in the 50s degrees Fahrenheit at night.
Advantages
- Simplicity: This requires basic garden tools (trowel, gloves) and topsoil.
- Moisturizing: Mounding results in tender and succulent stalks as they are well supplied with moisture from the earth.
- Longer stalks: Mounding while celery is growing produces very long stalks.
- Quality: Mounding celery maintains has better texture and flavour than using other garden-blanching methods.
Disadvantages
- Time-consuming: Depending on the weather in your area as well as the age and variety of your plants, full blanching can take from three to six weeks. In short growing seasons, this can be problematic.
- Tiring: This method is labor-intensive and tiring, particularly if you are growing a large number of plants.
- Defects: Soil gets into the crevices of each plant. Avoid increasing pests or disease by keeping the mounds relatively dry and water only the base of each plant.
- Expensive: This is rather expensive due to the labor required for mounding. After harvesting, the stalks contain a lot of insects, fungi, algae, and other organisms that give the celery and “earthy” flavor.
PRO TIP: Prepare yourself. These soil elements will give you more work such as breaking the stalks apart, and then cleaning and washing them.
Method 2: Wrapping
To avoid the disadvantages of mounding that uses topsoil or ground cover, celery can be garden-blanched by wrapping with paper, cardboard, or any light-proof material a few weeks before harvest.
How To Do It?
- Wrap: Use any material that is light-proof (and if possible, waterproof) gently wrap the stalks of each plant. If you’re using milk cartons, wash them thoroughly and cut off the tops and bottoms.
- Tie: Use twine or string to tie these loosely around each plant, up to just below the leaves so growth can continue. Give the leaves and stalks enough space to breathe. If you’re using milk cartons, gently slide the leaves and stalks into the carton, and cover only the stalks; let the leaves show.
PRO TIP: The leaves must be touched by sunlight so that the plant can keep on growing.
- Water: Water each plant as usual, but avoid wetting newspaper. If it rains, change the paper, or switch to waterproof, lightproof material, such as milk cartons or black plastic.
- Unwrap: When your celery is ready for harvest, untie the wraps, set them aside for reuse, and start harvesting. If you’re using milk cartons, cut off or remove the celery plant from ground, and slide it out of the carton.
PRO TIP: To avoid damaging the leaves, slide the milk carton towards the roots.
Advantages
- Low cost: Wrapping materials and string are cheap when reused. Paper can be folded first and later unfolded to cover stalks as they grow longer. Waxed milk cartons are waterproof and do not allow any sunlight to penetrate.
- Sanitary: Blanching celery by wrapping is more sanitary than mounding. At the same time, you can expect a cleaner taste.
- Longer stalks: Celery will grow up beyond the wrappers, so you end up with longer stalks.
Disadvantages
- Less blanching: Wrapping with material that allows some sunlight to touch the plant (such as newspaper) will not be as well-blanched as celery blanched by mounding. A longer blanching time will be required.
- Less flavor: The stalks will not have a sturdy flavor like those mounded with soil.
- Time factor: The plants cannot be covered till they’re almost fully grown. In areas with short growing seasons, plants must be harvested before blanching is complete.
- Infestation: In hot, humid weather, the fungus can infect plants mounded up with boards or paper.
- Lengthening: If you’re using milk cartons, you have to go around and add more cover to adjust to plant growth. For instance, you have to insert folded newspaper or black plastic to cover the newly exposed stalks of each plant.
Related Videos:
Further Reading:
- Advances in the research of celery, an important Apiaceae vegetable crop by Li et al
- Growing celery: planting, growing, and harvesting celery by Catherine Boeckmann, The Old Farmer’s Almanac
- A Pest Management Strategic Plan for California Celery Production by the California Celery Research Advisory Board (PDF 39pp)
Key Takeaways
You can blanch celery long before or right after harvest. Blanching by lessening heat exposure in the garden over a long time makes celery sweeter, paler. On the other hand, blanching by shocking (quick heat and cold exposure) makes celery more tender and better preserved.
- Kitchen blanching: There are many ways to blanch celery. Kitchen blanching is best done right after harvest before freezing, dehydrating, serving, or cooking celery. Most common methods: hot water, steam, and microwave.
- Garden blanching: Blanching celery before it is harvested is done mainly for palatability and saleability. Most common methods: mounding, wrapping.
- Commercial blanching: For large-scale blanching, blanching methods include the use of gas, heat, or irradiation.
Now you’re an expert in blanching celery! Congratulations.
That ends our guide to celery blanching methods.
But, wait!
Before you go, here are 14 Most Frequently Asked Questions About Celery Blanching
14 FAQs About Celery Blanching
Here are some of the most common questions that we hear about blanching celery after it is harvested:
Are there other ways of garden-blanching celery?
Green chlorophyll can be removed from celery stalks by exposure to ethylene gas (used for anesthesia): with excellent results. Other methods include gamma irradiation (GI) and infrared radiation (IR) for large-scale applications. Marilyn C. Erickson’s report says that irradiation at (1.0 kGy) dosages can kill pathogenic bacteria in fresh celery.
PRO TIP: Acetylene gas was tried. However, the changes to the resulting flavor were not acceptable.
What happens if I blanch celery of the self-blanching variety?
Self-blanching and green varieties of celery benefit from kitchen blanching in terms of cleaning, softening, and preservation.
What happens if I don’t blanch celery before freezing?
If you freeze celery without blanching it first, it will be mushy when thawed. At the same time, ice crystals will break down the nutrients.
What happens if I don’t blanch celery before dehydrating?
If you dehydrate un-blanched celery, it will end up with an unappetizing tan color. If un-blanched celery is frozen, it will show defects such as “faded or dull coloring” and “off-flavors and textures,” according to Kelli Foster.
What happens if I don’t blanch celery before serving or cooking?
If you’re talking about dark green celery, you’ll have a bitter dish to serve. In comparison, the self-blanching celery that is served raw celery is less tender as blanched celery.
Can I cross-pollinate green celery with self-blanching celery varieties?
Yes. According to a report by Edward J. Ryder, “Celery is naturally cross-pollinated, but not self-incompatible.” However, you should keep in mind that self-pollination can eventually result in in-breeding of your celery crop.
Is using a microwave blanching the same as irradiation?
Actually, no. Although both use radiant heat, the former can be done with a regular microwave oven found in many home kitchens, while the latter requires equipment specially designed for large-scale vegetable processing plants.
What are other uses of self-blanching celery?
You can use any kind of celery in different ways.
– Either green or self-blanching celery varieties can be used to treat arthritis, diabetes, inflammation, and obesity.
– Ground or whole celery seeds are used as seasoning.
– For drinks, you can make juices and smoothies.
– For dishes, you can make salads, crudités, soups, sandwiches, stews, and sautés. In addition, you can also make garnishes, dips, and candied celery.
– There are even many ideas for leftover celery.
PRO TIP: To keep away mosquitos, rub raw celery juice or celery essential oil on your skin.
I’ll be harvesting tons of self-blanching celery soon. Aside from food, what other products I can make out of it?
You can make frozen celery packs, celery powder, celery salt, or essential celery oils.
What is the history of blanching celery?
Historical records do not mention explicitly mention pre-harvest blanching. However, celery has been used by ancient Greeks, Romans, and Germans, long before eighteenth century records of its use as medicine. In the US, celery has been used as a vegetable since 1806.
What pre can I do to adjust flavor and color of celery?
To get the exact results you want, try different lengths of garden blanching time. If you want lighter, sweeter celery, you can blanch celery for about three to four weeks before harvest.
PRO TIP: If you want more robust petioles (stalks) and a slightly stronger flavour, you can blanch celery about two weeks before harvest.
Are there ways to improve the garden blanching process?
You can plant them so that they shade each other. For instance, self-blanching varieties can be planted in blocks instead of in rows.
What is the main difference between dark green and pale green celery?
Researchers agree that pale green celery has less chlorophyll and less nutritional benefits compared to dark green celery.
PRO TIP: Both green and light celery have mostly (about 94%) water, vitamins, and minerals for medication, health benefits, and your sex life (e.g., increases pheromones dilates blood vessels, increases sex drives, and enhances climax).
I don’t want to deal with kitchen blanching. What other celery varieties are available?
Kitchen blanching is used to sanitize and tenderize all varieties of celery. There are three types: to cut, stalk, and celery turnip. Each of these is available in different varieties. For instance:
1. To cut: The “to cut” types (Apium graveolens var. secalinum) such as De Dinant, D’Anvers Tardif, Flora 55, Par Cel, and Safir are cultivated (best grown in USDA’s 5a to 8b zones) for their aromatic leaves that are used as condiments.
PRO TIP: For more celery varieties, check out Cornell University’s Vegetable Varieties for Gardeners website.
2. Shoot/stalk: The “shoot celery” or “stalk celery” (Apium graveolens var. dulce) are in three types: purple, cultivated green, and white or golden (also called self-blanching) varieties. These are preferred for their stalks, which are commonly used in soups, salads, and slaws.
– Purple: Varieties include the Giant Red, Red Venture, Pink Plume, Pink Celery, Red Celery. These are quite popular in England.
– Cultivated green: Use covers of black plastic or increase planting density to create white stalks if you plant varieties such as D’Elne green, Easter green-filled, Florida type, Florimart, June-Belle, Lepage green, Slow Bolting type, UTA type, or Verdon.
PRO TIP: If you prefer a stronger flavor, plant Chinese celery (Apium graveolens) or Nan Ling varieties such as Golden Medium or Hainan Green.
– Golden / white / self-blanching: Available varieties include: Avon Pearl, Avon Resister, Chatteris, Celebrity, Full Golden, Golden Barbier, Golden Heart (or Kalamazoo), Golden Plume, Golden Self-Blanching, Golden Spartan, Golden Yellow, Jason, Lathom Blanching, and Selfira, to mention a few.
PRO TIP: The Pascal type is commonly grown in the USA and includes varieties such as the Golden Boy (short stalks), the Tall-Utah (long stalks), Tango Hybrid, the Conquistador and the Monterey (mature early), and the White Plume.
3. Celery turnip: The “celery turnip” or celeriac (Apium graveolens var. Rapaceum) variety is cultivated (best in USDA zones 8 and 9) for its edible root, hypocotyl (a specific part of the stem), and shoots that make a great celery substitute. You can try varieties such as the Brilliant, Diamante, Early Erfurt, Giant Prague, Mentor, the President, the Tom Thumb Erfurt Turnip Rooted Celery, or the Apple-Shaped Celery (céleri-rave pomme à petite feuilles).
PRO TIP: Raw celeriac in salads or slaws is crunchy and has “a super nutty, celery-like flavor” while mashed, baked, or roasted celeriac has a slightly sweet flavor.
Related Videos
Further Reading
- History-of Celery (PDF, 8pp) by E. Lewis Sturtevant, M. D.
- Effects of packaging on shelf life of fresh celery by G. Muratore and V. Rizzo
- Grades and Standards: Grades of Celery by the USDA Agricultural Marketing Service
Just a Gift Before You Go
Just click, download, and enjoy.
Happy blanching!
P.S: Do tell us in the comments section below:
- Have you ever blanched celery? Tell us about your experience.
- Did you learn something new or useful in this article? Share your thoughts with us.
If you like this guide, share it on Pinterest!
For more growing guides across every vegetable you’re likely to grow this season, our vegetable gardening guide is always a good place to start.