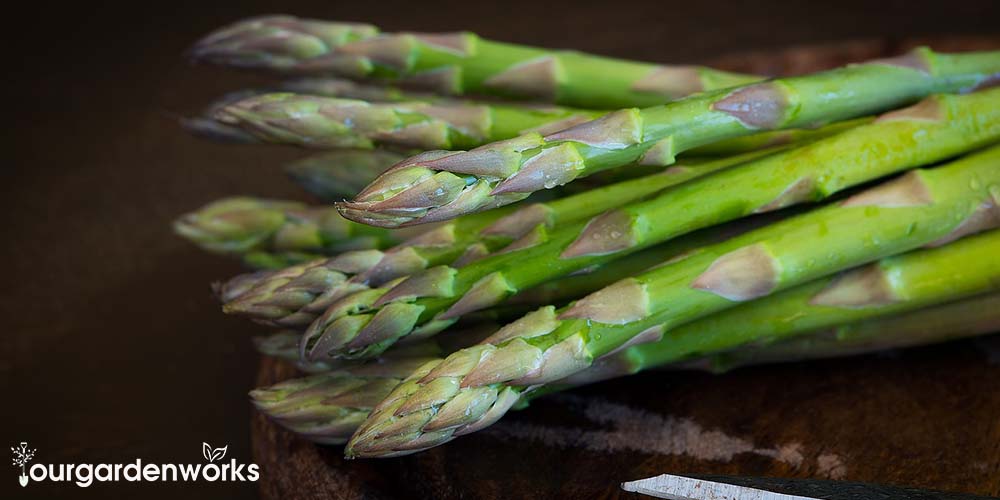
Consuming vegetables can help you lower the risk of developing diseases. When you grow them yourself, you can easily cook them at your convenience. Other than saving money, you will have the assurance of getting fresh produce all the time.
Container gardening, which has been on a rise for years now, can allow you to do just that. What’s more, it is even possible to grow almost any type of vegetable in a container.
Doing so not only protects your plants from harmful fungi and pests but also gives you the freedom to move the plant around at your convenience. One type of vegetable you can actually include in your container garden is asparagus.
So, let us find out how to grow asparagus in a container.
What is Asparagus?
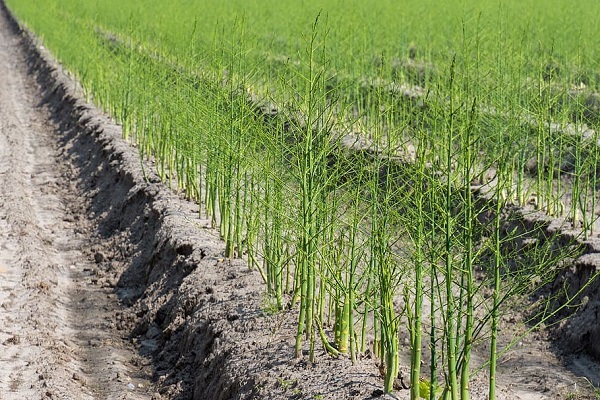
Also called garden asparagus (Asparagus Officinalis), this vegetable is a perennial plant that is usually harvested between April to May. It can grow from 40 to 60 inches (100 to 150 centimeters) tall. However, only the young shoots are usually eaten. Once the buds fern out or start to open, these shoots start to turn woody.
Its taste is quite similar to broccoli and long beans with a grassy and bitter aftertaste. This plant originated from the Eastern Mediterranean with varieties in Africa. It is also cultivated in Europe.
In ancient Greece, the asparagus was sacred and considered an aphrodisiac. Other than that, the Greeks were also interested in its medicinal properties and used it to treat a variety of ailments like diarrhea.
The Romans, on the other hand, included it in their daily meals as an entree. However, this vegetable was forgotten in the middle ages and was only reintroduced in the 17th century when it was served in the royal courts of Europe.
When people from England moved to the US, they brought asparagus with them. However, it was only propagated commercially in the 1850s.
What Are The Different Varieties of Asparagus?
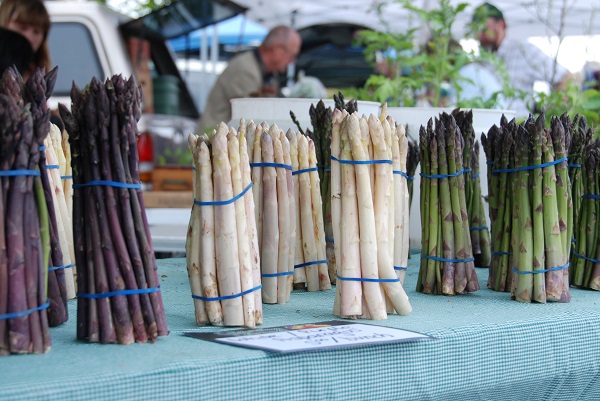
Today, there are typically three types of asparagus that you can see in the market. These are white, green, and purple asparagus.
1. Green Asparagus
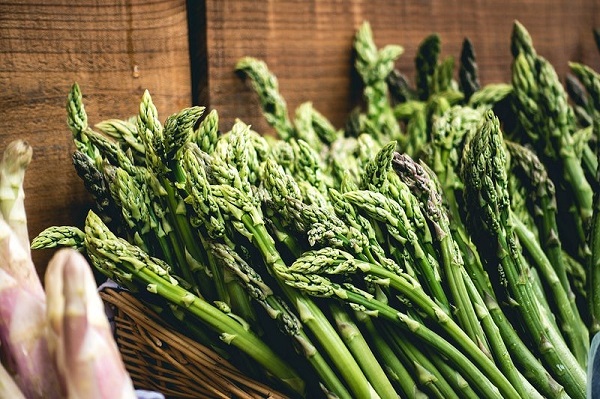
The first one is green asparagus. It is also the variety that you can usually grow in your garden.
The spears can be thin or thick depending on the variety. There are plenty of green asparagus varieties that you can choose from. The Jersey King is characterized by its long and pointed spears that are about seven to eight inches in length.
Another type is the Jersey Knight which has long thin spears that can reach eight to ten inches. A third variety, the Jersey Giant, has shorter and thicker spears.
The Mary Washington asparagus is a much older variety and has more tender spears than other types. It also yields the most harvest.
The variety called Precoce D’Argenteui, which means early variety in Italian, is rarer than other green asparagus types. This type is easily identified by its light green stems and purple-colored buds.
2. White Asparagus
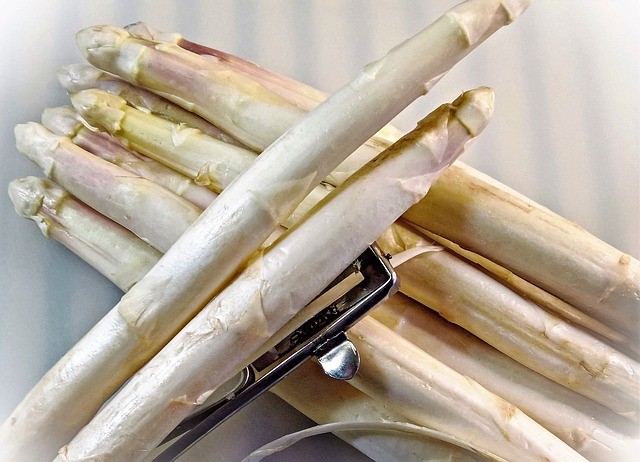
Do you know the difference between green and white asparagus? It is mainly their growing method. Unlike the green asparagus where you just plant the seeds and let the sprouts grow, the growing method of the white asparagus is quite unique.
The white asparagus is grown underground. Simply put, gardeners or farmers pile the soil above it or place a black-colored plastic. This will stop the sunlight from reaching the plant which inhibits the vegetable from producing chlorophyll.
This would effectively lessen the grassy taste because of the absence of chlorophyll. The taste is also much sweeter and less bitter than the green variety. It is mostly grown in places with temperate climates.
Popular white asparagus varieties include Gijnlim that is best for sandy or clay soils. It produces high-quality yields.
3. Purple Asparagus
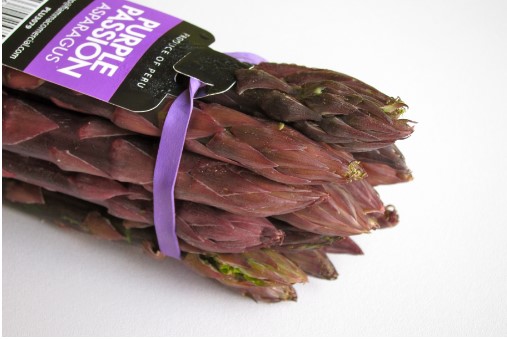
Because it was cultivated from green asparagus, the purple asparagus has a taste very much like the other types of asparagus. Its plant still has its green foliage and the purple coloring is present only on its skin.
However, the color of its flesh can range from light green to creamy white. One of the reasons why it is the preferred choice is because it is more tender and sweeter than other varieties.
The difference in taste is especially apparent when it has been cooked. It can even have barley and almond flavor undertones.
Why Should You Grow Asparagus?
Asparagus is full of nutrients. It has high anti-inflammatory and antioxidant properties. These include folic acid, thiamin, vitamins A and C, and potassium, among others.
Furthermore, it is low in calories. It has only 20 calories per serving of a hundred grams of asparagus and has zero fat. Asparagus improves digestion and blood pressure levels. Plus, it is inexpensive and quite easy to prepare.
If you do not have a lot of space or are just afraid to commit, choosing to grow it in planters is the best way to go. Furthermore, planting it couldn’t be much easier, so read on below to find out how to grow asparagus in a container.
How Do You Grow Asparagus in a Container?
Planting asparagus in your garden is actually the preferred method in cultivating this crop. However, contrary to popular belief, it is also possible to successfully grow asparagus in containers.
Just follow these quick tips and steps and you will definitely harvest fresh asparagus in no time at all.
The Materials That You Will Need Are:
1. Planter or Container
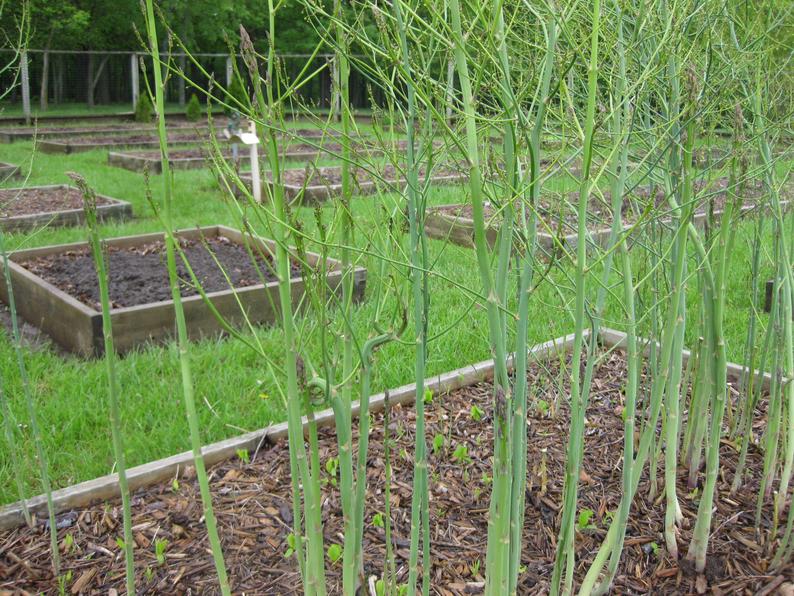
Note that asparagus needs enough space to grow. So, make sure to choose a deep large container. It should at least be 18 in (46 cm) deep and 12 in (30 cm) in diameter.
There are a variety of container materials you can choose from. You have to remember, though, to choose ones with holes at the base or you may need to poke holes for irrigation. So, consider this when choosing your planter.
2. Soil
Asparagus prefers light soil types with a ph of 6.5 to 7. It can grow well in sandy loam soil as well as clay. As long as it holds moisture properly and can be easily irrigated, your asparagus will thrive.
3. Fertilizer
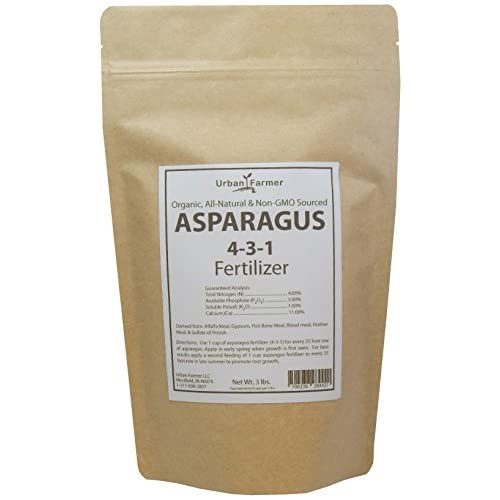
You can use an all-purpose. A Phosphate-Nitrogen-Potassium (10-10-10) fertilizer is best for growing asparagus plants. Just make sure that you don’t use too much.
If you have a 46 cm deep planter, approximately 28 grams of fertilizer will do the job. You can choose to buy one from the store or make use of natural alternatives. Asparagus prefers mildly acidic soil. If you use coffee grounds, you have to mix it with compost since pouring it directly can be too acidic for the plant.
4. Mulch
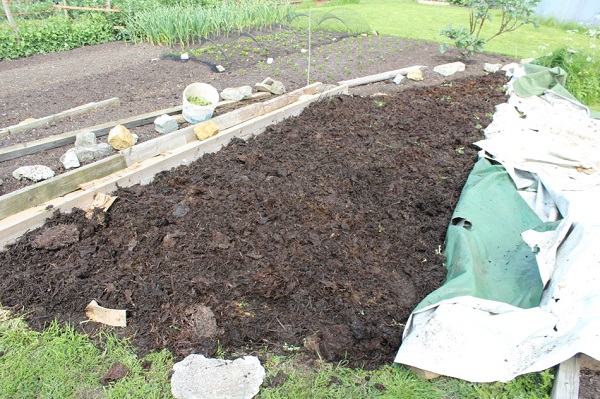
Organic mulch helps retain warmth and moisture to the soil, both of which are important for the growing asparagus plant. It protects the vegetable from weeds and supplies additional nutrition as well.
5. Asparagus Seeds or Crowns
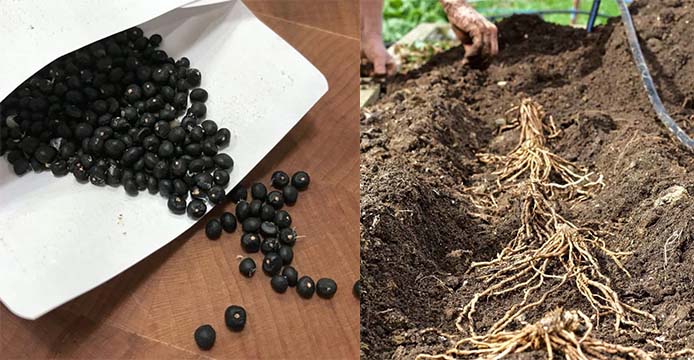
Asparagus can be planted through a couple of methods. If you have access to seeds of your preferred variety you can choose to plant those. Seeds are also much cheaper than crowns. Otherwise, you can plant asparagus crowns or the root systems of a two-year-old asparagus.
Interestingly, the asparagus is a dioecious plant. This means that unlike monoecious plants that have both produce male and female flowers for each individual plant, asparagus will have only produce male or female flowers per plant. Although both produce spears, the female asparagus produces seeds and, because of this, its spears are thinner.
Furthermore, the seeds that have fallen on the soil may also cause overcrowding. On the other hand, male asparagus have thicker spears which is a prime choice for cooking. However, if you are not sure how to differentiate between the two, you do not have to worry.
There are male varieties available like the Jersey varieties. Male asparagus crowns are generally preferred and there are male hybrids as well.
Method 1: The Step-By-Step Planting Process For Planting Asparagus Crowns
- Drill Holes into The Container
Most prefer to use a plastic container when planting asparagus because it does not absorb moisture. Drill holes at the bottom of your chosen container if it doesn’t have them to allow the soil to drain out excess water.
- Prepare Your Soil
The next step is to prepare your soil. As mentioned before, sandy loam soil works best with asparagus. However, if you can’t find any from the store, you can easily make it yourself.
Just mix in half part sand, 40% of clay, and about 10 to 20% of organic matter like compost or silt. Mix it well and pour it into the pot. - Prepare The Asparagus
If you have asparagus crowns, they tend to be quite dry when you take them out of the package. So, before planting them, let the crowns soak in water for a few minutes or until it is noticeably hydrated. However, do not soak it for too long or its roots could become damaged.
Carefully separate the asparagus crowns after soaking. - Plant The Asparagus
Place one crown gently at the center of your chosen container. Spread its roots outwards like the rays of the sun. Additionally, avoid placing the roots too close together.
- Cover It With Soil
After you have placed the asparagus crown, cover it carefully with about four to six inches of soil. After this, lightly pat down to level off the soil.
- Water The Plant
Once you have finished doing all of that, water the soil. Just make sure that the soil is nice and moist but not to the point of being too runny.
- Place The Planter in a Sunny Location
Label the container and place it on an area in your garden or space where the sun hits the most and wait for it to grow.
- Cover The Soil With Mulch
After at least two days, you will notice that small shoots are already visible. Once this happens, cover the planter with mulch but make sure it does not cover the asparagus shoots itself. It should be ready for harvest by spring next year.
Method 2: How To Plant Asparagus Seeds in Containers
Although planting asparagus crowns might be easier, growing asparagus from seeds is quite a fulfilling venture, as well. If you plan to start growing asparagus from seeds, you will need to prepare the following:
- Indoor plant lights
- Seedling tray
- Three-inch deep planters
- Containers (minimum 12 inches or ~46 cm deep)
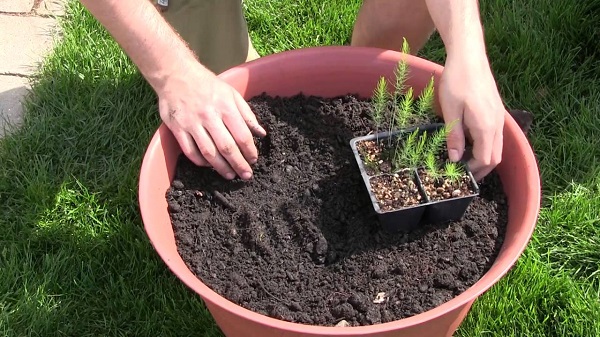
For starters, completely fill in the seedling tray with seed-starting soil. It is basically a mix of coconut husk or coir, perlite, and organic compost. One compartment can fit three seeds without overcrowding. So, use your forefinger and make three equally-distanced holes on the soil on each compartment and place the seeds.
The holes need to be 1 cm (½ inch) deep or three times the size of the seed. Doing so will allow the sprouts to pop out and grow well. After that, practice your patience and wait for it to grow.
Now, depending on when the seeds were harvested, it would take 2 to 8 weeks before they start to sprout.
If the asparagus seed was harvested and placed indoors for quite a while, chances are it would take a longer time for it to grow compared to those that have stayed covered up in the shelf for shorter periods.
Keep it indoors with constant light. In about a month or so, it will be ready to be transferred to the three-inch planters. When transplanting, the type of soil you use will affect the size of the container to be used.
If you use heavier types of soil like clay, it will be harder for the asparagus roots to grow and it will barely grow longer than six inches. So, you will only need an eight to ten-inch deep planter as compared to the usual 12 inches deep container.
In turn, branches are thinner and will only taper a little, looking more rounded than those grown in sandy loam soil. You do not have to water the asparagus all that much since it dislikes wet environments.
For the first two years of growth, it will need an inch or two of water. When it reaches four years, you will only have to water and irrigate it every two to three weeks. As long as there is enough moisture in its soil, then it would be enough.
When Do You Harvest Asparagus?
As a perennial plant, asparagus can be productive for decades once its roots have been established. It reaches maturity in about two to three years. During this time, you are not allowed to harvest the shoots.
Harvesting will only happen once the plant’s establishment period is finished. Which makes the plant about three to four years old. The best time to plant asparagus is in spring when the weather is neither too hot nor too cold.
Your container-grown asparagus will start producing shoots in its first year. Allow the plant to produce its fern-like leaves first. In October of the first year, cut it down and repeat the process for another year.
In the early part of spring in its second year, loosen soil and put in your preferred fertilizer and compost. Finally, in its third or fourth year, you can start harvesting the shoots.
However, you must only harvest a few and leave most for it to grow ferns. After all that hard work, you can harvest as much as you want. Just remember to leave some shoots for next year’s harvest.
Final Thoughts
Give the asparagus enough time for it to properly grow. It is also good to remember that asparagus takes about two to three years to mature. Furthermore, different varieties have different timeframes.
So, if you want to have asparagus all year, it would be best to plant different varieties in your container garden. When starting with seeds, it is best to start early in spring to yield much earlier.
Just follow the above tips on how to grow asparagus in a container and you will surely have plenty of this nutritious vegetable for you to cook in no time.
