

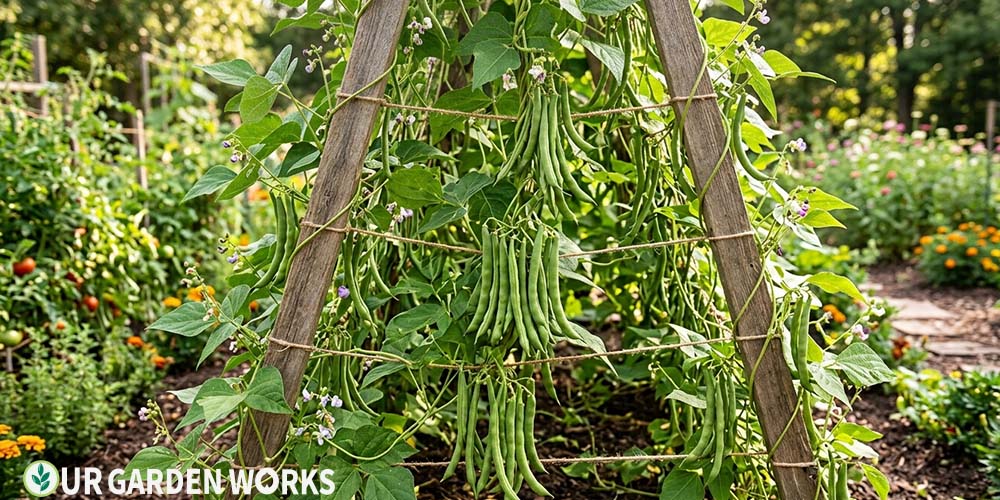
Green beans are one of those crops that tends to surprise beginners with how productive and easy they are.
Direct sow into warm soil, keep them watered, and they’ll produce abundantly from midsummer through fall. No indoor seed starting. No complicated soil preparation. Just seeds, sun, and water.
The main decision is bush vs. pole beans — two completely different growth habits with different space requirements, staking needs, and harvest patterns. Get this decision right for your garden and green beans become one of your most reliable crops.
How to Grow Green Beans: Direct sow green bean seeds when soil reaches 60°F, 1 inch deep, 3–4 inches apart. Bush beans need no support and produce in one concentrated 2-week period. Pole beans need a trellis but produce continuously for 2–3 months. Both varieties are ready to harvest in 50–65 days when pods are firm, bright green, and before seeds visibly bulge inside.
Bush Beans vs. Pole Beans — Choose First
| Bush Beans | Pole Beans | |
|---|---|---|
| Height | 12–24 inches — no support needed | 5–10 feet — trellis required |
| Harvest window | One concentrated period (2–3 weeks) | Continuous for 2–3 months |
| Setup effort | Minimal — just sow and water | Requires trellis installation |
| Best for | Canning/freezing (bulk at once), small spaces | Fresh eating all summer, vertical gardening |
| Popular varieties | Blue Lake 274, Provider, Contender | Kentucky Wonder, Rattlesnake, Dragon Tongue |
| Succession planting | Sow every 3 weeks for continuous supply | One planting provides all-season harvest |
Best Varieties by Type
Bush beans: Blue Lake 274 is the classic — tender, reliable, excellent fresh or canned. Provider is the earliest bush bean at just 50 days, with strong disease resistance that makes it especially forgiving for a first attempt.
Dragon Tongue is a flat yellow Dutch variety streaked with purple, and its flavor genuinely earns the extra attention it gets from seed catalogs.
Pole beans: Kentucky Wonder is the heirloom standard most gardeners eventually try, with excellent flavor and a long track record. Rattlesnake Bean has striking purple-striped pods and noticeably better drought tolerance than most pole varieties.
Fortex is an extra-long French filet type that stays tender even at unusually long lengths, which is forgiving if you miss a harvest day.
💡 Our recommendation for first-time bean growers
Start with Provider (bush) — it germinates reliably even in cooler soil, is disease-resistant, and produces abundantly. Then add one pole variety (Kentucky Wonder is classic) to give you continuous fresh beans alongside your bush harvest.
Green Bean Growing Requirements
Bean Growing Requirements
- Soil temperature: 60°F minimum for direct sowing. 70°F for best germination speed.
- Sunlight: Full sun — 8+ hours for best production.
- Soil pH: 6.0–7.0. Beans are tolerant of a wider range than most vegetables.
- Watering: 1 inch per week. Consistent moisture during flowering and pod fill is critical — drought at these stages reduces yield dramatically.
- Fertilizer: Beans fix their own nitrogen — use low-nitrogen fertilizer or none at all. High nitrogen produces leafy growth at the expense of pods.
- Days to harvest: 50–65 days from direct sowing.
How to Grow Green Beans: Step by Step
Step 1 — Direct Sow (Don’t Transplant)
Beans don’t like having their roots disturbed — they resent transplanting and perform significantly better when direct-sown into their permanent location.
There’s also no timing advantage to starting indoors since beans germinate quickly in warm soil (4–8 days) and catch up with any transplant within 2 weeks.
Directions
- Wait until soil reaches 60°F at 4 inches deep. Beans sown in cold soil rot rather than germinate.
- Prepare a bed with good drainage and average fertility. Beans don’t need pre-amended soil the way tomatoes and peppers do — the inoculant (see step 3) handles much of their nutrient needs.
- Sow seeds 1 inch deep, 3–4 inches apart in rows 18 inches apart (bush) or 4–6 inches apart at the base of a trellis (pole).
- Water gently. Seeds germinate in 4–8 days in warm soil.
- Once seedlings are 4 inches tall, thin bush beans to 6 inches apart. Pole beans can stay at 4–6 inches — their vertical growth compensates for closer spacing.
Step 2 — Inoculate Your Seeds (Optional but Worthwhile)
Bean seeds can be coated with rhizobium bacteria inoculant before planting — a powder available at garden centers for a few dollars. Rhizobium bacteria form a symbiotic relationship with bean roots, fixing atmospheric nitrogen in root nodules.
This reduces or eliminates the need for nitrogen fertilizer and produces visibly more vigorous plants. Moisten seeds slightly, toss in the inoculant powder to coat, and plant immediately.
How to Inoculate
- Dampen seeds very slightly — just enough that the powder will stick, not so much that they start swelling.
- Place seeds in a bag with the inoculant powder and shake gently to coat evenly.
- Plant immediately. Inoculated seeds shouldn’t sit around for more than an hour or two before going into the ground.
Step 3 — Install Trellis for Pole Beans
Install your trellis before sowing — disrupting soil and root systems after germination causes setback.
Options: bamboo poles in a teepee arrangement (6 poles, 6 feet tall, tied at the top), a wire mesh fence panel, or horizontal string trellis between posts. Pole beans climb by twining — they need something to wrap around, not just lean against.
Step 4 — Water and Fertilize
Water consistently — 1 inch per week, deeply. The most critical time for consistent moisture is during flowering and pod development. Drought at this stage causes flower drop and poor pod fill. Mulch around plants to retain moisture.
For fertilizer, beans typically need very little nitrogen — they produce their own. If you amended the bed with compost, no additional fertilizer is usually needed. If plants look pale, a single application of balanced 10-10-10 at planting is sufficient.
Step 5 — Harvest Frequently
Pick beans when pods are firm, snap cleanly, and are the right size for the variety (typically 4–6 inches for bush beans, slightly longer for pole varieties).
Seeds should not visibly bulge inside the pod. Leaving mature pods on the plant signals it to stop producing — harvest every 2–3 days during peak production.
Setting Up a Trellis for Pole Beans
Install your support structure before sowing, or immediately after — never wait until the vines actually need it. By that point the root system is already established, and disturbing it to drive in posts costs you growth you’ve already paid for.
A handful of options work equally well: 6-foot T-posts with horizontal wire run every 12 inches, a teepee of 6–8 poles lashed together at the top, a cattle panel bent into an arch, or simple string run vertically from a fence or overhead support.
Pole beans climb by twining around whatever’s nearby — they’re not picky about materials, only about having something thin enough to wrap around.
Minimal Care Through the Season
Watering: About 1 inch per week. Beans tolerate brief dry spells better than most vegetables, but consistent moisture during flowering and pod development genuinely matters — drought stress at exactly this stage is the single most common cause of poor pod set.
Fertilizing: Because beans fix their own nitrogen, additional nitrogen fertilizer is often counterproductive — it pushes lush leaf growth at the direct expense of flowers and pods.
If your soil already has compost worked in, supplemental feeding usually isn’t necessary at all. If plants genuinely look pale, a single balanced application at planting is plenty.
Avoid cultivating near established plants: Bean roots sit shallow and damage easily. Once plants are up and growing, hand-pull weeds close to the stems rather than reaching for a hoe.
Why Daily Harvesting Is the Whole Trick
Harvest when pods reach 4–6 inches and snap cleanly rather than bending. At this size the seeds inside are still small, and the pod itself is at peak tenderness and flavor. Push past 6 inches and pods on most varieties turn stringy and noticeably tougher.
Pick every 2–3 days during peak season, without exception. This isn’t just a suggestion for better-tasting beans — it directly controls how long the plant keeps producing.
A bean plant’s underlying goal is to mature seed, full stop. Once a pod has matured seeds inside it, the plant registers that job as done and slows new flower production accordingly.
Picking pods young and often, before seeds mature, keeps the plant believing its reproductive work isn’t finished yet — which is exactly the state that keeps it flowering and setting new pods for weeks longer than it otherwise would.
⚠️ One forgotten pod can slow the whole plant
Just like zucchini, a single bean pod left to mature fully sends a real signal through the plant. Check thoroughly under leaves during each harvest — pods hide easily in dense foliage, and the ones you miss are exactly the ones doing the most to slow you down.
Frequently Asked Questions
Why are my bean flowers dropping without forming pods?
The most common cause is temperature extremes — beans drop flowers when temperatures exceed 90°F (or drop below 55°F at night). High humidity can also prevent pollination. The plant typically resumes setting pods when temperatures moderate. Ensure consistent watering during heat — water stress also causes flower drop.
Can I save green bean seeds?
Yes — leave a few pods on the plant until they turn dry and papery. Harvest the dried pods, shell the seeds, and dry them indoors for 2 more weeks. Store in an airtight container in a cool, dark location. Saved bean seeds remain viable for 3–4 years.
What's eating the leaves of my bean plants?
Most likely Mexican bean beetle (yellow-orange beetles with 16 black spots) or Japanese beetles. Check the undersides of leaves for egg clusters and larvae. Hand-pick adults and larvae, apply neem oil spray, and remove egg clusters (usually yellow and laid in clusters on leaf undersides).
How long do fresh green beans store after picking?
Refrigerated and unwashed, fresh beans hold well for 5–7 days. For longer storage, blanch in boiling water for about 3 minutes, cool quickly in ice water, and freeze in bags for up to 12 months. Freezing this way preserves flavor and texture far better than anything you’ll find commercially processed.
Do bush beans need to be replanted to keep producing all season?
Yes — a single bush bean planting produces its concentrated harvest and then winds down within a few weeks. Succession sowing a new short row every 2–3 weeks through the growing season is the standard way to keep bush beans coming continuously, rather than relying on pole beans alone for a long harvest window.
What's the difference in flavor between bush and pole beans?
Less than most gardeners expect — growth habit, not flavor, is really the defining difference between the two types. Variety matters far more than bush versus pole status; a well-chosen bush variety like Provider and a well-chosen pole variety like Kentucky Wonder can both taste excellent, while a poorly matched variety for your climate underperforms regardless of which growth habit it has.
🥬 Related Articles in Our Vegetable Gardening Guide
Free Tools to Plan Your Bean Bed:
Final Thoughts
We hope this guide sets you up for one of the most rewarding summer crops you can grow.
Green beans are genuinely one of the easiest high-yield vegetables in the garden — and once you grow your own, the texture difference from grocery store beans is startling.
For all our vegetable growing guides, our vegetable gardening guide links to everything.
Share this post with a fellow gardener who’s ready to get growing — and let us know in the comments whether you’re going bush or pole this season. Happy growing!
