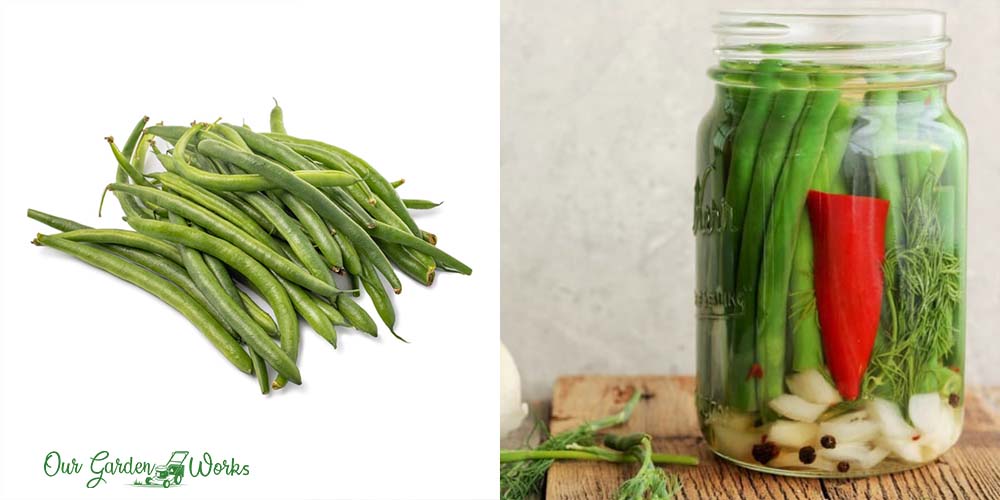
Green beans are among the most versatile vegetables that go well with both fish and meat dishes. They give that distinct crunch in your meals and are packed with several vitamins and minerals.
Since the cold seasons are right ahead of us, it’s now time to think of ways to store and preserve them until winter.
To support and help our growing community of sustainable environment, we will help you preserve your green beans. Having preserved vegetables like green beans kat your arms reach, can serve a lot of benefits such as:
- Saves you money from buying them again in the farmer’s market.
- Prevents spoilage and food waste.
- Serves as emergency food in times of food crisis.
- Saves your time and effort to buy from time to time.
- Helps you get your daily or weekly nutrient intake .
- Food safety will never be an issue.
Unlike root crops, green beans can’t stay in a root cellar since their pods will deteriorate if placed in a room that is below 40°F (or 4.4°C).
How To Harvest Green Beans For Storage
The best time to harvest your green beans depends on your plans in using them. Green beans are ready to harvest 50 to 65 days after planting or 2 to 3 weeks after they start to bloom.
To achieve a bountiful harvest, you need to harvest the young beans every day. Otherwise, the beans will mature and will never produce new ones.
One way to identify the old beans is their yellow color and leathery texture. Make sure to avoid yanking the beans from the plant to avoid breaking the vines and bruising the plant.
The best time to harvest green beans is in the morning when they are at their sweetest.
Green beans or snap beans should be harvested when they are young, tender, and at the same size as a pencil. The beans inside the pods should be small bumps and snaps when bent.
Each plant can provide 2 to 3 batches of pods. When the pods are bulging with seeds and too mature, they will already be tough to chew. The plant will also start to wither and develop brown spots as soon as the outdoor temperatures reach below 40°F (or 4.4°C).
Did You Know? If you let the beans mature attached to the plant, the flowers will stop blooming and produce new pods. As soon as that happens, the life cycle of the green beans is already done.
Different Way To Store and Preserve Your Fresh Green Beans From The Garden
Storing green beans can vary from keeping them preserved in their raw condition, putting them in freezing temperatures, or mixing them with other ingredients to prolong their shelf-life.
Contrary to root crops, Green Beans are quite sensitive to temperature and can easily develop dark spots.
Storage For Immediate Use
If you harvested green beans for immediate consumption or your stash of vegetables for the week, keep them in the refrigerator.
Leaving them at the kitchen counter or the less curved side of the green beans at room temperature for several hours can change their texture and freshness.
How long can green beans stay at room temperatures?
Green beans can only last at room temperature for 2 hours. Leaving them longer than that on your countertop will cause black and brown spots on the pods.
Since green beans are not like root crops that stay alive after they are harvested, they can rot and get contaminated faster.
Refrigerating Green Beans
Newly harvested green beans can stay in your refrigerator for up to 7 days. You can leave them unwashed in a ziplock bag with holes in it. The hole in the plastic bag will regulate the moisture levels and prevent the green beans from getting dry.
If you opt to cut the green beans before storing them, make sure to wash them properly to remove any insecticide residue.
Some homeowners use a mixture of vinegar and water and use it to wash green beans. Once sone, remove the fibers on the sides of the podes by shaping the ends of the green beans.
How to remove or string the fibers of green beans
Removing the fibers can be a satisfying chore or a frustrating one if you don’t get it right. The fibers are removed because they are tough to chew when cooked.
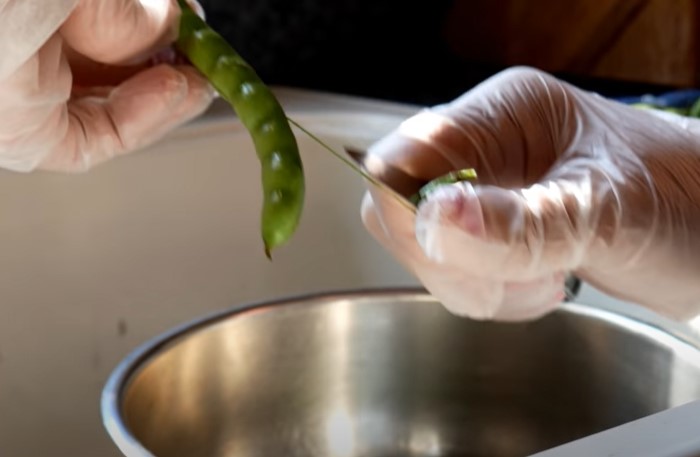
So, to ensure a fun and satisfying food prep for storage, here’s how to snap off the fibers of green beans:
- Start removing the fibers on the less curved side of the green beans. Cut the tip until you feel the end of the string and gently pull it downwards.
- As you reach the other end, cut the tip without breaking the string and pull it from the other side of the green beans.
- Voila! You now have the whole string out of the green bean. You may start cutting the beans based on your preferred size.
Pro tip: You may also use your fingers to snap off the fibers. Simply snap the tip of the green bean without breaking the fiber. Then, pull the fiber off the sides. Mature beans have tougher fibers that are easier to pull than young ones.
Storage For Long-Term Use
If you had a bountiful harvest before the cold seasons, you might be dealing with an oversupply dilemma where you can’t cook them immediately.
So, here are some ways for you to extend the green beans up to the winter season.
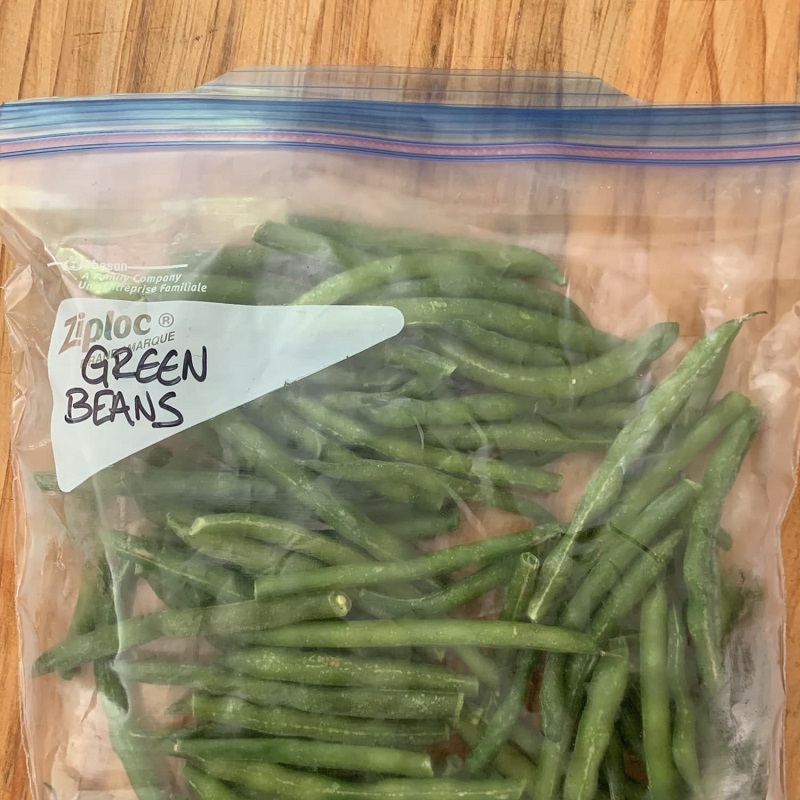
Freezing Green Beans
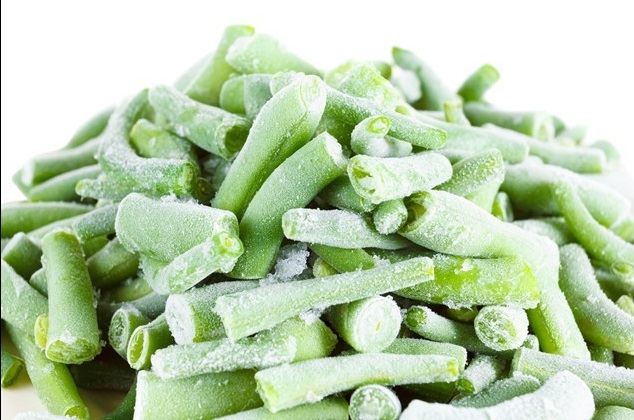
Like other vegetables, you can also extend the lifespan of fresh green beans up to 7 to 8 months with freezing.
However, you must first prepare them for the long haul by cleaning and blanching them. Here’s what you need to do:
- Clean the green beans and trim their fibers. You may cut them based on your preferred size.
- Over medium heat, place a pot of water and bring it to a boil.
- Place the green beans and cook the young beans for 2-3 minutes and 3-4 minutes for mature ones.
- Drain the water and let them cool down for a few minutes.
- Place the chopped green beans in a freezer-safe container like a zip lock bag and mark them with the preparation date.
You might also like: The Noob Friendly Guide To Blanch Celery: 5+ Ways [and Means]
Salting Green Beans
Salting is one of the oldest preservation methods that became more prevalent during the 18th century.
Salt has strong antimicrobial properties that prevent bacterial contamination on food that triggers spoilage. It also makes a perfect flavor enhancer to preserved foods over time.
Learn how to store fresh green beans through salting below:
Materials:
- ½ cup of any rock salt
- 1 medium-sized bowl of chopped green beans
- 1 airtight container
Directions:
- Wash and trim the green beans and remove their tough fibers.
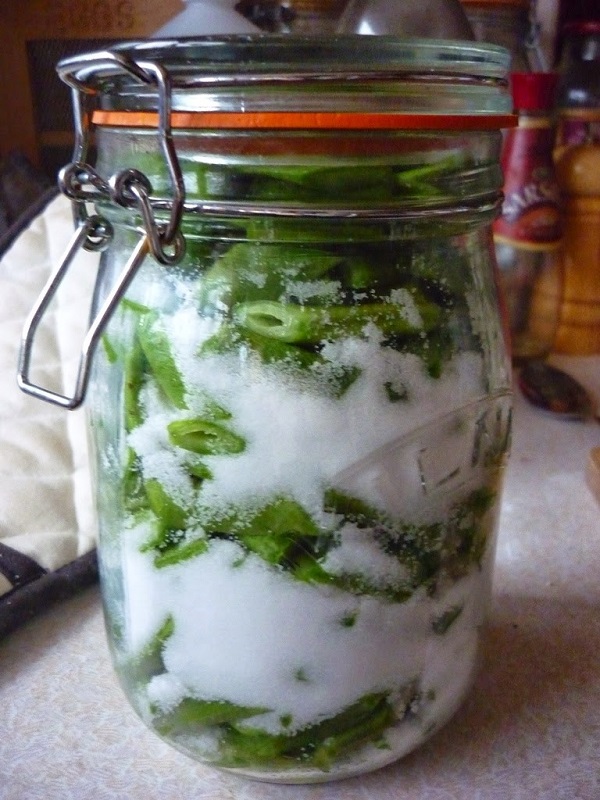
- Chop them and place them in an airtight jar.
- Pour all of the salt on top of the green beans.
- Shake the container to coat the green beans with salt.
- Store the container in your storage room or basement.
- After a few hours, you will notice that the salt extracted the water from the green beans. The green beans may also shrink a bit due to water loss. The jar of salted green beans can last until the next spring.
You might be wondering how you will consume the salted green beans and worried if they will be too salty for your dishes.
Here’s how to use the salted fresh green beans from storage:
- Get your desired amount of green beans from the jar.
- Rinse them with water.
- Soak the newly rinsed green beans in a bowl of cold water overnight. Don’t forget to cover the bowl to avoid contamination.
- The next day, drain the water and add the rehydrated green beans to your dish. You may notice that it adds a richer flavor after being soaked in salt.
Fermenting Green Beans
There are a lot of ways to ferment your green beans. At the end of the day, your best fermentation recipe all boils down to having your favorite ingredients that go well with green beans.
So, we listed several fermentation techniques to help you find the right blend that will suit your palate.
#1 Fermented Green Beans With Dill
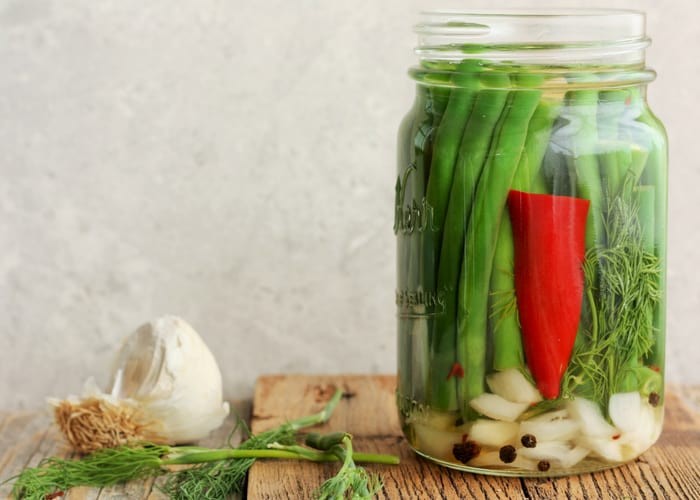
If you love that garlicky flavor from your usual green beans, here is a good one-grab fermented green beans recipe. First off, prepare the following ingredients:
Ingredients:
- 1-gallon water
- 6 oz. salt
- 2 lbs. green beans
- 6 crushed cloves of garlic
- 4 dill heads
- Pepper and red bell pepper (optional)
Directions:
- Clean, trim, and chop the green beans based on your preferred size.
- Dissolve the salt in water in a separate container.
- Layer the garlic, green beans, and dill in a jar.
- Pour in the brine or the mixture of salt and water and let it sit in your basement for about 4 to 5 days. Do not cover the jars tightly to let the fermentation process work.
- Remove the scum buildup on top of the jar every day. When the jar is clean, you may taste the beans to check if it’s already your desired taste.
- After two weeks in the storage, you may put it in the fridge for easy access. You can eat the fermented green beans for several months.
#2 Pizza Beans
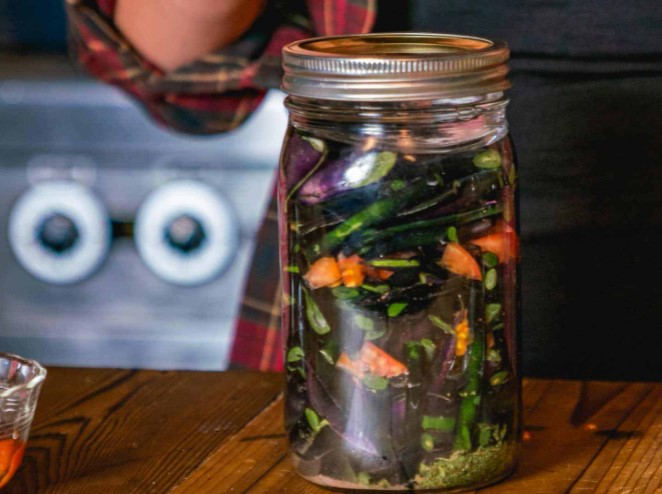
Have you ever thought of your green beans tasting like pizza?
Well, it’s more than possible. Here’s how:
Ingredients:
- Green beans
- 2 tbsps Himalayan salt
- Distilled water
- 2 tomatoes(diced)
- 2 cloves of garlic
- 1 tsp dried or fresh oregano
Directions:
- Sterilize your mason jars for 12 minutes before using them.
- Dissolve the Himalayan salt in the sterilized water.
- Layer the garlic and oregano at the bottom of the jar before placing the other ingredients.
- Alternately place the green beans and tomatoes.
- Lastly, pour the brine into the jar and place the fermenting brine.
- Do not tightly close the jar for two weeks to let the gases released during the fermentation period.
- Seal the leads tightly after two weeks and place them in your refrigerator or leave it in a cool dry place.
Tips in Fermenting Green Beans
- Sterilizing your storage jars can make a lot of difference with the final taste of your fermented green beans. For short-term storage, you can simply wash the jars with water and dish soap. However, if you are fermenting your green beans for several months, you need to sterilize the jar in boiling water for 12 to 13 minutes.
- You can pack the green beans in the jar since they will lose some volume once they start to ferment.
- Try not to use iodized salt and chlorine-treated water for fermenting your green beans to preserve the bacteria required for fermentation.
- Use a fermenting weight to keep all the ingredients submerged in the brine and prevent the formation of mold.
- Place the fermented green beans in a room with a temperature that is less than 55 degrees.
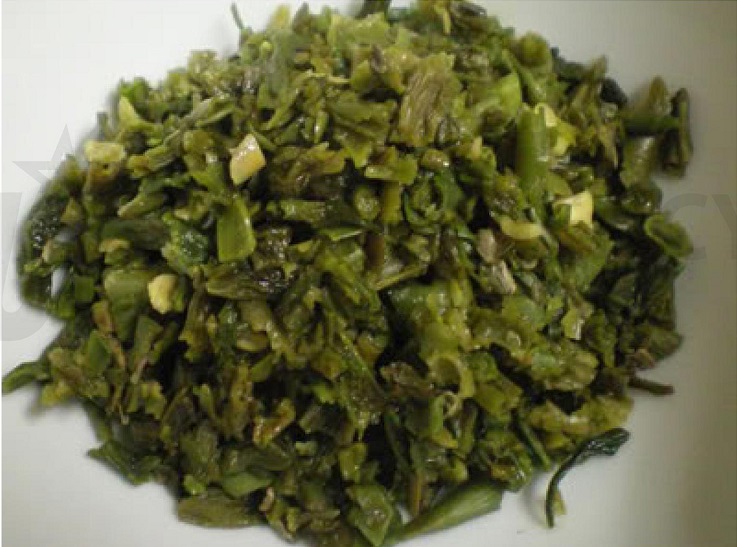
Dehydrating Green Beans
beans
Another fun way to store your green beans to consume them for the next season is by turning them into delicious crisps.
With a dehydrator, you can make a healthy out of your fresh green beans or dried beans to add flavor to your favorite soups and stir-fry dishes. Here’s how:
- Clean and trim the green beans to remove the tough fibers.
- Blanch the green beans in a pot of boiling water for 2 to 3 minutes for the young ones and 3 to 4 minutes for the mature beans.
- Drain the water and pat them dry.
- Slice the green beans into 1-inch bite sizes.
- Layer them in a dehydrator and set the temperature at 125 degrees. Let them dry for about 10 to 12 hours. If you wish to dry them for a shorter period like 8 hours, you may increase the temperature to 135 degrees.
- Once dry, place the dehydrated green beans in an airtight container.
If you wish to turn the beans into a crispy snack. You may season them with oil and taco powder or any seasoning you love before drying. You may cook your seasoned green beans in a dehydrator or air fryer.
Recommended article: How To Dehydrate Bananas & Make Them Into A Healthy Snack?
Frequently Asked Questions (FAQs)
How do you store green beans without a refrigerator?
You can place the green beans in a ziplock with holes and leave them on the kitchen counter. However, unlike root crops, green beans can lose their snappy and crunchy texture if left at room temperature after two hours.
Should I refrigerate green beans after picking?
Yes. Green beans can develop dark spots and lose their snappy and crunchy texture if left at room temperature for a long time. They will last in a crisper for 7 weeks if stored properly.
Can you leave fresh green beans in water overnight?
Fresh green beans should not be soaked in water overnight. They can get soft and lose their crunchy texture. You can only soak green beans if you want to reduce their saltiness after being preserved in brine for several months.
How can you tell if green beans are still good?
You can tell that your green beans are still good when it still snaps when you try to break them. They should also be not too dry and mushy or slimy. Otherwise, you’ll end up with tasteless green beans or a stomach ache from spoiled and moldy green beans.
What is the healthiest way to preserve green beans?
The best way to bring out the healthiest nutrients from your green beans is to Lacto-ferment them. You will be able to grow good bacteria from your fresh green beans and preserve their nutrients for several months.
Final Thoughts
Fresh green beans provide the best flavors to our favorite dishes. They are also versatile and taste best in different types of cooking.
We hope this post helped you get the most out of your green beans harvest this season. Knowing how to store what you grow is just as important as growing it well — and it’s one of the things that makes a vegetable garden truly pay off.
If you found this helpful, share it with a fellow gardener and let us know in the comments how your harvest turned out this year!