

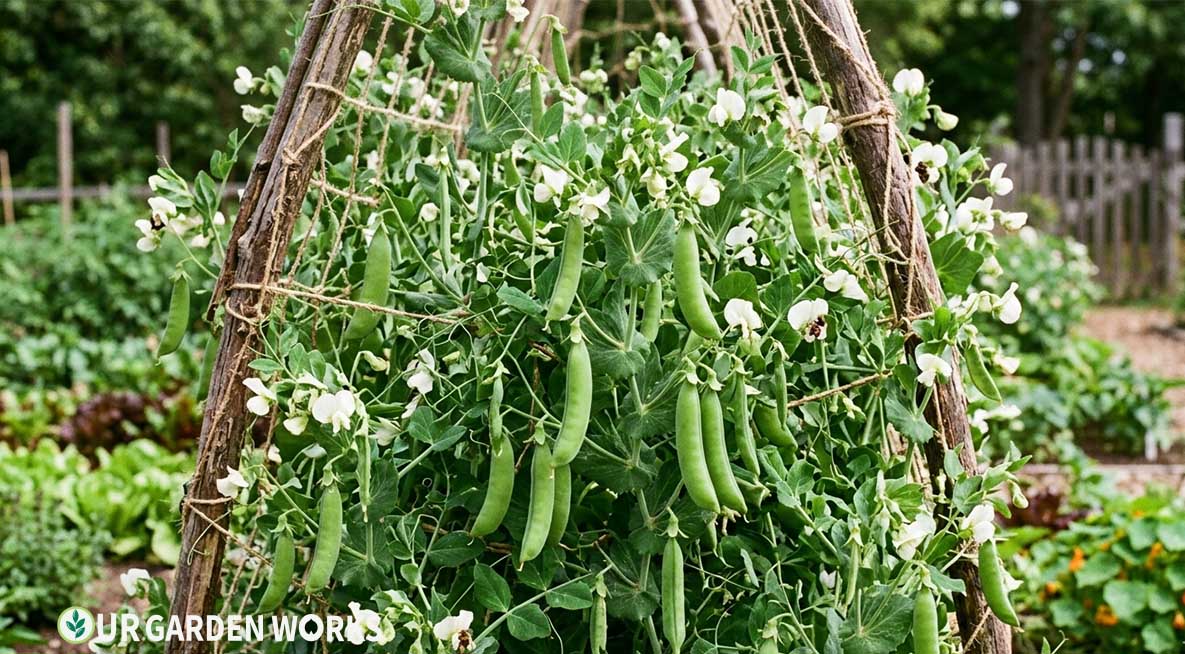
Peas are the sprinters of the vegetable garden — they bolt out of the gate the moment the weather cooperates, produce like crazy for 6–8 weeks, and then collapse when summer heat arrives.
The entire pea growing season is over before most warm-season crops even get started.
That’s what makes them so rewarding: you squeeze a genuinely productive crop into the cool margins of spring that would otherwise sit empty.
The sweet fresh pea you snap off the trellis and eat warm on a cool May morning is one of the defining flavors of home vegetable gardening. No commercial pea comes close — sugars in fresh peas begin converting to starch within hours of picking.
How to Grow Peas – Quick Guide: Direct sow peas outdoors 4–6 weeks before last frost — they’re cold-hardy and actually prefer cool soil (45–65°F). Plant 1–2 inches deep, 2–3 inches apart. Provide trellis support for vining types. Harvest daily at peak season — pods left on the vine trigger the plant to stop producing.
Why Peas Reward Early Planning
Most vegetable crops punish you for planting too early — cold soil rots seeds, frost kills seedlings, and slow germination invites disease. Peas flip that logic entirely.
The biggest mistake gardeners make with peas isn’t planting too early, it’s planting too late and trying to compensate with extra water or fertilizer once heat has already set in. By the time most people are thinking about their garden in March or April, peas should already be in the ground.
This matters because pea genetics are essentially fixed around temperature. There’s no amount of mulching, shading, or watering that convinces a pea plant to keep flowering once daytime temperatures settle above 80°F for several days running.
The entire growing strategy for peas is really a timing strategy — get them in the ground as early as the soil allows, and let them race through their natural cycle before summer arrives.
Site and Soil Preparation
What Peas Need
- Sunlight: Full sun is ideal, though peas tolerate light afternoon shade better than most vegetables — useful in a yard with mixed exposure.
- Soil pH: 6.0–7.5. Peas are forgiving on pH compared to many vegetables, but very acidic soil reduces nodulation from the nitrogen-fixing bacteria they rely on.
- Soil texture: Loose, well-draining soil. Heavy clay that stays saturated in cool spring weather is the fastest way to rot seeds before they germinate.
- Spacing: 2–3 inches between plants, rows 18–24 inches apart (or single rows along a trellis with no row spacing needed).
Avoid heavily working fresh manure or high-nitrogen amendments into a pea bed. Unlike most vegetables, peas don’t benefit from rich, nitrogen-heavy soil — and as covered below, too much nitrogen actively works against them.
A bed that grew a nitrogen-hungry crop like corn or brassicas the previous season, then had that fertility drawn down, is often close to ideal for peas without any additional amendment.
Three Types of Peas — Which Are You Growing?
| Type | Best Varieties | Harvest | Eat How |
|---|---|---|---|
| Shell peas (English peas) | Green Arrow, Lincoln, Wando | Plump, filled pods | Shell and eat the peas; pod discarded |
| Snap peas | Sugar Snap, Super Sugar Snap, Cascadia | Plump pods, fully filled | Eat entire pod — the most popular home type |
| Snow peas | Oregon Giant, Mammoth Melting Sugar | Flat, undeveloped peas | Eat the flat pod before peas develop; stir-fry classic |
Sugar Snap is the most beloved home garden pea for good reason — you eat the whole pod, the harvest window is forgiving, and the flavor is extraordinary. It’s also one of the most productive pea varieties available.
A single 10-foot trellis row produces enough snap peas to snack on daily through the entire pea season.
How to Grow Peas: Step by Step
Step 1 — Sow Early and Don’t Wait for Warm Weather
This is where peas differ most from every warm-season crop. While you’re waiting for soil to warm up for tomatoes and peppers, you should already be sowing peas.
Peas germinate at 40°F, grow best at 55–65°F, and actively prefer cold spring weather. Planting too late — after daytime temperatures regularly exceed 75°F — means your plants spend their peak growing time fighting heat stress instead of producing.
Directions
- Sow 4–6 weeks before your last frost date — or as soon as soil can be worked. If you can kneel on it without sinking, you can sow peas.
- Soak seeds overnight in water before planting to speed germination.
- Inoculate with legume inoculant (same as for beans) — it meaningfully improves yield in soil where peas haven’t been grown before.
- Plant 1–2 inches deep, 2–3 inches apart, in rows or along your trellis.
- Germination takes 7–14 days in cool soil. Water once after planting, then minimally until germination — overwatered pea seeds in cold soil rot.
Step 2 — Trellis Setup
Vining peas (most varieties) need support. Dwarf or bush types (Tom Thumb, Little Marvel) can stand without support at 18–24 inches. Vining types reach 5–6 feet and need a trellis, fence, or pea netting.
Install before or immediately after sowing. Peas climb by tendrils — they grab onto anything within reach, so horizontal wires or netting at 6-inch intervals works perfectly.
Step 3 — Minimal Care Through the Season
Watering: 1 inch per week. Peas are less water-demanding than most vegetables in cool weather. Critical period: flowering and pod fill — inconsistent moisture during these stages causes misshapen, poorly-filled pods.
Fertilizing: Like beans, peas fix their own nitrogen. If your soil has compost worked in, you likely need no additional fertilizing. In very poor soil, a single application of balanced fertilizer at planting is sufficient.
Mulching: Keep soil mulched to moderate temperature. As spring turns to summer, mulch keeps roots cool — extending the pea season by 1–2 weeks.
Step 4 — Harvest Daily
For snap peas: harvest when pods are fully plump and the peas inside feel round against the pod.
For shell peas: harvest when pods are full and bright green but before they start to fade.
For snow peas: harvest when pods are 2–3 inches long and completely flat — before any pea development inside.
Pick every day or two at peak season. Like beans, leaving pods on the plant signals it to stop producing new flowers. The season is short enough that you want every day of production you can get.
Crop Rotation and Soil Benefits
Peas leave soil better than they found it. As legumes, they host nitrogen-fixing bacteria in root nodules that pull nitrogen from the air and deposit it in the soil — a genuine fertility gift to whatever you plant next.
Many gardeners deliberately follow a spent pea bed with a nitrogen-hungry crop like lettuce, spinach, or brassicas to take advantage of this residual fertility.
After harvest, cut pea plants at the soil line rather than pulling them — leaving the nitrogen-rich roots in place to decompose and release that nitrogen back into the bed.
Avoid planting peas or beans in the same spot in consecutive years; rotating legumes through different beds reduces disease buildup specific to this plant family.
Frequently Asked Questions
Can I plant peas in fall for a second crop?
Yes — in Zone 6 and warmer, plant a fall pea crop 6–8 weeks before first frost. Fall crops often develop better flavor than spring ones due to the cooling temperatures. Germination can be tricky in warm summer soil — sow deeper (2–3 inches) and keep consistently moist until germination.
Why did my peas stop producing?
Heat is almost always the answer. Peas stop flowering when daytime temperatures consistently exceed 80°F. This is hardwired into the plant — it’s not a care problem you can fix. Pull spent plants, compost them, and plant a heat-loving summer crop in the same space.
How do I know when shell peas are ready?
Feel the pods rather than looking at them — pods that feel plump and rounded when you run your thumb along them have fully developed peas inside. Shell one and taste it as a test. Over-mature peas (left too long) are starchy and less sweet; under-mature ones are tiny and don’t yield much. Shell peas have the narrowest harvest window of the three types.
Related Articles in Our Vegetable Gardening Guide:
- How to Start Seeds Indoors: Complete Step-by-Step Guide (2026)
- How to Grow Green Beans — Bush Beans and Pole Beans from Planting to Harvest
- How To Store Fresh Green Beans & Prolong Their Shelf Life
- How to Grow Cucumbers: Planting, Trellising & Harvest Guide (2026)
- Free tool: Succession Planting Scheduler — Never Run Out of Fresh Vegetables Again
- Vegetable Gardening Guide
Final Thoughts
We hope this guide has shown you just how special the spring pea season is — and why it’s worth planning your garden calendar around it. For all our vegetable growing guides, our vegetable gardening guide links to everything.
Share this post with a fellow gardener who’s ready to grow their own — and let us know in the comments which pea type you’re growing and whether you’ve tried a fall crop yet. Happy growing!
