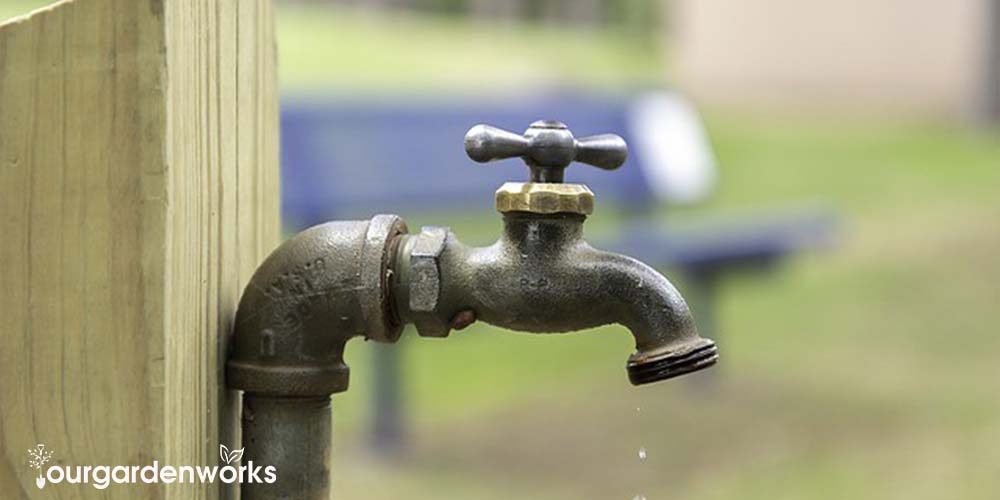
Outdoor facilities like outdoor faucets exposed to extreme weather conditions are prone to damage over time. Learning how to repair or replace these tiny details of your house can be a handy skill if you want to save on handyman fees and enjoy DIY projects.
In this post, we’ll discuss how to replace an outdoor faucet without damaging your plumbing system. We’ll also share with you some helpful tips so you can work on your plumbing system like a pro.
Before you remove your faucet, it’s crucial to know more about the faucet itself so you can manage it on your own.
Things You Need To Know About Your Outdoor Faucet
When you search about outdoor faucets, you’ll be bombarded by a lot of different terms such as spigot, hose bibb, and sillcock.
All of these terms are the different types of outdoor faucets. So before you buy a replacement, make sure to know the kind that you have at your home.
Here are the different types of outdoor faucets, so you’ll know what you’ll be looking for in the hardware:
Spigot is the term often used in the plumbing industry referring to the outdoor faucet.
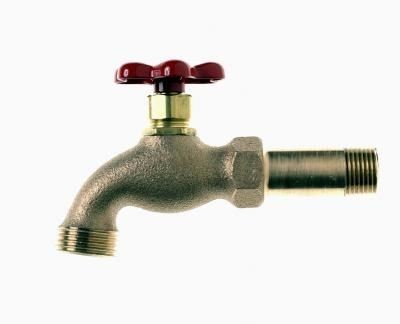
Hose bibb is the type of faucet where the spout has threads where you connect the hose.
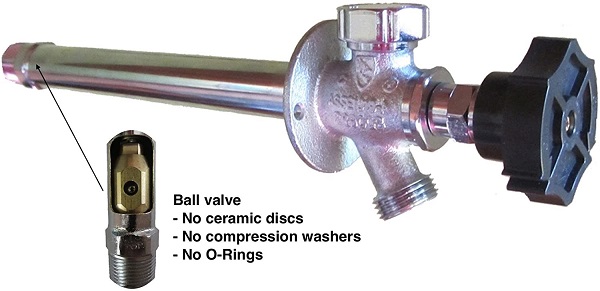
Sillcock also referred to as hose bibb, is an outdoor faucet with a long pipe where the mechanism that stops the water is at the end of the water pipe to prevent frosting.
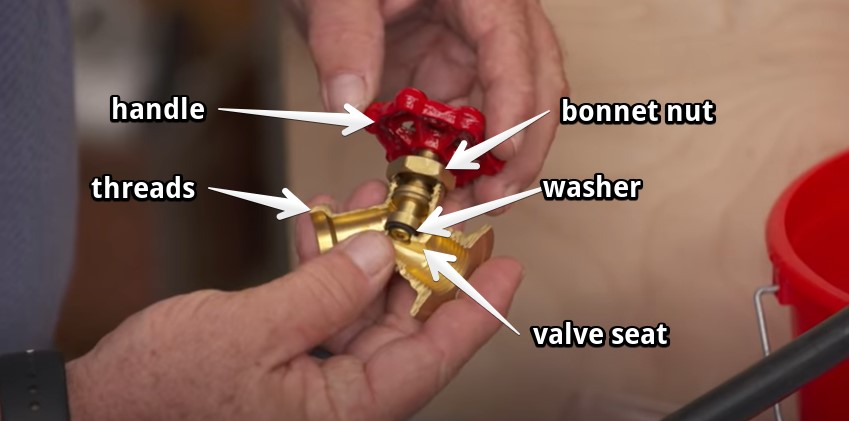
Parts of An Outdoor Faucet
Now that you know how your outdoor faucet is called, let’s get into the parts.
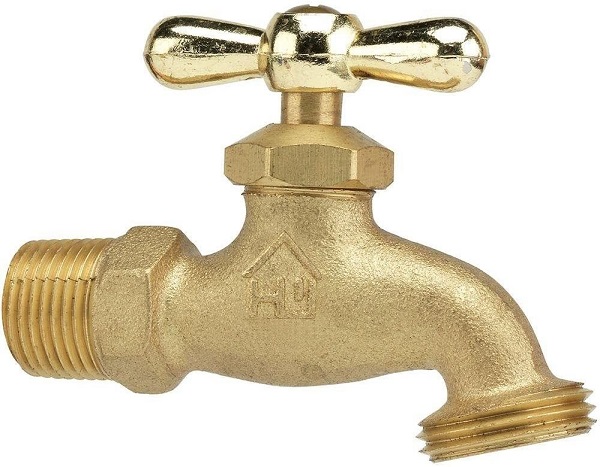
- Handle – used to turn the water on or off.
- Threads – found at the tip of the spout to connect the hose and the outdoor faucet.
- Bonnet nut – secures the stem of the outdoor faucet to the base.
- Washer – a rubber that helps seal water when turned off.
- Valve seat – serves as the gate that stops the water when the faucet is off.
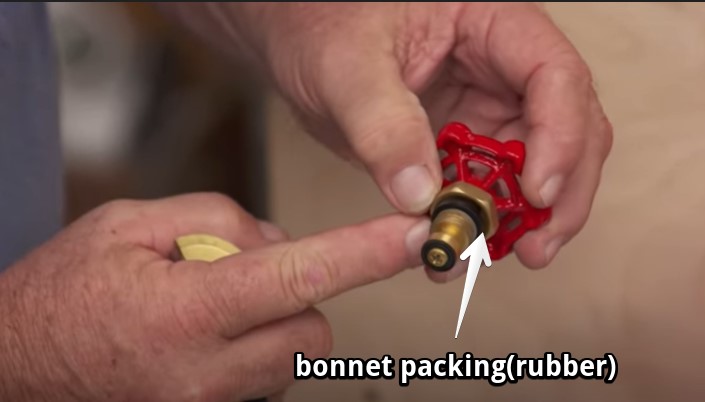
- Bonnet packing – a rubber inside the bonnet nut that helps seal the water at the top of the faucet base.
Pro tip: Worn-out washer can be the cause of the leaks coming from the spout and can no longer seal the water at the valve seat.
Replace the washer by removing the screw at the top of the handle and removing the other parts of the faucet. Bring the worn-out washer to the hardware store to get the right size.
Pro tip: Over time, the washer and the bonnet packing will wear down that can cause leaks coming from the bonnet nut or the spout.
You may tighten the bonnet nut with a pipe wrench to remove the space between the packing and the nut and stop the leak.
3 Signs That You Need To Replace Your Outdoor Faucet
Before you learn how to replace an outdoor faucet, try to repair it first by doing the tips mentioned above.
If adjustment and replacing the parts no longer work, maybe it’s time to replace your outdoor faucet. Other possible reasons for faucet replacement are as follows:
- Rust and corrosion can damage all the parts of your outdoor faucet over time.
- Mineral deposit buildup in your faucet is a sign of hard water flowing through your home. The accumulated minerals can clog the inner mechanisms of the outdoor faucet and cause more damage if left unreplaced.
- Leaks caused by broken threads in your spigot can be one of the causes of your high water bill this month. If left leaking, rust, and molds may build up around your spigot.
How To Replace An Outdoor Faucet
Now that you know the parts of the faucet and what’s the possible cause of leaks, it’s now easier to make a careful judgment to repair or replace the faucet.
If you’ve decided to replace your spigot, you’ll need the right materials so you can work with ease.
Materials Needed in Replacing a Spigot:
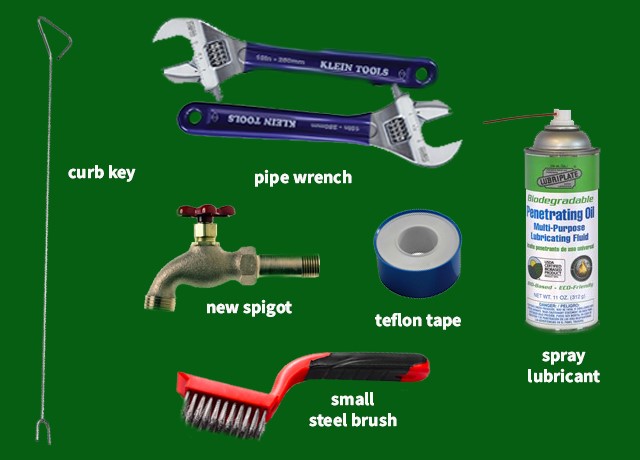
- Two pipe wrenches – one wrench will hold the water pipe, and the other will help you remove the outdoor faucet from the water pipe.
- Plumbing tape or Teflon tape – seals the threads to the water pipe.
- Curb key – used to open and close the water meter.
- New spigot – replacement to your old spigot.
- Small steel brush or old toothbrush – used to clean the pipe and spigot from any debris or rust.
- Spray lubricant(optional)- helps loosen tight and rusty threads.
A Step-by-Step Guide To Replace An Outdoor Faucet
- Turn off the water supply through the valve or the water meter
Locate the valve that connects your spigot to the main water line and turn it off.
If there’s no valve connected near your spigot, directly turn the water off from your water meter using a curb key. The water meter is usually placed in an enclosed case in your basement or crawlspace. - Open the spigot to drain the remaining water
The water supply may be closed but there’s still water in the pipes. Drain the remaining water in the pipe by opening the spigot.
This step will help release the water pressure left in the water pipes and make it safe for you to work on it. - Remove the old spigot using the pipe wrenches
Use one wrench to hold the water pipe and attach the other wrench to the base of the spigot with your dominant hand. Gently loosen the spigot with your right hand in a counterclockwise direction. Once it’s loose enough, remove the spigot by hand.
- Clean the end of the pipe and threads
Brush off the accumulated debris between the threads and the at the tip of the pipe. Old houses with outdated plumbing systems are usually rusted and won’t even budge. Adding too much force won’t be the best way to go because you might break the parts.
For corroded and rusted outdoor faucets, you can use a spray lubricant like WD-40 or other penetrating oil to dissolve the corrosion and loosen the threads.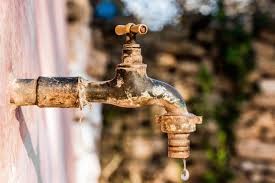
Source: Rusty and corroded spigot
You’ll also see some mineral deposits that look like white powdery substance in the pipes. These deposits come from the hard water that flows throughout the house. Leaving your water pipes uncleaned with these deposits can cause more plumbing problems in the future. - Wrap three layers of Teflon tape on the threads of the spigot
The Teflon tape helps hold the outdoor faucet and the pipe together and prevents the water from seeping through the threads.
Make sure to cover all the spigot threads with the plumbing tape or Teflon tape. - Connect the new outdoor faucet to the pipe
Use your hand to place and rotate the new outdoor faucet. Place one wrench on the pipe and the other on the base of the outdoor faucet and gently tighten it.
Make sure to twist the faucet properly so the threads won’t get stuck and leave no room for any leaks. - Open the water supply and check for leaks
Test your work by opening the water supply and see if there are any leaks. If water still drips from the spigot, turn off the water supply and re-install the new outdoor faucet.
Voila! You can now add faucet replacement as your new handy skill! Plus, you also saved some bucks from doing it without the help of a professional.
5 Helpful Tips in Replacing Your Outdoor Faucet Repair
While replacing your faucet may seem like an easy task, there are still precautions you need to take.
Just like in any other project, one mistake can ripple down into a major problem. The last thing you may want to happen is bursting a pipe and flooding your home.
Here are some tips on how to replace your outdoor faucet properly:
1. Check the size and the type of thread of the old outdoor faucet before buying a replacement.
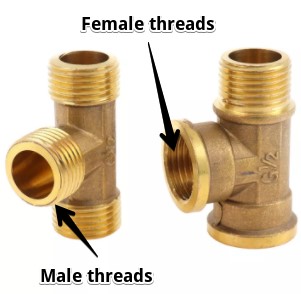
The size of your outdoor faucet will depend on the size of your water pipes. The usual pipe size in the US is between ½ and ¾. As for the type of thread, there’s a female and a male.
Male threads are exposed at the outer layer of the pipe, while female threads are on the inner surface of the water pipe. Most outdoor faucets have male threads but make sure to check your spigot first to be sure.
Check your old spigot first and take some snaps or bring it to the hardware so you can buy the exact size for the replacement.
2. Use a drill if the outdoor faucet is on your exterior wall.
Make sure to drill the holes horizontally to avoid damaging the pipes. Once you’ve accessed the water pipe and replaced the faucet, use cement to cover the hole in the wall and use a wet sponge for a squeaky clean finish.
3. Don’t twist the spigot with too much force.
Rusted and corroded spigot in outdated plumbing systems can be hard to detach from the pipes. However, too much pressure can break the water pipe or the threads, especially if they are old, and can cause more damage to the plumbing system.
You might have the strength of a Spartan, but too much pressure can do more damage than good. Instead, use a spray lubricant and allow it to seep through the threads and dissolve the rust.
4. Keep the water pressure low to avoid damaging your water pipes.
If you turned off the water supply directly from your water meter, be careful not to increase the water pressure once you turn it back on. High pressure from the water supply can burst your plumbing system and break the pipes.
Keep the pressure below 80 psi to make sure your plumbing system can handle it. Another way is to take a picture of the meter before you turn it off and use it as a guide when it’s time to turn it on.
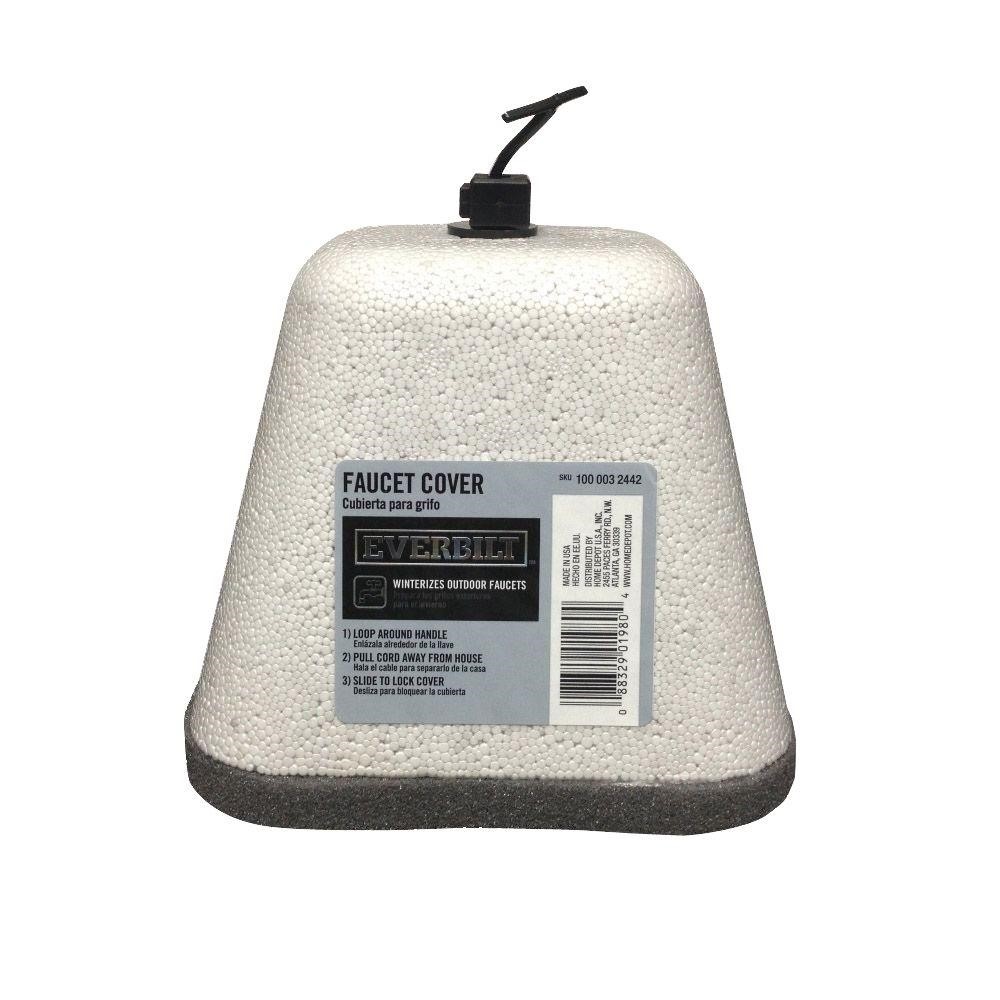
5. Avoid damaging your outdoor faucet by removing the garden hose before the winter comes.
Frost is one of the main reasons why water pipes burst, and plumbing costs spike during the winter season. To save yourself from the plumbing headache, detach the hose from the spigot, and add insulation to prevent it from freezing.
Frequently Asked Questions About Outdoor Faucets Repair
How much should it cost to replace an outdoor spigot?
The price of spigot replacement costs around $7 to $50 for the frost-proof variants. Hiring a plumber to replace an outdoor faucet for you can cost around $150 to $300.
If you’re planning to replace the spigot DIY style, you can borrow the plumbing tools of your dad or your friends to minimize the costs.
2. What should I do when the faucet is noisy when I turn it off?
There are a lot of possible reasons why your outdoor faucet is buzzing or producing a hammering sound. These includes:
1. Worn-out washer
2. High water pressure
3. Movement of unsupported pipes
4. Damaged outdoor faucet
Final Thoughts
We hope that you’ve learned how to replace an outdoor faucet properly and how to work on your plumbing system with precaution. And skills in plumbing is an advantage and can be pretty handy during tough times.
Enjoy the satisfaction of DIY projects like this by checking out our other DIY guides on our site.
Learning to do things around the house by yourself can give a certain kind of fulfillment and makes you appreciate every detail of your home.
If you find this post helpful, share this guide with your friends, and family and get them started with the DIY lifestyle. We’d love to hear about your DIY journey by posting a comment below.
pictures would be worth a thousand words!!!
Thank you Marty!
Many communities require some method of backflow prevention on outdoor faucets (as seen in your sillcock illustration). Even if the one you’re replacing doesn’t have any, new work is generally required to meet code.