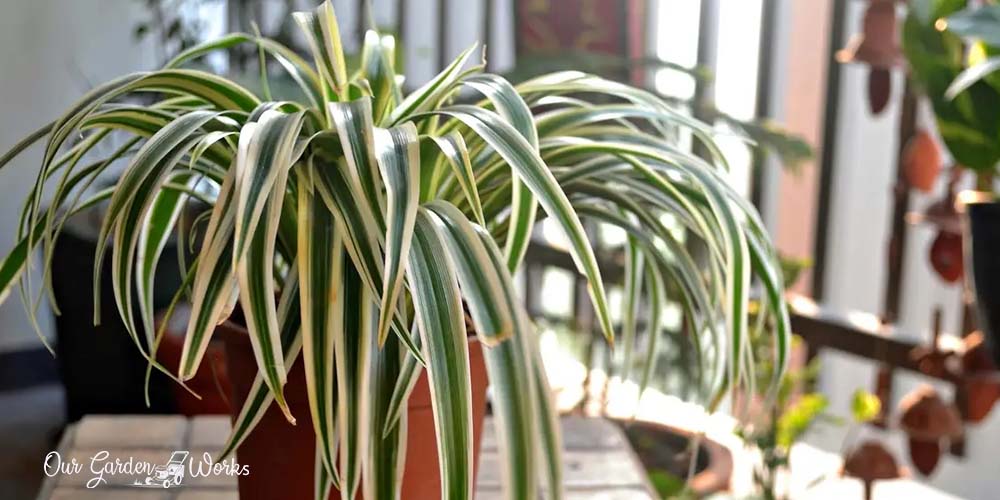
Spider plant is by far one of the easiest plants to grow indoors. Its ribbon-like leaves make them suitable for any part of the house, whether as a hanging plant, potted plant, or an outdoor ornament. Learning how to prune a spider plant is probably the only maintenance you need to know to keep it healthy and looking clean.
The leaves of the spider plant can grow like crazy and turn into tangled hair if not pruned and cleaned up.
In this post, we will share how to prune them and other care tips to maintain their green and white streaks without any yellow or brown streaks.
If you’re new to gardening, planting a spider plant should definitely be one of the first plants that you should start to grow so you can get off to a great start.
Spider plants can grow up to 2. 5 to 3 feet in diameter and height. They grow indoors and outdoors in UD Hardiness Zones 9 to 11. The ideal temperature for them to thrive is around 50°F to 80°F and a humid environment. If your indoor condition has dry air, you may place a humidifier near your spider plants.
Spider plants are notorious for spreading and growing baby plants called pups or spiderettes. If left unmanaged, the leaves and new shoots will make the whole plant bushy and look messy. Just imagine an unruly hair in a plant’s version.
Now let’s head over to the steps on how to prune a spider plant so you can go ahead and give them a haircut and trim.
How To Prune Spider Plant
Since we’re about to be pruning and snipping some leaves, sharp and clean pruning shears will be your best friend.
Using a tool in pruning will prevent damaging and bruising the outer layer of the leaves and stem of the plant. The plant should be at least 2 inches in diameter before you prune it for upkeep or propagation.
Here are the steps to clean up and improve the health of spider plants:
(1) If your spider plant has a bunch of dead leaves in one area, you may comb your hand through the leaves and they’ll easily come off on their own.
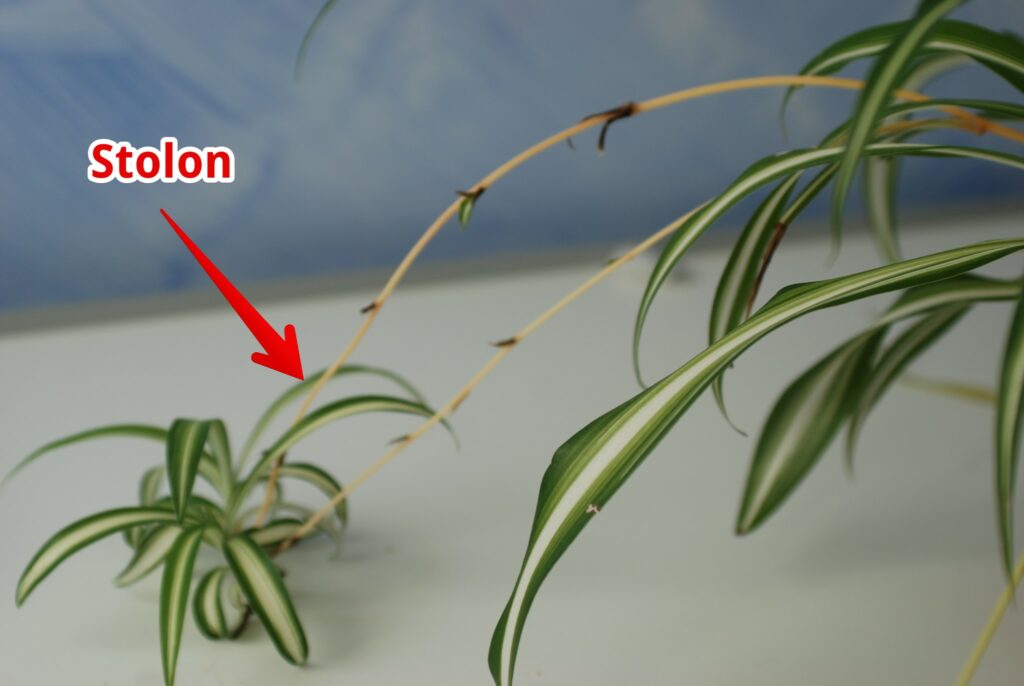
(2) If you want to trim off the excess pups or spiderettes, separate them from the mother plant by cutting off the stolon. The stolon of the spider plant is a stem-like part where a new plant or pup grows. When you remove the pup, you may use it to propagate and grow another spider plant in another pot.
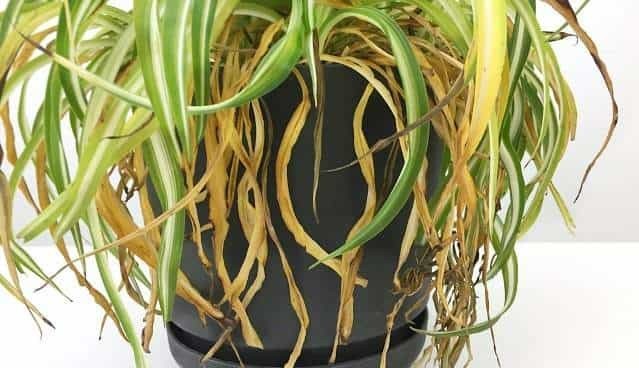
(3) The spider plant may start to look neater. However, if you see some sloppy and yellowing leaves, you may remove them as well. Removing dead leaves helps save the energy of the plant to improve its health instead of getting rid of its old, discolored, and spent leaves.
Pro tip: Cover the pot with a plastic bag and set it in bright, indirect light. Roots should form in a few weeks.
When To Prune Spider Plants?
Spider plants are low-maintenance plants and only need a trim or prune every year. If you heavily pruned the spider plant, you may skip it for 1 year. Other reasons to start pruning your spider plants are when:
- The leaves are too crowded.
- New pups are overwhelming.
- Signs of nutrient deficiency are starting to emerge (yellow and brown leaves).
Too much pruning can also harm the plant, especially when it’s weak due to temperature stress, infestation, or root problems. Too much love for your plant can also kill them at some point, so moderation is key.
Benefits of Pruning a Spider Plant
While some gardeners are not a fan of pruning spider plants, it can actually provide some benefits to your plants.
From another perspective, pruning is aiding the plant to reserve its resources for other plant processes. Here are the specific benefits of pruning spider plants:
- Promotes new leaf growth: Plants reserve their energy for their plant processes like producing new leaves, blooms, and strengthening the roots.
- Boost air circulation around the leaves: When there are too many leaves compiled at the base of the spider plant, there will be a limited airflow around the plant which provides a perfect breeding ground for pathogens of fungal diseases.
- Tidies up the look of the plant: Removing the discolored leaves will make your spider plant look neat and well-cared for. Who doesn’t love a uniform look of green and white on their plants right?
- Prevents nutrient deficiency: Of all the benefits, proper nutrient absorption is probably the strongest benefit of pruning spider plants. The pups or baby plants that are extending from the mother plant are heavy feeders of nutrients. With more pups, the nutrients become shared around which may lead to the nutrient deficiency of the mother plant which causes the yellow and brown leaves.
- Strengthens the overall health of the spider plant: Cutting off the excess leaves and pups removes a lot of tasks on the queue of the plant. This means that it will save a lot of energy that will then divert to maintaining the overall health of the plant and its resistance to pests and fungal diseases.
Tips on How To Deal With The Brown Tips of Spider Plant
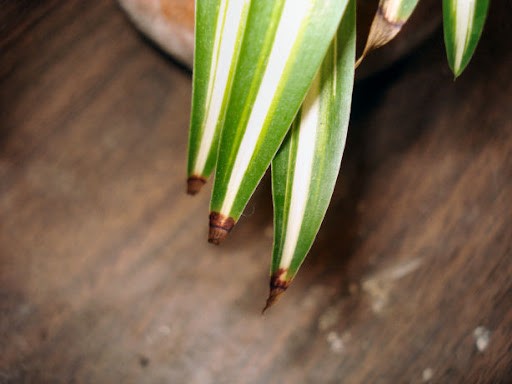
As you check on the leaves of your spider plants, you may sometimes notice that some of the leaves have brown tips. It is a concern that may come from various possible causes. These include:
Chemicals in Water
Spider plants are sensitive to chlorine and fluoride. Tap water among communities usually contains a small percentage of fluoride and chlorine which may not be in favor of your spider plants.
To know if the water is the cause of the brown tips in your plants, try using distilled water or rainwater for your spider plants. If brown tips still persist on the new and existing leaves, then the problem may lie in the humidity and sun exposure of the plant.
Sun Exposure
The reason why spider plants make a good indoor plant is that they can thrive in low indirect light. However, when placed under direct sunlight, the leaves may burn which will cause the brown tips.
Low Humidity
Spider plants love a humid environment. Humidity is the amount of water in the air so, during dry weather, the leaves may not get enough moisture from the air, leading to some of them getting too dry.
Root Pruning a Spider Plant
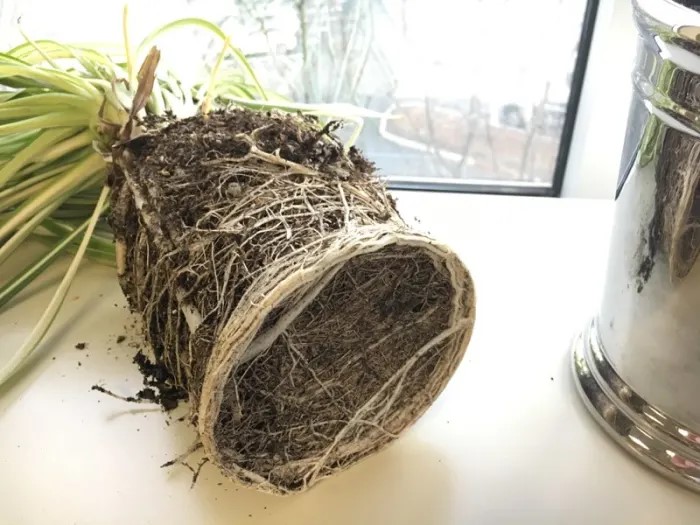
Some gardeners still see a persistent streak of yellowing leaves after they prune their plants. Another possible cause of this problem may lie in the roots of the plant. Spider plants are very generous in growing their roots which can cause root-bound growth.
Rootbound is a condition wherein there are already too many roots in the soil which suffocate and get tangled inside a pot.
The telltale signs of a rootbound spider plant are when the soil absorbs water and nutrients from fertilizers too fast than before. Due to this condition, leaves may start to droop, yellow, and turn brown.
To know if your plant is root bound, lift the plant and remove it from its pot. The best solution if you find out that your plants are root-bound is to remove the extra roots and place the plant in a bigger pot.
Here’s how:
(1) Remove the root-bounded spider plant from the pot to reveal how many roots you’re dealing with.
(2) Next is to remove the potting soil that clung to the root ball. You may remove it by hand. However, if the soil is too hard, you place the plant in water to soften the soil.
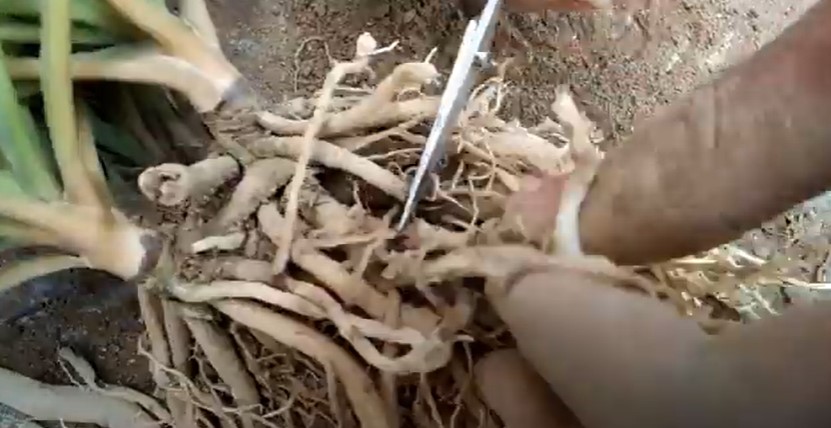
(3) When the root ball is revealed, you may start to trim the roots to allow them to develop new ones on their new pot. In pruning the roots, you have to make sure that you will leave 2 to 5 inches of roots from the base. Don’t worry about cutting the roots because they grow again.
(4) Once done, plant your newly trimmed spider plant in a bigger pot and water it.
Pro tip: You can leave the thick ball of roots on their own and re-pot it on its new pot. It’s a matter of preference. Nonetheless, the spider plant will still grow well even if the roots were pruned or not.
What To Do When The Plant Looks Like Dying After Pruning The Leaves
If the leaves continuously turn yellow after you prune them, then there are two possible reasons. It’s either the soil is too alkaline or holds too much water which causes root rot. If the soil is too alkaline, you must add some soil acidifiers like blood meal to reduce the soil pH.
If the cause of yellowing leaves is root rot, you must adjust the composition of the soil. You must add some perlite or compost to promote good soil drainage. You should also prune the dead and rotting roots so the plant may develop new ones.
Once you have tried to prune the leaves, adjust the soil, or limit its sun exposure, you cannot rule out the chances of temperature stress.
Spider plants have a strong resistance to pests and diseases. So, as you may have noticed, we rarely mention instances of pest infestation as a cause of leaf problems on spider plants.
So when the leaves show any problems, the cause would be more likely found in the soil, sunlight exposure, and overcrowding of leaves, pups, or roots. Altogether, the spider plant is easy to grow and propagate and only needs some special attention once or twice a year.
Tool Care: How To Disinfect Your Pruning Shears And Tools
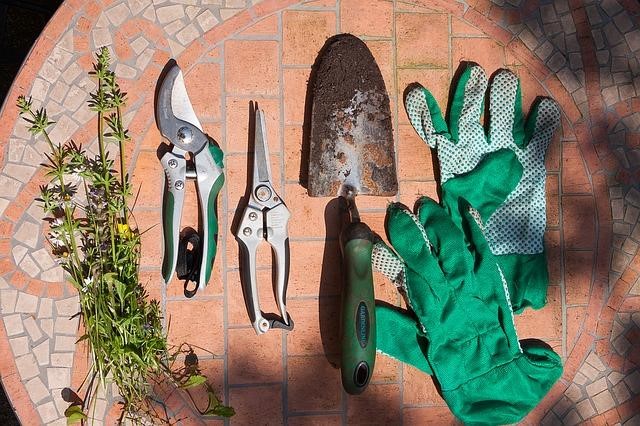
Let’s move on to taking care of your pruning shears. Gardening tools are a great help in keeping plants healthy. However, they may also be the cause of the spread of pathogens of fungal diseases.
Here are some steps to make sure that your pruning shears will work for you and not against you:
Materials:
- Pruning shears
- Bleach water
- Soap
- Gear oil or WD-40
Directions
- Wash your pruning shears before using them on your spider plants.
- File the pruning shears to make sure it is sharp and does not have any dents on their blades for the bacteria and fungus to get stuck into.
- In a basin, mix 1 part of bleach with 9 parts of water. It
- Submerge the pruning shears in the disinfectant solution for 30 minutes.
- Wipe the pruning shears with a clean cloth and wipe the hinges with WD-40 to prevent rusting.
- Start using them in cleaning up your spider plants.
- Repeat the disinfection process every time you use your gardening tools.
Pro tip: Designate one pruning shear for your indoor plants and one for your outdoor plants. With that, you will lessen the risk of spreading pathogens or fungal diseases from outdoor plants to indoor plants.
Toxicity of Spider Plants
According to ASPCA or the American Society for the Prevention of Cruelty to Animals, spider plants have low toxicity levels and do not pose any threat to your kids and pets.
Cats, however, are obsessed with this plant and may attempt to eat it. Ingesting the leaves of spider plants may cause vomiting and diarrhea in cats due to its open contents.
Since it is safe to place it around the house, a spider plant is a versatile accent to every corner of the house, whether you want them hanging, on the table, or in the empty corners of the house.
Final Thoughts
We hope that this post has helped teach you how to prune a spider plant. It may look intimidating at first but once you get a hang of it, pruning will grow on you. You will notice yourself tidying up your other plants as well.
Let us know in the comments how many pups you were able to cut from your mother plant.
Lastly, if you find this post helpful, please don’t forget to share it with your friends so they can propagate and maintain the vigor and beauty of their spider plants.