

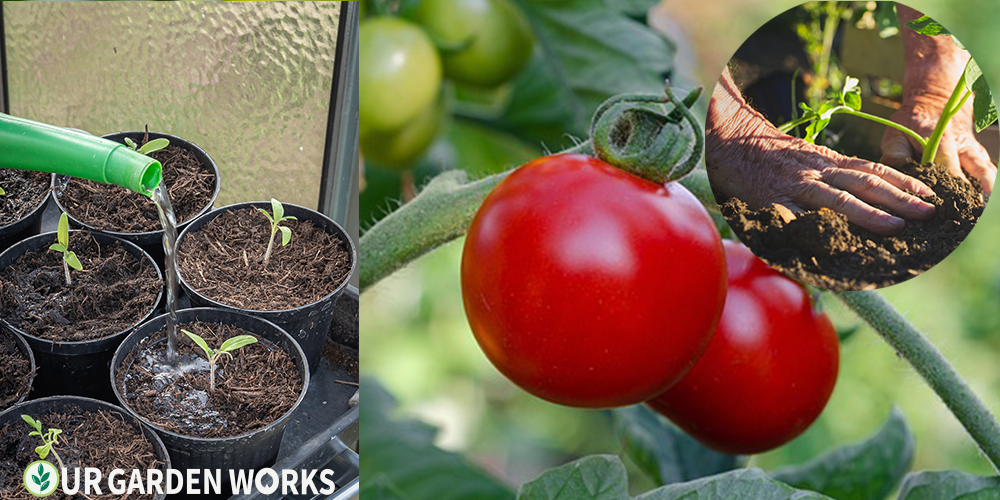
If there is one crop that every gardener eventually grows, it is the tomato. It is the most popular home garden vegetable in the world — and for good reason. Nothing you buy at the grocery store tastes quite like a tomato you picked yourself, still warm from the vine, a few minutes before dinner.
But tomatoes have a reputation for being difficult, and we think that reputation is only partly deserved.
The truth is that tomatoes are demanding — they have opinions about soil, water, sunlight, and support — but once you understand what they need at each stage, growing them becomes one of the most rewarding things you can do in your garden.
In this guide, we’ll walk you through the complete process of how to grow tomatoes from seed all the way to harvest.
Whether you’re starting seeds indoors for the first time or you’ve grown tomatoes before and want better results, this guide covers every stage with exactly what to do and when to do it.
Quick Answer: Start tomato seeds indoors 6–8 weeks before your last frost date. Transplant outdoors when nighttime temperatures stay above 50°F. Tomatoes need full sun (8+ hours), consistent watering, calcium-rich well-draining soil (pH 6.0–6.8), and staking or caging for support. Most varieties are ready to harvest 60–85 days after transplanting.
(You could use the table of contents below to jump to the sections that are most important to you.)
First: Choose the Right Tomato Variety
Before you buy a single seed, you need to make one important decision: determinate or indeterminate? This choice affects how you stake, when you harvest, and how much space you need.
Determinate Tomatoes (Bush Tomatoes)
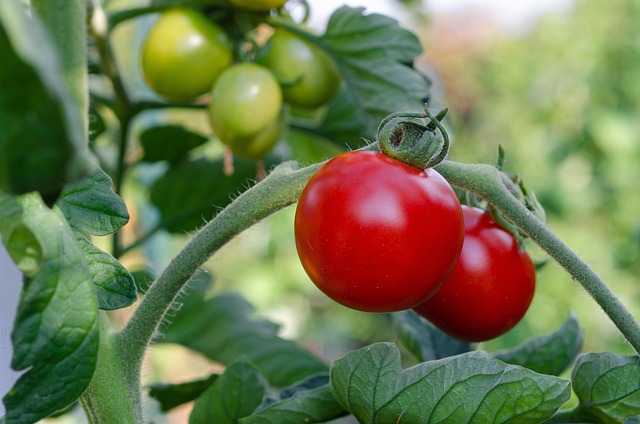
Determinate tomatoes grow to a fixed height — usually 3–4 feet — and produce all their fruit within a 2–4 week window before the plant stops growing. They are ideal for:
- Small gardens or containers
- Making large batches of sauce (all fruit ripens at once)
- Gardeners who want a predictable harvest date
- Gardeners who don’t want to do much pruning
Popular determinate varieties: Roma, Celebrity, Rutgers, Patio, Bush Early Girl
Indeterminate Tomatoes (Vining Tomatoes)
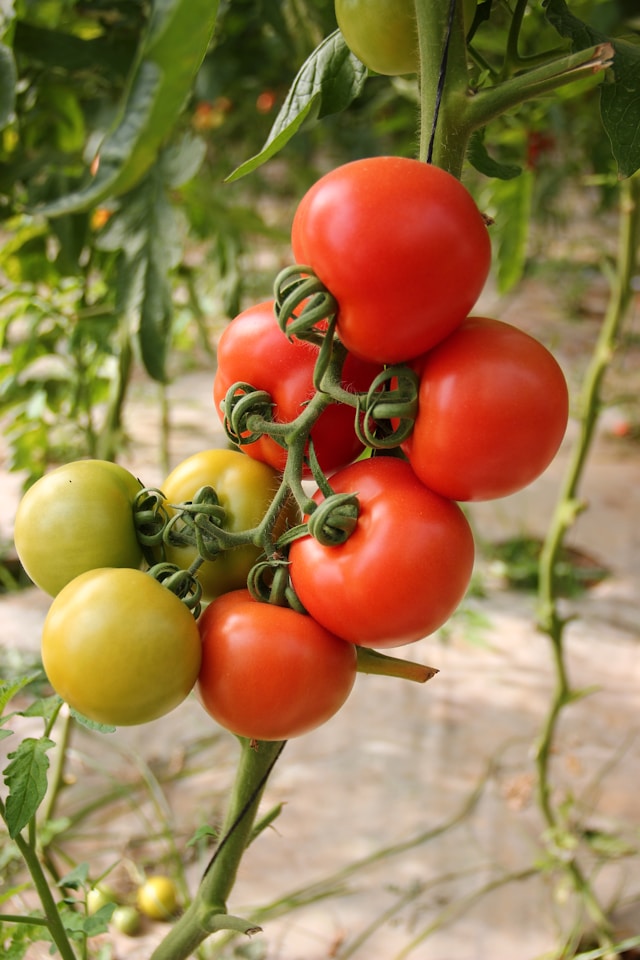
Indeterminate tomatoes keep growing and producing fruit until the first frost kills them. They can reach 6–10 feet tall and produce continuously all season. They need sturdy staking or caging and benefit from regular pruning of suckers.
Indeterminate tomatoes are ideal for:
- Gardeners who want fresh tomatoes all season long
- Raised beds or garden plots with vertical space
- Cherry tomato varieties (most are indeterminate)
- The best-tasting heirloom varieties
Popular indeterminate varieties: Brandywine, Cherokee Purple, Sungold (cherry), Black Krim, Mortgage Lifter, Early Girl, Beefsteak
💡 Our recommendation for beginners
Start with one determinate variety and one cherry tomato (most cherry tomatoes are indeterminate but extremely forgiving). You’ll get the experience of both growth habits without committing an entire garden to one approach.
Tomato Varieties at a Glance
Here are the most common types of tomatoes by use:
- Slicing tomatoes — large, meaty, ideal for sandwiches and fresh eating (Beefsteak, Celebrity, Brandywine)
- Cherry tomatoes — small, prolific, the easiest to grow (Sungold, Sweet 100, Black Cherry)
- Plum / paste tomatoes — low moisture, ideal for sauce and canning (Roma, San Marzano, Amish Paste)
- Heirloom tomatoes — open-pollinated, saved seed, often the best flavor (Cherokee Purple, Brandywine, Green Zebra)
- Hybrid tomatoes — disease-resistant, consistent, reliable producers (Celebrity, Big Boy, Early Girl)
Tomato Growing Requirements
Tomatoes are full-sun, warm-season crops with strong preferences about their growing conditions. Meeting these requirements from the start prevents the majority of problems that frustrate home growers.
🍅 Tomato Growing Requirements at a Glance
- Sunlight: Full sun — minimum 8 hours of direct sun per day. Six hours is survivable but will reduce yield significantly.
- Soil: Well-draining, loamy soil rich in organic matter. pH 6.0–6.8. Heavy clay or compacted soil will cause root problems.
- Water: 1–2 inches per week, deeply and consistently. Inconsistent watering is the most common cause of blossom end rot and cracking.
- Temperature (germination): 70–80°F soil temperature for seed germination. Seeds germinate in 5–10 days at optimal temperature.
- Temperature (growing): Daytime 70–85°F, nighttime above 55°F. Flower drop occurs above 95°F or below 55°F at night.
- Fertilizer: Balanced NPK at planting (10-10-10), then switch to low-nitrogen, high-phosphorus and potassium once flowering begins.
- Support: All but the smallest determinate varieties need staking, caging, or trellising.
- Days to harvest: 60–85 days from transplanting, depending on variety.
How to Start Tomatoes From Seed Indoors
Starting tomatoes from seed gives you access to a far wider range of varieties than what’s available as transplants at your local garden center. It also saves money — a packet of seeds that costs $3–5 gives you 20–30 plants, versus $3–5 per transplant.
The most important thing to know about starting tomatoes from seed is timing. Start too early and you’ll have leggy, root-bound seedlings before it’s warm enough to plant. Start too late and you lose growing season. The target: 6–8 weeks before your last expected frost date.
💡 How to find your last frost date
Search “last frost date [your city]” or use the USDA Plant Hardiness Zone Map. For most of the US: Northern states — late April to mid-May. Southern states — February to March. Pacific Coast — February.
What You Need:
Materials
- Tomato seeds (your chosen variety)
- Seedling tray or small pots (at least 2–3 inches deep)
- Seed-starting mix (not regular potting soil — it’s too dense for germination)
- Plastic dome or plastic wrap (to hold humidity)
- Heat mat (optional but significantly improves germination rate)
- Grow light or very bright south-facing window
- Spray bottle for watering
How to Start Tomato Seeds Step by Step:
Directions
- Fill your seedling tray or pots with damp seed-starting mix. It should be moist but not dripping.
- Make a shallow indentation in each cell about ¼ inch deep — use a pencil or your fingertip.
- Drop 2 seeds per cell. We plant 2 per cell to guarantee germination, then thin to the strongest seedling later.
- Cover the seeds lightly with seed-starting mix and gently press down so the seeds have good contact with the soil.
- Mist the surface gently with a spray bottle.
- Cover the tray with a plastic dome or loosely draped plastic wrap to hold in humidity.
- Place the tray somewhere warm — on top of your refrigerator, near a heating vent, or on a heat mat set to 70–80°F. Seeds do not need light yet — they need warmth.
- Check daily and mist if the surface looks dry. Do not let the soil dry out during germination.
- Remove the dome as soon as you see the first tiny loop of stem emerging from the soil — typically 5–10 days.
- Move the tray immediately under a grow light or into your brightest window the moment seeds emerge. Light is critical from this point forward.
⚠️ The most common seed-starting mistake
Waiting to move seedlings to light. Most gardeners wait until the seedling is standing upright before moving it to light. By then, it has already started stretching (etiolating). Move trays to bright light the moment the seed coat breaks through the soil surface — even if the seedling is still bent in a loop.
Caring for Seedlings Under Lights
Once your seedlings are under the grow light, here is what the first few weeks look like:
- Light: 14–16 hours per day under grow lights, or all the daylight hours available in a south-facing window. Rotate trays every 2–3 days if using a window to prevent leaning.
- Watering: Water when the top of the soil feels dry to the touch. Bottom-watering (placing the tray in a shallow dish of water and letting it absorb from the bottom) produces stronger roots than top-watering.
- Thinning: When seedlings have their first set of true leaves (the second set — the first are seed leaves), snip the weaker seedling in each cell at soil level with scissors. Do not pull it out — pulling can disturb the roots of the one you’re keeping.
- First feeding: Start a diluted liquid fertilizer (quarter strength) at the true leaf stage. Use a balanced fertilizer like fish emulsion or a liquid 10-10-10. Full strength fertilizer at this stage will burn seedlings.
- Potting up: When seedlings are 3–4 inches tall with 2 sets of true leaves, pot them up into 4-inch pots. Tomatoes can be buried deep — plant them up to their lowest set of leaves. Roots will grow from the buried stem, producing a stronger plant.
Hardening Off — The Step Most Gardeners Skip
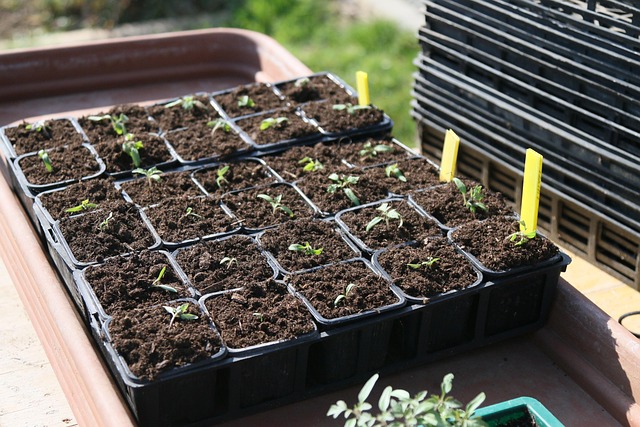
Hardening off is the process of gradually introducing your indoor-grown seedlings to outdoor conditions before transplanting them permanently. Seedlings that have spent their entire lives under grow lights in a warm room will go into shock if you put them outside on a breezy, bright spring day without any transition.
Skipping this step is one of the most common reasons perfectly healthy seedlings collapse after transplanting.
7-Day Hardening Off Schedule
- Day 1–2: Place seedlings outside in a sheltered, partly shaded spot for 1–2 hours. Bring back inside. The goal is gentle outdoor air, not full sun yet.
- Day 3–4: Increase to 3–4 hours outdoors. Move to a slightly brighter spot. Watch for wilting — if leaves droop, bring inside immediately and water.
- Day 5: 5–6 hours outside, some direct sun in the morning or late afternoon. Still bring inside at night.
- Day 6: Most of the day outside, including direct midday sun. Bring inside before temperatures drop at night.
- Day 7: Leave outside all day including overnight if nighttime temperatures stay above 50°F. If a frost is forecast, bring back inside.
After Day 7, your seedlings are ready to transplant. This whole process feels slow, but it makes a dramatic difference in how well plants establish after going in the ground.
Preparing the Soil for Tomatoes
Tomatoes are heavy feeders and need soil that has been genuinely prepared before planting — not just dug over. The quality of your soil preparation at this stage determines the health of your plants all season long.
In-Ground Beds
Directions
- Dig or till the bed to a depth of 12–14 inches. Tomato roots go deep and compacted soil at 8 inches will stop them.
- Remove rocks, old roots, and large clumps.
- Mix in 3–4 inches of compost throughout the full depth of the bed. This is the most important amendment you can make.
- If you have heavy clay soil, add perlite or coarse sand (at least 20% of the total volume) to improve drainage.
- Test your soil pH with a basic pH meter or test kit. Tomatoes need 6.0–6.8. If below 6.0, add dolomitic lime and wait 2–4 weeks. If above 7.0, add elemental sulfur.
- Mix in a slow-release granular fertilizer (10-10-10) at the rate on the package label — typically 1 cup per 10 square feet, worked into the top 6 inches.
- Add calcium: work in crushed eggshells or gypsum if you’ve had blossom end rot problems in previous seasons. Calcium deficiency (often caused by inconsistent watering, not low calcium in the soil) is one of the most common tomato problems.
Raised Beds and Containers
- Raised beds: Fill with a quality raised bed mix (not topsoil). A 50/50 blend of compost and raised bed soil is ideal. Add slow-release fertilizer at planting.
- Containers: Use a premium potting mix — never garden soil or topsoil in containers. Minimum pot size for tomatoes is 15 gallons for indeterminate varieties, 10 gallons for determinate. Containers dry out faster than beds and will need daily watering in summer.
For more on soil preparation, pH management, and choosing the right potting mix for your tomatoes, our garden soil guide has everything you need.
Transplanting Tomatoes Outdoors
The moment you’ve been building toward. Transplanting time is one of the most consequential decisions in the tomato growing season — too early and a cold snap can set the plant back for weeks. Too late and you lose valuable warm-season growing time.
The rule: Transplant when nighttime temperatures consistently stay above 50°F and all frost risk has passed. Tomatoes planted in cold soil simply sit there and do nothing — the energy savings of waiting for warm soil are real.
How to Transplant Tomatoes
Materials
- Hardened-off tomato seedlings
- Prepared bed or containers (see soil prep above)
- Shovel or hand trowel
- Stakes, cages, or trellis (install these at transplanting — not later)
- Compost
- Mulch (straw, wood chips, or shredded leaves)
- Watering can or hose
Directions
- Dig a hole significantly deeper than the root ball — deep enough to bury the plant up to the lowest set of leaves. If you have a 10-inch tall seedling, you might dig a hole 7 inches deep and only leave the top 3 inches above ground. This deep planting is one of the most important tomato techniques — roots grow along the buried stem and create a much stronger plant.
- Alternatively, for very tall leggy seedlings, dig a trench at an angle and lay the stem sideways, bending only the top 3–4 leaves above the surface. The buried stem becomes roots within 2 weeks.
- Remove any leaves that would be underground or touching the soil — they will rot and invite disease.
- Place a handful of compost at the bottom of the hole before setting the plant in.
- Set the plant in the hole, backfill with soil, and firm it gently around the base.
- Install your stake or cage immediately — doing it later risks root damage. For indeterminate varieties, install a stake at least 5–6 feet tall or a heavy-duty wire cage at least 4 feet tall.
- Water deeply — water slowly at the base until it runs freely from the drainage holes or until you’ve given the area at least 1 inch of water. This first deep watering is critical for root establishment.
- Apply 2–3 inches of mulch around the base of the plant, leaving a 2-inch gap around the stem. Mulch conserves moisture, suppresses weeds, and prevents soil from splashing onto leaves (a major disease vector).
Spacing
- Indeterminate varieties: 24–36 inches between plants in rows 3–4 feet apart
- Determinate / bush varieties: 18–24 inches between plants
- Container growing: One plant per 15-gallon container
⚠️ Don’t crowd tomatoes
Overcrowding is the second most common tomato mistake (after inconsistent watering). Plants that are too close compete for nutrients, restrict each other’s airflow, and create the humid conditions that fungal diseases love. Give them more space than you think they need.
Watering Tomatoes — The Most Important Skill
More tomato problems trace back to watering than to any other cause. Blossom end rot, cracking, blossom drop, inconsistent fruit size — all of these are symptoms of irregular watering. Getting watering right is worth more than any fertilizer or spray.
How Much and How Often
- After transplanting (first 2 weeks): Water every 1–2 days, shallowly. You want the root ball to stay moist while the plant establishes.
- Established plants (weeks 3+): Water deeply 1–2 times per week. Deep, infrequent watering encourages roots to grow down, making plants more drought-tolerant. Shallow daily watering produces shallow roots and calcium uptake problems.
- How much: 1–2 inches per week total. Use a rain gauge or simply water until the soil is moist 8–10 inches deep — push a finger or a stick in to check.
- Container plants: Check daily in summer. Containers can dry out completely in a single hot day. When the top inch of soil is dry, water until it runs freely from the drainage holes.
How to Water
- Always water at the base, not overhead. Wet leaves are the leading cause of fungal disease in tomatoes. Drip irrigation or a soaker hose is ideal.
- Water in the morning if you must use a hose or sprinkler — leaves dry before nightfall.
- Never let soil go completely dry between waterings. The soil should be consistently moist — not soggy, not bone dry. A moisture meter ($10–15) takes the guesswork out completely.
Fertilizing Tomatoes — What to Feed and When
Tomato fertilization changes at different stages of the plant’s life. Getting this wrong — especially by over-fertilizing with nitrogen — is the most common reason tomato plants produce huge amounts of leaves but very little fruit.
The 3-Stages of Tomato Fertilization
Stage 1 — At transplanting: Use a balanced fertilizer (10-10-10) worked into the soil at planting. This gives the plant what it needs to establish roots and build a strong structure.
Stage 2 — First flowers appear: Switch to a fertilizer with lower nitrogen and higher phosphorus and potassium — look for ratios like 5-10-10 or 3-8-8. High nitrogen at this stage causes the plant to keep growing leaves at the expense of fruit. Phosphorus and potassium support flowering and fruit development.
Stage 3 — Fruiting season: Continue with the low-nitrogen, high-potassium fertilizer every 2–3 weeks until the end of the season. Potassium is the nutrient most directly associated with tomato flavor and fruit quality.
Signs of Nutrient Problems
- Pale yellow leaves all over the plant: Nitrogen deficiency — increase feeding
- Purple tint on the undersides of leaves: Phosphorus deficiency — common in cold soil, usually resolves as soil warms
- Brown leathery patch on the bottom of fruit: Blossom end rot — calcium uptake problem, almost always caused by irregular watering
- Dark spots on leaves spreading rapidly: Fungal disease (early or late blight) — see our best fungicides for tomatoes guide for treatment options
Staking, Caging, and Pruning
Unsupported tomato plants fall over, break, produce less fruit, and develop more disease. Supporting your plants and — for indeterminate varieties — pruning them correctly are two of the most impactful things you can do for your harvest.
Support Options
- Wire cages: The easiest method. Use the heavy-duty concrete-reinforcing wire cages (at least 4 feet tall, 18 inches wide), not the flimsy lightweight ones sold at garden centers for $2. The lightweight ones collapse under the weight of a full-grown indeterminate tomato.
- Single stake: Drive a 6-foot stake 12 inches into the ground at planting. Tie the main stem to the stake with soft ties every 8–10 inches as the plant grows. Prune all suckers to keep the plant to a single stem for maximum airflow and faster fruit production.
- Florida weave / trellis system: Run wire or twine between posts, weaving it around each plant stem as the plant grows. Used in commercial production and works well for long rows.
How to Prune Suckers (Indeterminate Varieties)
Suckers are the shoots that grow in the V-shaped joint between the main stem and a side branch. Left to grow, each sucker becomes a full branch that produces its own suckers — exponential growth that eventually creates a tangled jungle of vines with many leaves and fewer large tomatoes.
Pruning suckers focuses the plant’s energy into the fruit it’s already developing instead of building new structure.
How to remove suckers
- Look for the V-shaped joint between the main stem and a side branch. The shoot emerging from this joint is the sucker.
- When small (under 2 inches), simply pinch it off with your fingers.
- When larger, use clean, sharp pruning shears. Always clean shears between plants with a diluted bleach solution (1 part bleach to 9 parts water) to prevent spreading disease.
- For stake-trained plants, remove all suckers to maintain a single main stem.
- For cage-grown plants, you can leave 1–2 suckers to create a 2- or 3-stem plant — this is a good compromise between maximum yield and manageable size.
- Never remove suckers in wet weather — open pruning wounds invite fungal disease.
⚠️ Determinate varieties — don’t prune
Do not remove suckers from determinate tomatoes. Determinate varieties set their fruit from those side shoots — pruning them reduces your total harvest. The only pruning determinate varieties need is removing leaves that touch the soil.
Tomato Pest and Disease Control
Tomatoes attract a reliable cast of characters every season. The good news is that most problems are preventable or easily treated when caught early.
Most Common Tomato Pests
- Tomato hornworm: Large green caterpillars that can defoliate a plant quickly. Look for ragged holes in leaves and black droppings. Hand-pick and drop in soapy water, or apply Bt (Bacillus thuringiensis) spray. See our complete guide: black worms in tomatoes.
- Aphids: Clusters of tiny soft-bodied insects on new growth and leaf undersides. Spray directly with insecticidal soap. See our guide on removing ants on tomato plants — ants protect aphid colonies, so solving the ant problem often solves the aphid problem.
- Whiteflies: Tiny white flies that swarm when disturbed. Yellow sticky traps are the first line of defense. Insecticidal soap for active infestations.
- Flea beetles: Tiny beetles that create small round holes in leaves. Most damaging on young transplants. Row covers in spring and neem oil spray prevent and treat.
Most Common Tomato Diseases
- Early blight: Brown concentric ring spots on lower leaves, spreading upward. Remove affected leaves, improve airflow, apply copper-based fungicide preventively. Guide: best tomato blight spray recipes.
- Late blight: Fast-spreading dark water-soaked lesions with white fuzzy growth on undersides. Escalate immediately to copper or chlorothalonil fungicide — late blight can kill a plant in 5 days. Guide: best fungicides for tomatoes.
- Tomato stem rot: Brown/black discoloration at the stem base, plant wilts despite watering. Caused by soil-borne fungi — remove the plant immediately and do not compost it. Guide: tomato stem rot.
- White spots on fruit: Multiple causes including stinkbug damage, sunscald, and bacterial canker. Guide: white spots on tomatoes.
Prevention Is Better Than Treatment
The three most effective disease prevention strategies are:
- Mulch: 2–3 inches of mulch prevents soil from splashing onto leaves during rain or watering — the number one way early blight spreads.
- Airflow: Proper spacing and sucker pruning keeps air moving through the plant, preventing the humid conditions fungi need.
- Crop rotation: Don’t plant tomatoes (or peppers, eggplant, or potatoes) in the same bed two years in a row. Many soil-borne pathogens persist for 3–7 years.
For a complete guide to organic pest management across your whole garden, see our tomato pesticides guide and our full garden pest control guide.
When and How to Harvest Tomatoes
This is the moment you’ve been working toward all season. Knowing when to pick is one of the most common sources of confusion for home gardeners — and picking at the right moment makes a dramatic difference in flavor.
How to Know When a Tomato Is Ready
- Color: The tomato has reached its final color for the variety — red for most, yellow for Yellow Pear, deep purple-black for Cherokee Purple, and so on. The color should be uniform across the fruit.
- Feel: Slight give when you gently squeeze. A tomato that feels rock hard needs more time. One that feels very soft is overripe.
- Ease of removal: A ripe tomato releases from the vine with a gentle twist. If it resists, it’s not ready.
- Smell: A ripe tomato smells like a tomato at the stem end. If there’s no smell, it’s not ripe.
The “Breaker Stage” — When You Can Pick Early
Once a tomato has begun to change color — even just a blush of pink, orange, or yellow — it has reached the “breaker stage.” At this point, the tomato has produced all the sugars and flavor compounds it’s going to produce. It will ripen to full flavor off the vine.
Picking at the breaker stage protects fruit from:
- Birds and squirrels (the biggest threat to ripe garden tomatoes)
- Cracking from rain after a dry spell
- Late-season frost
Ripen breaker-stage tomatoes on your kitchen counter at room temperature, stem side down. Never refrigerate tomatoes — cold permanently destroys the enzymes responsible for flavor and changes the texture to mealy. For tips on ripening the last green tomatoes before frost, see our guide: how to store green tomatoes.
How to Harvest Without Damaging the Plant
Directions
- Hold the tomato firmly in one hand.
- With your other hand, hold the stem above the fruit.
- Twist the tomato gently downward and toward you — it should release cleanly with the stem cap attached.
- Alternatively, use clean pruning shears to cut the stem above the fruit.
- Never pull — pulling can break the branch or pull a cluster of unripe tomatoes off with it.
- Harvest every 2–3 days during peak season. Leaving ripe fruit on the vine signals the plant to slow down production — regular harvesting keeps the plant producing.
End of Season — What to Do in Fall
When the first frost is forecast and you still have green tomatoes on the vine, you have a few options:
- Pick all remaining fruit at the breaker stage or above and ripen indoors (see guide above).
- Cover plants with frost cloth if a light frost is forecast but warmer days are coming — this can buy you 1–2 more weeks of production.
- Pull plants completely after a killing frost. Do not compost any plant material that showed signs of disease — bin it. Compost piles don’t get hot enough to kill most tomato pathogens.
- Clean and store supports — wash stakes and cages with a diluted bleach solution before storing, especially if any plants had disease.
- Rotate beds for next season — plan now to plant a non-solanaceous crop (brassicas, beans, lettuce) in the same bed next year.
Frequently Asked Questions
How long does it take to grow tomatoes from seed?
From seed sowing to first harvest is typically 80–120 days depending on the variety — 6–8 weeks of indoor seed-starting, then 60–85 days after transplanting. Early-maturing varieties like Early Girl (57 days) are faster; large heirlooms like Brandywine (80+ days) take longer.
Can you grow tomatoes in containers?
Yes — but container size matters enormously. Use at least 15 gallons for indeterminate varieties (5-gallon buckets are too small) and a minimum 10 gallons for compact determinate varieties. Containers dry out fast in summer and need daily checking. Use a premium potting mix, not garden soil.
Why are my tomato plants flowering but not setting fruit?
The most common causes are temperature extremes (above 95°F or below 55°F at night causes blossom drop), too much nitrogen (lush green growth but no fruit — switch to a low-nitrogen fertilizer), not enough sun, or lack of pollinator activity. Gently shake the plant or an electric toothbrush held against the flower cluster can help vibrate pollen loose in the absence of bees.
How many tomato plants do I need per person?
For fresh eating, 2–3 plants per person is usually enough. For preserving and sauce-making, plan 5–10 plants per person. Cherry tomato plants produce far more fruit per plant than large slicing varieties.
What is blossom end rot and how do I fix it?
Blossom end rot is a brown, leathery patch on the bottom of the tomato. It’s caused by calcium deficiency — but almost never from a lack of calcium in the soil.
The cause is almost always irregular watering, which prevents calcium from being transported to the developing fruit. Fix it by watering consistently and deeply, and applying mulch to retain soil moisture. The affected fruit won’t recover, but the next fruits will be fine once watering is corrected.
Should I remove leaves from my tomato plants?
Remove any leaves touching the soil (disease risk), and any leaves that are yellowing, diseased, or damaged. On indeterminate varieties, removing lower leaves to leave 12 inches of bare stem at the base improves airflow significantly. Do not remove healthy green leaves from the middle and upper canopy — they are producing energy for the plant and shading developing fruit from sunscald.
🍅 More Tomato Guides on OurGardenWorks.com
- Best Companion Plants for Tomatoes
- Tomato Varieties Guide — Best Types for Every Garden
- When to Plant Tomatoes — Regional Guide
- How to Store Green Tomatoes: Ripen Them Indoors (Complete Guide)
- 7 Best Potting Soils for Tomatoes — Tested & Reviewed
- 10 Best Fungicides for Tomatoes — Organic & Chemical Options
- Tomato Pesticides Guide: Organic & Chemical Options Compared
- White Spots on Tomatoes: 4 Causes, Fixes & Safety Guide
- How to Fix Blossom End Rot on Tomatoes
- Black Worms in Tomatoes: What They Are & How to Get Rid of Them
- Holes in Tomato Leaves: 6 Causes, ID Guide & Organic Fixes
- Why Are My Tomato Leaves Curling? 5 Causes + Fixes
- Tomato Leaves Turning Yellow: 7 Causes and Exactly How to Fix Each One
- Tomato Stem Rot: Causes, Treatment & Prevention Guide
- 9 Best Tomato Blight Spray Recipes That Actually Work
- How to Get Rid of Ants on Tomato Plants — 8 Methods That Work
- How Many Tomato Plants Per Person?
- Why Do Tomatoes Crack and Split? (5 Causes + Fixes)
Final Thoughts
We hope this guide has given you everything you need to grow tomatoes with confidence — from the first seed you sow indoors to the last harvest before frost.
Tomatoes reward attention and consistency more than almost any other crop, and the flavor difference between a supermarket tomato and one you grew yourself is something you only have to experience once to understand why gardeners keep coming back to them every season.
If you’re growing tomatoes for the first time and want a broader framework for your first garden season, our beginner gardening guide covers everything from setting up your space to managing your first harvest. And for all our vegetable growing guides in one place, our vegetable gardening guide is where we keep them.
Share this post with a fellow gardener who’s ready to grow their first tomatoes — and let us know in the comments which variety you’re planting this season. Happy growing!

1 thought on “How to Grow Tomatoes From Seed to Harvest (Complete 2026 Guide)”