

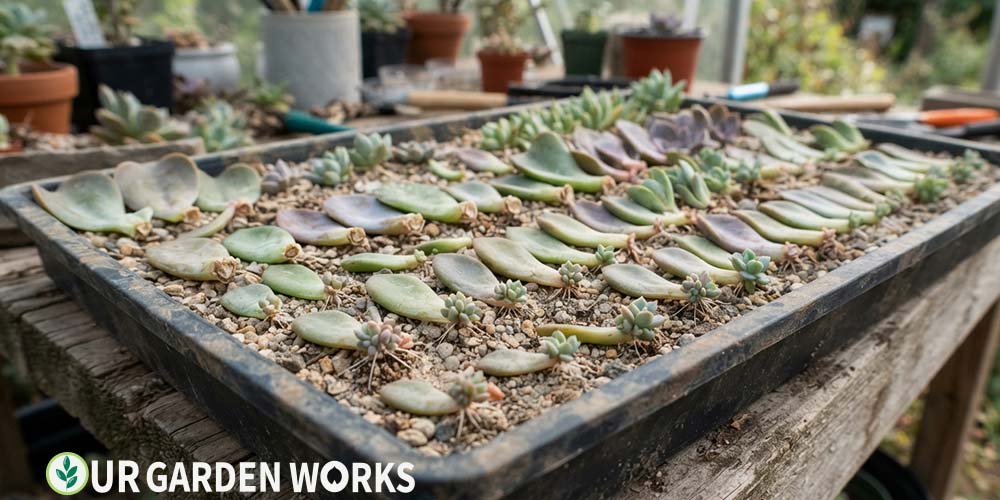
Succulent propagation looks deceptively simple on social media — a leaf in a jar, a few weeks, a new plant. In practice, it has one of the higher failure rates among common houseplant propagation methods, mostly because the single most important step (callousing) is the one almost every quick tutorial skips or rushes.
Done correctly, though, succulent propagation is genuinely reliable. The difference between a tray of thriving new rosettes and a tray of mush almost always comes down to patience at one specific stage.
How to Propagate Succulents – Quick Guide: Remove healthy leaves or stem cuttings with a clean twist or cut, let the wound callous (dry and seal) for 2–5 days in a dry spot out of direct sun, then place on top of dry, well-draining soil. Mist lightly every few days rather than watering directly. New roots and a baby rosette typically appear within 2–4 weeks.
Why Callousing Is the Step That Actually Determines Success
A freshly removed succulent leaf or stem has an open wound with no protective barrier, and succulents store an unusually high amount of water in their tissue relative to other plants.
Combine an open wound with high water content and you have ideal conditions for rot — the moment that fresh cut contacts soil moisture, bacteria and fungi can enter the tissue far more easily than they could through intact, calloused skin.
Callousing is simply giving the plant time to seal that wound with a dry, corky layer before introducing any moisture at all. This isn’t optional or merely helpful — it’s the single biggest factor separating reliable propagation from a tray of rotted leaves, and it’s worth resisting the urge to speed past it.
Why Succulents Specifically Are So Prone to This Failure Mode
It’s worth understanding why this particular failure happens so often with succulents specifically, since it’s not actually a universal plant propagation issue in the same way.
Succulents evolved their water-storing leaf and stem tissue specifically to survive long droughts in arid climates, which means that tissue is, by design, packed with stored moisture sitting just beneath a thin outer skin.
A pothos cutting or a tomato seedling doesn’t carry nearly the same water reserve in its surface tissue, so an uncalloused wound on those plants simply doesn’t create the same rot-friendly environment.
Succulents are, in a real sense, victims of their own most successful survival adaptation when it comes to propagation — the very trait that lets them survive months without rain is exactly what makes an unprotected fresh wound such an effective entry point for decay organisms.
Method 1 — Leaf Propagation
Directions
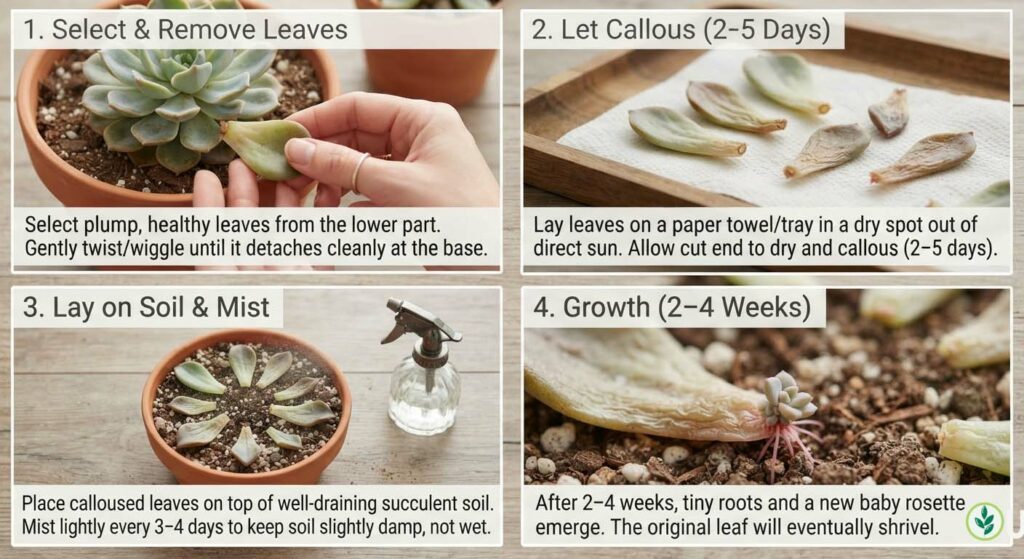
- Select plump, healthy leaves from the lower part of the plant. Gently twist or wiggle each leaf until it detaches cleanly at its base — a leaf that snaps and leaves part of itself on the stem usually won’t propagate successfully, since the growing point stays behind with the parent.
- Lay leaves on a paper towel or tray in a dry spot out of direct sun. Let them callous for 2–5 days, until the cut end looks dry and slightly shriveled, not moist.
- Place calloused leaves on top of (not buried in) well-draining succulent soil, with the calloused end barely touching the surface.
- Mist lightly every 3–4 days — just enough to keep the surrounding soil from going bone dry. Avoid soaking.
- Tiny roots and a new baby rosette typically emerge from the base within 2–4 weeks. The original leaf will shrivel and can be removed once the new plant is self-sufficient.
The “clean detachment” detail in step one is worth dwelling on, since it’s the single most common reason a batch of leaf cuttings underperforms.
When a leaf snaps rather than separating cleanly at its natural base, it almost always leaves a small but critical piece of growing-point tissue behind on the parent plant — without that tissue, the removed leaf has no source of new cells to build roots or a rosette from, no matter how perfectly you handle everything afterward.
Method 2 — Stem Cuttings (Faster, More Reliable for Leggy Plants)
Directions
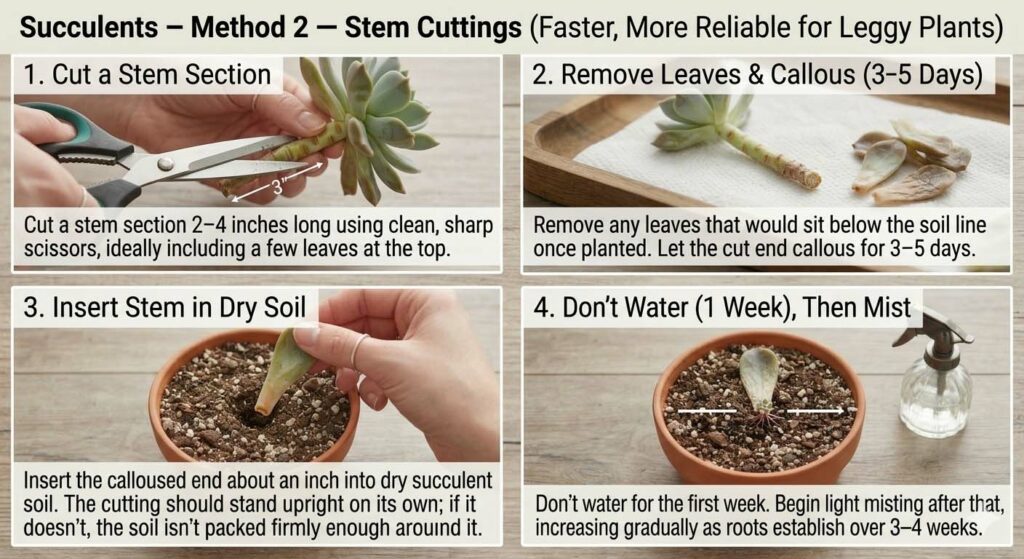
- Cut a stem section 2–4 inches long using clean, sharp scissors, ideally including a few leaves at the top.
- Remove any leaves that would sit below the soil line once planted.
- Let the cut end callous for 3–5 days — stem cuttings benefit from slightly longer callousing than leaves, given the larger wound surface.
- Insert the calloused end about an inch into dry succulent soil. The cutting should stand upright on its own; if it doesn’t, the soil isn’t packed firmly enough around it.
- Don’t water for the first week. Begin light misting after that, increasing gradually as roots establish over 3–4 weeks.
💡 Stem cuttings beat leaf cuttings for fixing a leggy succulent
If your succulent has stretched and become “leggy” from insufficient light, a stem cutting lets you behead the plant and root a fresh, compact top section — solving the legginess and producing a new plant in one move.
The leftover base often resprouts new growth, giving you two plants from one.
Caring for New Succulent Plantlets
Once roots and a small rosette have formed, the new plant needs a more gradual introduction to a normal watering schedule than an established succulent would get. Begin increasing water frequency slowly over the following month, watching the plant’s response rather than switching immediately to the deep, infrequent watering pattern mature succulents prefer.
Light matters just as much during this establishment period. New plantlets benefit from bright but indirect light initially — full, intense direct sun on a plant that’s still building its root system and energy reserves can cause stress or scorching that a more established plant would tolerate without issue. Gradually move new plants toward their permanent, brighter location over several weeks rather than all at once.
It’s also worth resisting the urge to fertilize new propagations for at least the first couple of months. Like most newly rooted cuttings, succulent plantlets are vulnerable to fertilizer burn while their root systems are still small and developing, and the plant simply doesn’t need the extra nutrients yet given how slowly it’s growing at this stage anyway.
Patience really is the operative word throughout this entire process. A succulent propagation that looks unremarkable for three weeks straight is often doing exactly what it should — slow, steady tissue development that simply isn’t visible from the outside yet, right up until the moment a new rosette suddenly appears.
Frequently Asked Questions
My leaf cutting is shriveling without producing roots — is it dead?
Not necessarily. Leaves naturally shrivel somewhat as they redirect stored water and energy into producing new roots and a rosette — this is normal in the first 2–3 weeks. If the leaf turns mushy, dark, or develops a foul smell, that indicates rot rather than normal water redistribution, and it should be discarded.
Can I speed up succulent propagation with rooting hormone?
Rooting hormone can modestly speed root development, but it doesn’t replace the callousing step — applying it to a fresh, uncalloused wound doesn’t meaningfully reduce rot risk. If you use it, apply after callousing, not instead of it.
Why are some of my leaf cuttings working and others not, from the same plant?
Leaf health at the time of removal matters more than technique consistency. Leaves that were already slightly damaged, very old, or removed with a torn rather than clean break have a meaningfully lower success rate, even when callousing and soil conditions are identical across the batch.
Do all succulent types propagate equally well from leaf cuttings?
No — this varies more by species than most general guides acknowledge. Echeveria and Sedum varieties are typically the most reliable leaf-propagators, readily producing new rosettes.
Some succulents, including many Haworthia and Aloe varieties, propagate far more reliably by division or offset removal than by individual leaf cuttings, since their leaf tissue doesn’t carry the same concentration of growth-point cells.
If you’ve had repeated failures with leaf cuttings on one of these species, it’s likely a species mismatch rather than a technique problem — switching to division or offset removal often resolves it immediately.
Common Mistakes That Cause Widespread Failure
A handful of specific errors account for the large majority of failed succulent propagation attempts, and most trace back to rushing past the patience the process genuinely requires.
Watering too soon and too heavily is the single biggest culprit — even properly calloused cuttings can rot if placed in consistently damp soil before any roots exist to actually use that moisture. The misting approach described above exists specifically to provide just enough humidity to encourage rooting without creating the standing moisture that invites decay.
Direct, intense sunlight on fresh cuttings is the second major issue. While mature succulents generally tolerate and even prefer strong light, a leaf or stem cutting with no root system yet has no way to take up the water it needs to handle that same light intensity, and can scorch or desiccate rapidly as a result. Bright, indirect light is the safer choice until roots are established.
Related Articles in Our Plant Care Guide
Final Thoughts
We hope this guide helps you skip the most common failure point and actually get the reliable results succulent propagation is known for.
The patience required during callousing is genuinely the whole trick — everything after that tends to take care of itself.
For ongoing care once your new plants are established, our plant care guides cover watering, light, and repotting in depth.
If you’ve struggled with succulent propagation in the past despite following other advice carefully, revisiting the callousing step specifically is the most likely fix.
It’s the detail quick social media tutorials skip most often, and it’s also the single change most likely to turn a string of rotted attempts into a consistently successful one. Give the wound the full window to seal, resist the urge to water early, and the rest of the process really does take care of itself from there.
A single tray of leaves, handled patiently, can realistically turn into a dozen new plants worth gifting, trading, or simply filling out your own windowsill collection over the following months, all from cuttings that would otherwise have simply been discarded during routine plant grooming.
Share this post with a fellow gardener who’s ready to get growing — and let us know in the comments which method worked best for your succulents. Happy growing!
