

Pothos is genuinely one of the most forgiving plants to propagate, which is exactly why it’s the houseplant most people start with when they want to turn one plant into ten.
A single healthy vine can produce a dozen or more rooted cuttings in a season, at zero cost beyond the parent plant you already have.
The plant’s vining growth habit is what makes this so reliable — each node along the stem already carries the genetic instructions to grow roots the moment conditions are right. You’re not coaxing the plant into doing something unusual; you’re just giving an already-willing stem the right environment.
How to Propagate Pothos – Quick Guide: Cut a 4–6 inch stem section just below a node (the small bump where a leaf or root attaches), with at least 2–3 leaves remaining. Place in water, moist soil, or sphagnum moss. Water propagation roots fastest (2–4 weeks) and lets you watch progress; soil propagation produces a sturdier plant from day one.
Why the Node Matters More Than Anything Else
A node is the small, slightly swollen point on a pothos stem where a leaf grows — and it’s also where the plant stores dormant root-producing cells called adventitious root primordia.
These cells sit inactive as long as the stem is attached to the parent plant and supplied with hormones that suppress rooting. The moment you cut the stem, that hormonal suppression disappears, and the node’s dormant cells activate to produce new roots within days.
This is the entire reason every propagation method below insists on cutting just below a node rather than mid-stem. A cutting without an intact node has no activation point — it can survive for a while on stored energy, but it has no mechanism to actually grow roots.
Why Pothos Specifically Roots So Easily Compared to Other Houseplants
It’s worth understanding why pothos has earned its reputation as the easiest plant to propagate, since the answer explains a lot about how to troubleshoot when something doesn’t work.
Pothos evolved as a climbing vine in tropical forest understories, where a broken or damaged stem section needs to root quickly and opportunistically wherever it lands, rather than relying on a single, slow-growing root system the way many non-vining plants do.
This evolutionary pressure means pothos nodes carry an unusually high concentration of those dormant root-producing cells compared to plants that didn’t evolve the same need for opportunistic rooting.
A money tree or rubber plant cutting can take many weeks to root for exactly this reason — their node tissue simply isn’t primed for rapid activation the way a vining aroid’s is. Understanding this also explains why pothos cuttings rarely fail outright; the plant’s whole evolutionary strategy is built around this exact scenario succeeding reliably.
It also explains why pothos so readily produces aerial roots even on an intact, unpropagated plant climbing up a moss pole or trellis — the same opportunistic rooting instinct that makes cuttings so reliable is constantly active in the parent plant too, just directed toward climbing rather than starting a new individual.
Method 1 — Water Propagation (Easiest to Monitor)
Directions
- Select a healthy vine and cut 4–6 inches below a node, leaving 2–3 leaves on the cutting.
- Remove the lowest leaf if it would sit underwater — submerged leaves rot and can foul the water.
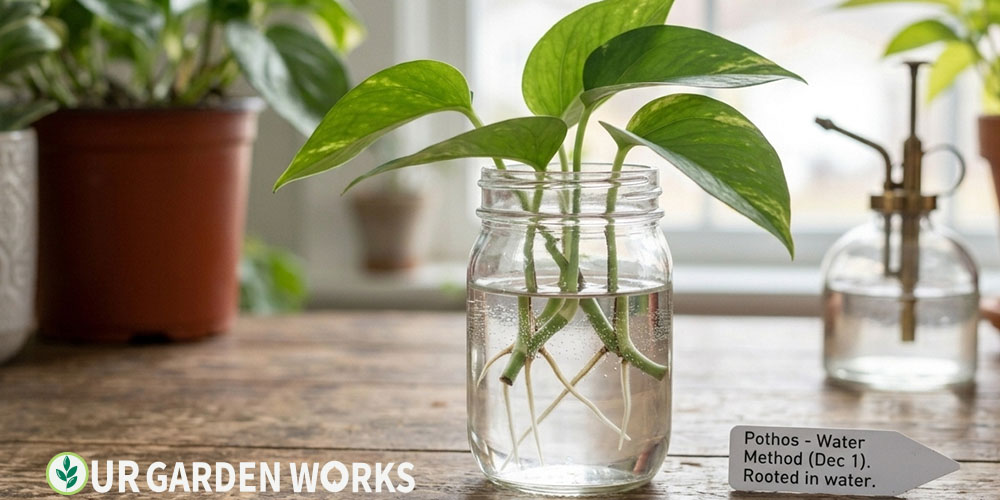
- Place the cutting in a clear glass jar of room-temperature water, with the cut node fully submerged.
- Set in bright, indirect light. Direct sun overheats the water and can scorch leaves.
- Change the water every 5–7 days to prevent bacterial buildup, which slows or stops rooting.
- Roots typically appear within 1–2 weeks and reach potting length (2–3 inches) in 3–4 weeks total.
The clear glass jar isn’t just convenient — it’s genuinely useful for learning to read your cutting’s progress without disturbing it. You’ll typically see small white root bumps emerge directly from the node first, growing into proper root threads over the following days.
This visibility is part of why water propagation remains the most popular starting method, even though it isn’t necessarily the fastest path to a fully independent plant.
💡 Don’t rush the transition to soil
Roots grown in water are structurally adapted to an all-liquid environment and need a short adjustment period once potted in soil.
Keep newly potted cuttings in slightly more humid, evenly moist conditions for the first 1–2 weeks to ease that transition, rather than treating them like an established plant right away.
Method 2 — Soil Propagation (Sturdier Long-Term Growth)
Directions
- Take the same node-based cutting as above.
- Dip the cut end in rooting hormone powder (optional, but speeds up the process noticeably).
- Plant directly into a small pot of moist, well-draining potting mix, burying the node.
- Cover loosely with a plastic bag or propagation dome to maintain humidity while roots establish.
- Keep soil consistently moist but not waterlogged. Check for resistance by gently tugging the cutting after 3 weeks — resistance means roots have formed.
Soil-rooted cuttings tend to establish into a strong, independent plant slightly faster than water-rooted ones once both are growing in soil, simply because they never need to make that water-to-soil adjustment at all.
The tradeoff is that you lose the visual feedback water propagation provides — there’s no way to check root progress without disturbing the cutting, which is part of why many gardeners reserve soil propagation for plants they’ve already successfully rooted in water before and feel confident leaving alone.
Method 3 — Sphagnum Moss (Best of Both Worlds)
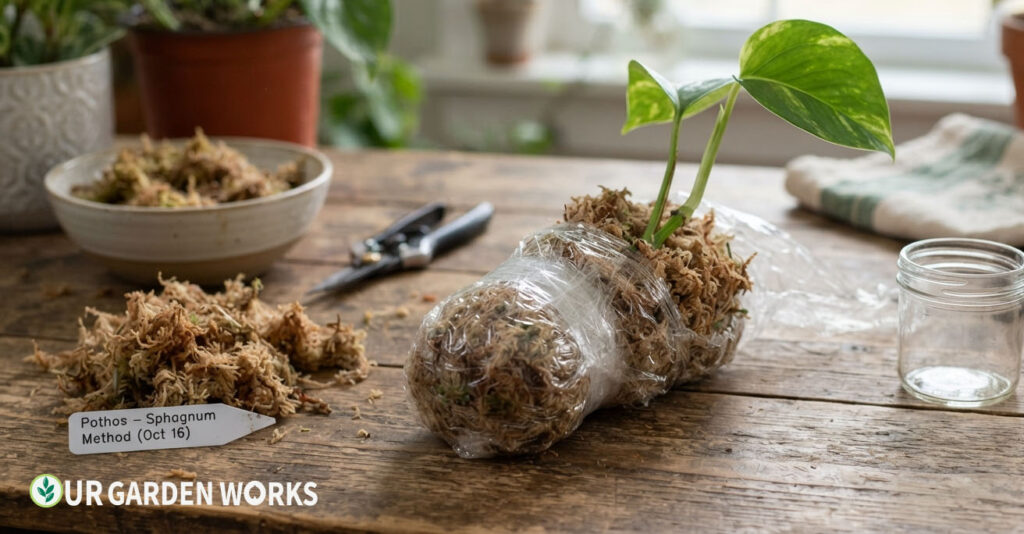
Moist sphagnum moss holds humidity around the cutting more consistently than soil while still letting you check root development by gently parting the moss — a middle ground between the visibility of water and the structural readiness of soil.
Wrap the cut node in a handful of pre-moistened moss, secure with plastic wrap, and check weekly for root growth, repotting into soil once roots reach an inch or two.
This method tends to suit cuttings taken in cooler months particularly well, since moss retains warmth and humidity more consistently than an open jar of water sitting in a draftier room.
Caring for Your New Plant After Potting
Once a rooted cutting is in its permanent pot, the care routine shifts from the patient waiting of propagation to the more familiar rhythm of ongoing houseplant care.
Water when the top inch or two of soil feels dry, provide bright indirect light, and resist the urge to fertilize for the first month — a newly potted cutting is still establishing its root system, and fertilizer at this stage does more to risk burning fragile new roots than to help the plant grow faster.
Pothos also benefits from occasional pinching once established, which encourages bushier, fuller growth rather than a single long trailing vine.
This is a separate technique from propagation, but it’s worth knowing that the very stems you pinch off in routine maintenance are themselves perfectly good propagation material — meaning ongoing care and propagation naturally feed into each other once you have an established plant.
Many experienced pothos growers simply keep a jar of water on hand specifically for whatever trimmings come off during normal upkeep, rather than treating propagation as a separate, deliberate project each time.
Frequently Asked Questions
Can I propagate a pothos leaf without any stem attached?
No — unlike succulents, a pothos leaf with no node or stem section attached has no source of dormant root cells and will not root, no matter how long you leave it in water. Always include at least a small piece of stem with an intact node.
Why is my cutting turning yellow before it roots?
Some yellowing of the lowest leaf is normal as the cutting redirects energy toward root production. Widespread yellowing across all leaves usually points to water that’s gone stagnant (change it more often) or a cutting that’s been sitting too long without rooting — discard and try a fresh cutting if more than 4–5 weeks have passed with no root growth.
How many cuttings can I take from one pothos plant?
As many as the vine length allows, as long as each cutting retains at least one healthy node and a couple of leaves. A single long, mature pothos vine can often yield 4–6 viable cuttings in one pass without meaningfully harming the parent plant.
Can I propagate a variegated pothos and expect the new plant to keep its pattern?
Generally yes, more reliably than with some other variegated houseplants, since pothos variegation tends to be distributed fairly evenly through the leaf and stem tissue rather than concentrated only in the growing point. Occasional reversion to solid green can still happen, particularly on cuttings taken from less-variegated sections of the vine, so choosing a strongly variegated section to cut from improves your odds.
Is it normal for a new cutting to grow noticeably smaller leaves than the parent plant?
Yes, this is completely normal in the first few months after propagation. A newly rooted cutting is still building its root system and overall energy reserves, and leaf size typically increases gradually over several growth cycles as the plant matures into something closer to the parent’s full size.
Related Articles in Our Plant Care Guide
Final Thoughts
We hope this guide makes propagating pothos feel as simple as it actually is. One healthy vine genuinely can become a whole shelf of new plants with nothing more than a clean cut and a bit of patience.
For more on keeping the parent plant thriving in between propagation sessions, our plant care guides cover everything else you need.
Share this post with a fellow gardener who’s ready to get growing — and let us know in the comments which method you’re trying and how many cuttings you’re starting with. Happy growing!
