

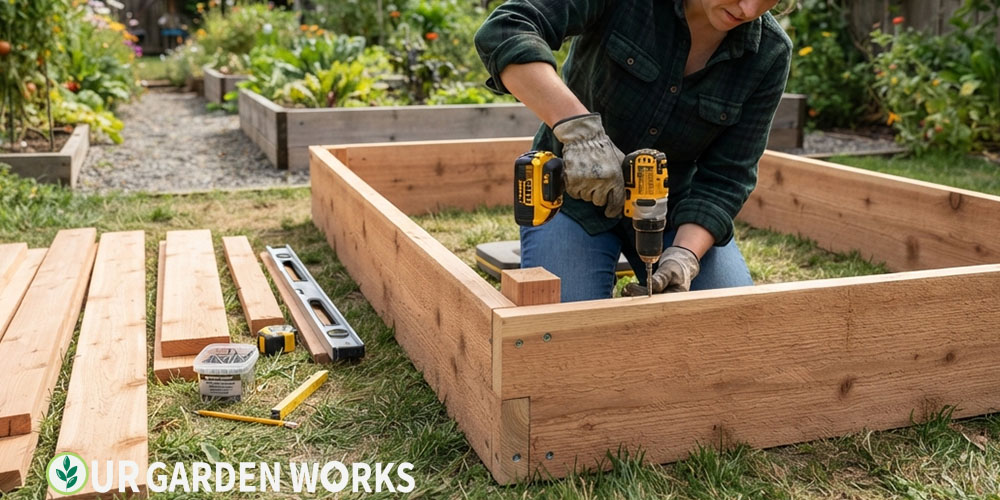
Building your own raised bed costs a fraction of a prefab kit and lets you size it exactly to your space. The actual carpentry involved is simple — straight cuts and basic screws — but a few specific details determine whether your bed lasts 5 years or 15.
This guide covers the full build process: cutting list, assembly, and the joinery choices that matter most for long-term durability.
Quick Guide: A standard 4×8 foot, 12-inch-tall raised bed needs six 2×12 boards plus corner posts, assembled with deck screws (not nails) and reinforced with corner brackets or posts at minimum. Cedar or another naturally rot-resistant wood lasts longest without chemical treatment. Total build time for one person is typically 2–3 hours.
Tools and Materials Needed
| Item | Quantity (for one 4×8, 12″ tall bed) |
|---|---|
| 2×12 boards, 8 ft length | 2 boards (for the long sides) |
| 2×12 boards, 4 ft length | 2 boards (for the short sides) |
| 4×4 corner posts, 14–16 inches | 4 posts |
| 3″ exterior deck screws | ~32 screws |
| Drill/driver | 1 |
| Tape measure and square | 1 each |
| Landscape fabric (optional, for weed barrier) | Enough to line the base |
Most lumber yards will cut boards to length for you if you don’t have a saw, which simplifies the build to assembly only.
Step 1 — Choose and Prepare Your Lumber
Cedar is the most popular choice for good reason — naturally rot-resistant without chemical treatment, and it weathers to an attractive silver-gray if left unfinished. Expect 15–20 years of service from cedar.
Douglas fir or pine are cheaper but less rot-resistant, typically lasting 3–8 years depending on climate and moisture exposure. These are reasonable choices for a budget-conscious first bed, accepting a shorter lifespan.
⚠️ Avoid pressure-treated lumber for food gardens
Modern pressure-treated wood uses copper-based preservatives considered safer than older arsenic-based treatments, but many gardeners still avoid it near edibles as a precaution. Stick with naturally rot-resistant species instead.
Step 2 — Cut Your Boards to Size
Cutting List for a Standard 4×8 Bed
- 2 boards at 8 feet (uncut, if purchased at that length) — these form the long sides.
- 2 boards cut to 4 feet — these form the short sides.
- 4 corner posts cut to your desired height plus 2–4 inches extra to drive into the ground for stability, if placing directly on soil.
Measure twice before cutting — this is the step where small errors compound, since an inaccurate cut on one board throws off the squareness of the entire frame.
Step 3 — Assemble the Frame
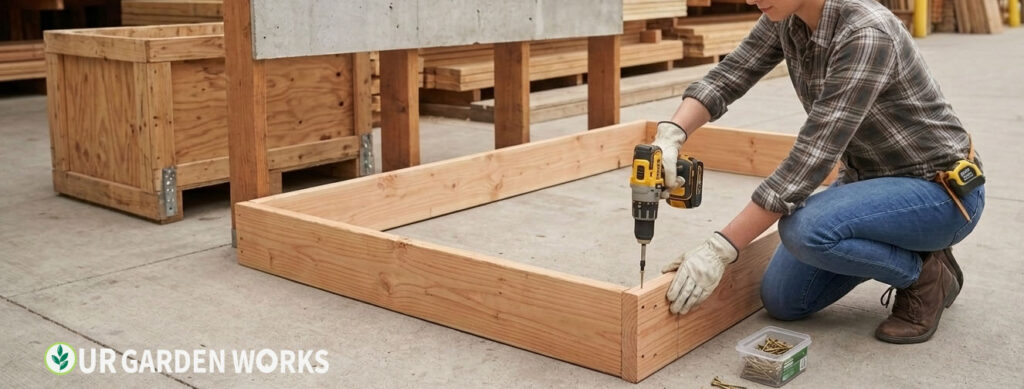
Directions
- Lay out the four side boards in a rectangle on a flat surface, with corner posts positioned at each inside corner.
- Pre-drill pilot holes through the boards into the corner posts to prevent splitting, especially important with cedar.
- Drive 2–3 deck screws through each board into the corner post at each corner, alternating direction slightly to improve grip strength.
- Check that the frame is square by measuring both diagonals — they should be equal if the corners are true right angles.
- If building a taller bed (18+ inches) with stacked boards, repeat the process for a second tier, staggering screw positions from the first tier for added strength.
💡 Why corner posts matter more than corner brackets alone
Metal corner brackets work for a lightweight bed, but a solid 4×4 corner post gives screws significantly more material to bite into, distributing stress across a larger surface area.
This meaningfully reduces the chance of corners working loose over years of soil pressure and seasonal expansion and contraction.
Why Screws Outperform Nails for This Project
It’s worth understanding why deck screws are specifically recommended over nails, since the difference matters more for a raised bed than for most other wood projects.
Nails rely on friction against the wood fibers to hold, and that friction weakens as wood naturally expands and contracts with moisture and temperature changes over years of outdoor exposure.
Screws, by contrast, have threads that physically grip the wood fibers, providing meaningfully stronger holding power that resists the gradual loosening nails are prone to. This matters especially at the corners, which bear the most structural stress as soil settles and shifts inside the completed bed.
Step 4 — Position and Level the Bed
Choose your final location before filling with soil, since a filled bed becomes extremely heavy and difficult to move. Level the ground as needed before placing the frame — a bed sitting on uneven ground stresses joints unevenly over time.
If using corner posts that extend below the frame, drive them into the ground at this stage to anchor the bed and prevent shifting.
Step 5 — Line the Base (Optional but Recommended)
Landscape fabric across the base, before adding soil, suppresses weeds growing up from below while still allowing proper drainage. Skip this step if building directly over an area you’ve already prepared with a cardboard smother layer.
Avoid solid plastic sheeting at the base — this blocks drainage entirely and works against everything a raised bed is supposed to accomplish.
Building Multiple Beds — What Changes
If you’re building more than one bed, plan pathways between them before construction begins — typically 18–24 inches minimum for comfortable access with a wheelbarrow, more if you’ll need wheelchair or mobility device access.
Building beds in a consistent size simplifies future material calculations (soil volume, cover sizing) and makes the overall garden layout look more intentional than a mismatched collection of different bed sizes.
Estimating Total Build Cost
| Material Choice | Approximate Cost (4×8, 12″ bed) |
|---|---|
| Cedar | $90–150 |
| Douglas fir | $50–80 |
| Untreated pine | $35–55 |
| Composite/recycled plastic lumber | $150–250 |
These figures cover lumber and hardware only, not soil to fill the bed, which is typically the larger expense overall. Building your own frame rather than buying a prefab kit usually saves 30–50% compared to an equivalent pre-made bed, even before accounting for the ability to size it exactly to your space.
Adding a Hardware Cloth Bottom for Pest Protection
If burrowing pests like gophers or voles are a known problem in your area, lining the bottom of the bed with galvanized hardware cloth (not chicken wire, which has gaps too large to stop determined diggers) before adding soil provides real protection.
Directions
- Cut hardware cloth to the exact inside dimensions of your completed frame, with a few extra inches on each side to fold up against the inside walls.
- Staple or screw the cloth securely to the inside bottom edge of the frame before filling with soil.
- Ensure there are no gaps where the cloth meets the frame, since pests will exploit even small openings.
This step adds modest cost and effort but can save an entire season’s harvest from underground pest damage in areas where this is a genuine, recurring problem rather than a remote possibility.
Frequently Asked Questions
How long does it actually take to build a raised bed from scratch?
For one person with basic tools and pre-cut lumber, assembly typically takes 1–2 hours for a standard 4×8 bed. Add time if cutting your own lumber, building multiple beds, or adding extras like a hardware cloth bottom for rodent protection.
Do I need corner posts, or can I just screw the boards directly together at the corners?
Direct corner screwing works for a lightweight, short-lived bed, but corner posts add significant structural strength and longevity, especially for taller beds or heavier soil loads. Given how little extra cost and effort posts add, they’re worth including for almost any build.
Should I add a bottom to my raised bed, or leave it open to the ground?
Leave it open to native soil in most cases — this allows roots to grow deeper and improves drainage. The exception is if you’re building on a hard surface like concrete or have a significant rodent problem, in which case a hardware cloth bottom (not solid wood) keeps pests out while still allowing drainage.
Can I build a raised bed without any power tools?
Yes, though it requires more effort — a hand saw for cutting (or pre-cut lumber from the store) and a manual screwdriver or hand drill for assembly both work, just more slowly than power equivalents. Pre-cut lumber from the lumber yard removes the cutting step entirely if you don’t have a saw.
How do I keep the wood from rotting even with a rot-resistant species?
Even naturally rot-resistant wood benefits from staying as dry as reasonably possible — avoid piling wet mulch directly against the outside of the frame, and ensure soil inside the bed drains rather than staying saturated against the wood long-term. A food-safe wood sealant can extend lifespan further if desired.
Is it cheaper to build my own bed or buy a prefab kit?
Building your own almost always costs less, often by 30–50% compared to an equivalent prefab kit, since you’re paying only for raw materials rather than manufacturing and packaging. The tradeoff is your own time and labor, plus needing basic tools — for someone without any tools or DIY interest at all, a prefab kit’s convenience may still be worth the premium.
Related Articles in Our Vegetable Gardening Guide
Free Tools
Final Thoughts
We hope this gives you a complete, no-guesswork path to building a raised bed that actually lasts. The lumber choice and corner joinery are where the real durability decisions happen — get those right and the rest of the build is genuinely straightforward. Once your bed is built, our soil filling and planting guide covers exactly what to do next.
Share this post with a fellow DIYer planning their own raised bed build — and let us know in the comments what size and material you’re going with. Happy growing!
