

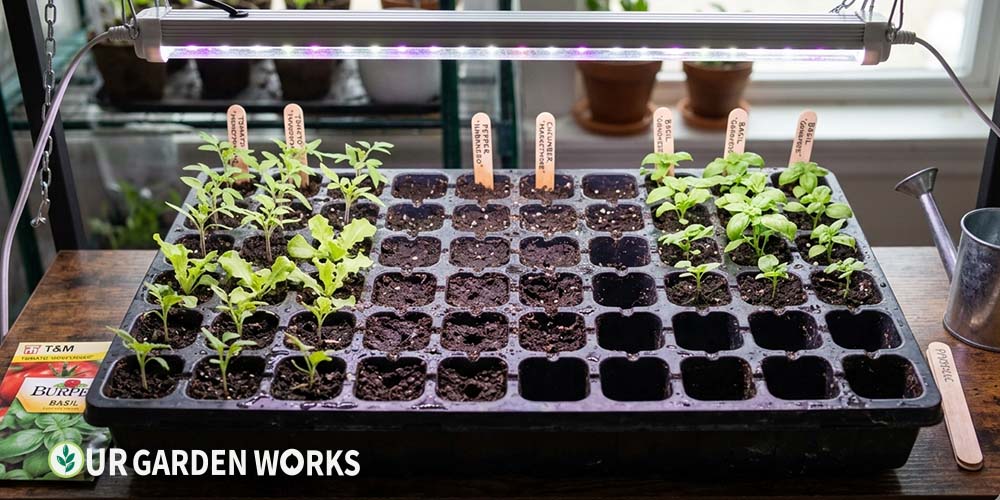
You did everything right. Filled the tray, sowed at the right depth, kept it moist, put the dome on, waited. A week later — half the cells sprouted and the rest are sitting there looking like you planted gravel. Or maybe nothing sprouted at all. You’ve started checking the tray three times a day and wondering what you did wrong.
Here’s the reassuring truth: seeds that won’t germinate almost always have one specific, identifiable, fixable cause. It’s almost never the seeds themselves, almost never bad luck, and almost never something mysterious.
The 7 causes below cover the vast majority of germination failures in home gardens — and each one has a fix that works the first time you apply it.
Work through them in order. The first three — temperature, moisture, and seed age — account for roughly 80% of failures.
Why are my seeds not germinating? The top 3 reasons seeds don’t germinate: soil temperature too cold for the crop (the single biggest cause for tomatoes, peppers, and cucumbers), inconsistent moisture during the germination window, and seeds that have lost viability from age or poor storage. Check all three before anything else. A $12 soil thermometer and a germination test on paper towel will diagnose most failures in 24 hours.
Before You Diagnose — Run a Germination Test
Before spending time fixing conditions, confirm whether your seeds are viable. A 10-seed paper towel test tells you whether the seeds are the problem or the conditions are the problem — and it saves you from spending another two weeks waiting on dead seeds.
The Paper Towel Germination Test
- Dampen a paper towel until moist but not dripping. Lay it flat.
- Place exactly 10 seeds spaced apart on one half. Fold the other half over to cover them.
- Seal inside a zip-lock bag. Label with crop name and date.
- Place somewhere warm — 75°F for most crops, 82–85°F for peppers.
- Check daily. Count sprouted seeds (a white root tip counts as germination).
- Results after maximum germination days for the crop:
- 8–10 sprouted (80–100%): Seeds are fine. Your problem is in the tray conditions.
- 5–7 sprouted (50–70%): Seeds are declining. Sow 2–3 per cell and buy fresh next season.
- Fewer than 5 (under 50%): Seeds are failing — don’t troubleshoot conditions, buy fresh seeds.
💡 Seed viability by crop — how long they last
Onions and parsnips: 1–2 years maximum — they decline fastest of any common vegetable. Sweet corn: 2–3 years. Tomatoes, peppers, cucumbers: 4–5 years stored properly. Squash, beans, beets: 3–4 years. Seeds stored in a cool, dark, dry location (airtight container in the refrigerator) stay viable significantly longer than seeds kept in a hot garage or humid kitchen drawer.
Cause #1 — Soil Temperature Too Cold
This is the single most common cause of germination failure for warm-season crops, and the one most gardeners don’t check because the air in the room feels warm enough.
Soil temperature and air temperature are not the same thing. A tray sitting on a cool basement floor can have soil at 58°F even when the room registers 68°F on the thermostat.
Below their minimum soil temperature, seeds either won’t germinate at all, or take three to four times longer than expected — long enough that the growing medium dries out, damping off moves in, or gardeners give up and assume the seeds are dead.
| Crop | Minimum Soil Temp | Optimal Soil Temp | Days at Optimal | Days at 60°F (no mat) |
|---|---|---|---|---|
| Peppers | 60°F | 82–85°F | 7–10 days | 21–35+ days (if at all) |
| Eggplant | 60°F | 80–85°F | 7–12 days | 21+ days |
| Tomatoes | 50°F | 75–80°F | 5–7 days | 14–21 days |
| Basil | 65°F | 75–80°F | 5–7 days | 14–21 days |
| Cucumbers | 60°F | 75–80°F | 3–7 days | 7–14 days |
| Squash/Zucchini | 60°F | 70–80°F | 4–8 days | 7–14 days |
| Broccoli/Kale | 45°F | 65–70°F | 5–10 days | 7–12 days |
| Lettuce | 35°F | 60–70°F | 2–5 days | 5–10 days |
| Beans | 60°F | 70–80°F | 4–7 days | 10–14 days |
| Onions/Leeks | 50°F | 65–70°F | 7–14 days | 14–21 days |
The fix: A seedling heat mat positioned under your trays during germination raises soil temperature 10–20°F above ambient room temperature. It’s the single most impactful piece of equipment for germination speed and consistency — more impactful than grow lights at the germination stage (seeds don’t need light to germinate; they need warmth).
Heat Mat Recommendations
-
VIVOSUN Seedling Heat Mat 10″ × 20.75″ — fits one standard tray, UL certified, 20W, raises temp 10–20°F above ambient. Reliable workhorse for home gardeners.
→ View on Amazon -
VIVOSUN Heat Mat + Digital Thermostat Combo — includes both the mat and a digital thermostat controller that holds exact temperatures. Best for peppers (set to 82°F and walk away). Thermostat pays for itself in consistent pepper germination alone.
→ View on Amazon -
BN-LINK Heat Mat + Thermostat Combo — strong alternative to VIVOSUN with ETL listing and 15-month warranty. Temperature range 70–85°F. Good option if VIVOSUN is out of stock.
→ View on Amazon
Remove trays from the heat mat once the first seedlings emerge. Heat mat is for germination — grow light takes over immediately at emergence.
💡 The pepper germination rule
Peppers have the strongest temperature dependency of any common vegetable. At 82–85°F soil temperature with a thermostat-controlled mat, expect germination in 7–10 days. At 65°F without a mat, many pepper seeds simply won’t germinate at all — not slowly, not eventually. Not at all. If you’ve had pepper germination failures, temperature is the cause more than 90% of the time. A thermostat-controlled heat mat is not optional equipment for peppers.
Cause #2 — Inconsistent Moisture
A germinating seed draws water continuously from the surrounding medium to activate its enzymes and power the sprouting process.
The moment that moisture supply is interrupted — even once, even briefly — germination in progress halts. The seed may have been 60% of the way to sprouting when it dried out. It won’t resume. You’ll find what looks like an ungerminated seed that actually began sprouting and stopped.
The frustrating part: the top surface of seed-starting mix dries out and looks dry long before the deeper layers do. Gardeners see a dry-looking surface, water heavily, the surface swings from dry to soggy and back. Neither extreme is what germination needs. The target is consistently moist throughout — not damp-on-top-and-dry-inside, not waterlogged.
The fix — four steps together:
- Pre-moisten the mix before filling trays. Add warm water to the bag of seed-starting mix, knead until it feels like a wrung-out sponge — moist throughout but not dripping. Fill trays with pre-moistened mix, not dry mix that you water afterward.
- Cover with a humidity dome immediately. The dome holds moisture at the seed level without requiring daily watering. It’s not optional — it’s how you maintain consistent germination moisture without constant intervention.
- Check daily and mist if the surface looks dry. Light misting from a spray bottle, not heavy watering from above. You’re maintaining surface moisture, not re-saturating the tray.
- Remove the dome the moment the first seedling emerges. The dome’s job ends at germination. Leaving it on after sprouting begins creates the humid, still conditions that damping off requires.
Cause #3 — Seeds Planted Too Deep
Each seed contains a finite energy reserve — enough fuel to push from the planting depth to the surface.
Plant it too deep and that fuel runs out before the seedling reaches light. It will have germinated successfully underground and simply died there, with nothing visible above the surface to tell you what happened. You’ll keep watering and waiting for something that’s already over.
Tiny seeds are most vulnerable: basil, lettuce, celery, savory, and most flowers are surface-sown or barely covered. Gardeners who aren’t thinking about it often bury them at the same depth as tomato or pepper seeds out of habit, and then wonder why germination was zero.
The fix — planting depth by seed size:
- Dust-fine seeds (celery, petunia): Surface-sow — press gently into moist mix but do not cover
- Tiny seeds (basil, lettuce, snapdragon): Surface-sow or cover with a dusting of vermiculite only
- Small seeds (tomatoes, peppers, broccoli, kale): ¼ inch deep
- Medium seeds (cucumbers, squash, melons): ½ inch deep
- Large seeds (beans, pumpkins, sunflowers — direct sow): 1–1½ inches deep
When in doubt, go shallower. A seed planted half as deep as it should be has twice the chance of reaching the surface. A seed planted twice as deep has almost none.
Cause #4 — Old or Poorly Stored Seeds
Seed viability declines every year after the pack date, and significantly faster in poor storage conditions.
Seeds kept in a hot garage over summer, a humid bathroom, or a kitchen drawer near the stove lose viability years ahead of seeds stored cool and dry. A packet labeled “packed for 2022” used in 2026 is four years old — acceptable for tomatoes and peppers if stored well, borderline for beans, and likely failed for onions.
The fix: Do the paper towel germination test from the top of this article on any seeds older than two years before you fill a full tray with them. Store seeds in an airtight glass jar in the refrigerator or a cool, dark pantry with a silica gel packet to absorb moisture. Seeds stored this way last significantly longer than their stated viability.
Cause #5 — Light Requirements Not Met
Most vegetable seeds germinate equally well in light or darkness. But a handful of crops have strong enough preferences that ignoring the light requirement causes complete germination failure:
| Need Light to Germinate (don’t cover) | Need Darkness (cover well) | Indifferent (most vegetables) |
|---|---|---|
| Lettuce, celery, dill, savory, most fine-seeded herbs | Onions, alliums, pansies, some flowers | Tomatoes, peppers, cucumbers, squash, broccoli, kale, beans, basil |
Lettuce is the most commonly killed by over-covering. It’s one of the fastest-germinating vegetables under good conditions — 2–5 days at the right temperature — and many gardeners never see that because they buried ¼ inch of mix over seeds that needed light to trigger germination. Surface-sow lettuce and press it in. Don’t cover it.
The fix: Check your seed packet for any light or darkness notation before sowing. If there’s no mention, the crop is likely indifferent and you can cover normally.
Cause #6 — Damping Off Killing Seedlings Before They Emerge
Damping off is a fungal disease complex that attacks seedlings at or just below the soil line.
In severe cases it can kill seeds before they ever emerge above the surface — the seed sprouted, the stem grew, but the fungus killed the stem at the soil line before the seedling broke through. You’ll see nothing, and assume germination failed. The real cause was damping off.
Signs that damping off is involved rather than simple non-germination: some cells sprouted and then collapsed at the base (the classic pinched-stem symptom), there’s white fuzzy growth visible on the soil surface, or the mix smells musty or sour.
The fix — five practices together prevent virtually all damping off:
- Use sterile seed-starting mix only — not garden soil, not reused old mix unless sterilized at 180°F for 30 minutes in the oven
- Remove the humidity dome immediately at first germination — the humid still air under the dome is damping off’s preferred environment
- Run a small fan near trays — airflow is the most effective damping off prevention that costs almost nothing
- Switch to bottom watering after germination — set trays in a shallow dish of water for 20 minutes, remove. Never water from overhead after seedlings emerge.
- Allow the soil surface to partially dry between waterings — not bone dry, but not constantly wet. Damping off thrives in wet, still, warm conditions. Eliminate those conditions.
Cause #7 — Wrong Season or Temperature for the Crop
Some seeds won’t germinate at certain times of year regardless of soil temperature, because they’ve evolved biological dormancy mechanisms.
More practically for home gardeners: trying to direct-sow lettuce outdoors in July when soil temperatures exceed 80°F gives zero germination — lettuce has a built-in heat dormancy that prevents it from germinating above 80°F. This is called thermodormancy, and it exists to prevent lettuce from germinating in summer conditions that would immediately kill the seedling.
The same applies in reverse: trying to direct-sow tomatoes or peppers outdoors in cold spring soil before it warms to their minimum germination temperature produces the same nothing.
The fix: Match sowing time to the crop’s season. For indoor seed starting timing, use our free Seed Starting Calculator — enter your ZIP code and crop list and it returns the exact indoor start dates and transplant dates for every crop. For the full regional chart by zone, our when to start seeds indoors guide shows the monthly calendar for every zone. For outdoor timing tied to your specific frost dates, our frost dates tool gives you the exact numbers.
Quick Reference — 7 Causes at a Glance
| # | Cause | Most Affected Crops | Fastest Diagnostic | Fix |
|---|---|---|---|---|
| 1 | Soil temp too cold | Peppers, tomatoes, basil, cucumbers | Soil thermometer under the dome | Heat mat — ideally with thermostat |
| 2 | Inconsistent moisture | All crops equally | Surface feels dry/wet in cycles | Pre-moisten mix + dome + daily misting |
| 3 | Planted too deep | Basil, lettuce, celery, fine seeds | Dig a cell gently — find the seed | Surface-sow small seeds, ¼” for tomatoes |
| 4 | Old/dead seeds | Onions, parsnips, any old stock | Paper towel germination test | Buy fresh seeds for low-viability crops |
| 5 | Light requirements missed | Lettuce, celery, dill (need light) | Check seed packet for light notation | Surface-sow light-needing crops |
| 6 | Damping off | All seedlings, especially in humid domed conditions | White mold on surface, pinched stems | Remove dome + fan + bottom water + dry surface |
| 7 | Wrong season | Lettuce (summer), all warm-season crops in cold soil | Check timing against frost dates | Seed starting calculator for exact dates |
How Long to Wait Before Giving Up
One of the most common supplementary mistakes: giving up too early and resowing into a tray that hasn’t finished germinating.
The rule: wait at least 1.5 times the maximum germination days stated on the seed packet before concluding failure. If the packet says 7–14 days, wait 21 days before making any decisions. Cold conditions alone can double germination time, so a tray that looks like nothing is happening at day 10 may still be working its way up at day 18.
If nothing has happened after this extended wait, go through the seven causes above. In almost every case, one of them is the answer.
Frequently Asked Questions
My seeds germinated in some cells but not others on the same tray — what causes uneven germination?
Uneven germination in the same tray usually points to moisture inconsistency (some spots dried out, others didn’t), soil temperature variation (corners and edges of trays run cooler than the center on a heat mat), or seed quality variation within a packet (some seeds closer to the end of viability than others). The most reliable fix for uneven germination is a thermostat-controlled heat mat (consistent temperature throughout) and a dome (consistent moisture throughout). Germination inconsistency typically isn’t a technique problem — it’s an environment consistency problem.
Can I reuse seed-starting mix from a failed tray?
Only after sterilizing it. Spread on a foil-lined baking sheet and heat at 180–200°F for 30 minutes. This kills damping off pathogens and other disease organisms without destroying the physical structure of the mix. Let it cool completely before reusing — and refresh it by mixing in 10–20% new perlite if it’s been compacted. If the mix smells strongly musty or sour, discard it — the pathogen load may be too high to reliably sterilize.
I tried everything and my pepper seeds still won't germinate — what am I missing?
For peppers specifically: confirm soil temperature, not air temperature, is reaching 80–85°F. A $12 soil thermometer pushed into the mix under the dome is the only way to verify this — room temperature and even heat mat surface temperature don’t tell you what’s happening at seed level. Second: check seed viability with the paper towel test. Third: make sure the seeds aren’t more than 3 years old. If all three check out and you’re still getting nothing at 14+ days, the seeds themselves are most likely the issue.
Do I need to water seeds after sowing if I pre-moistened the mix?
Usually not immediately — that’s the point of pre-moistening. Check the surface under the dome daily. If the top layer looks genuinely dry (not just slightly paler than when wet — actually dry to the touch), mist lightly. With a dome on, a well-pre-moistened tray can often go 3–5 days without needing any additional moisture. Don’t water on a schedule — water when the surface indicates it needs it.
Related Articles in Our Seed Starting Guide:
- Seed Starting Guide – Everything You Need to Start Seeds Indoors (Hub)
- How to Germinate Seeds Fast — Paper Towel Method, Pre-Soaking & Heat Tricks
- How to Start Seeds Indoors: Complete Step-by-Step Guide (2026)
- Seed Starting Mix vs. Potting Mix — What’s the Difference and When to Use Each
- When to Start Seeds Indoors — Region-by-Region Schedule (2026)
- How to Harden Off Seedlings Without Shocking Them (7-Day Schedule)
- Free Frost Dates by ZIP code tool
- Vegetable Gardening Guide
Final Thoughts
We hope this guide helped you pinpoint exactly what’s going wrong — because once you identify the specific cause, the fix is almost always immediate and simple.
Temperature and moisture solve 80% of germination failures before you even get to the other five causes. For everything that happens once seeds successfully sprout, our Seed Starting Guide hub maps the full journey from germination through transplanting.
Share this post with a fellow gardener who’s ready to get growing — and let us know in the comments which of these 7 causes turned out to be your culprit — and whether the heat mat made the difference you expected. Happy growing!
