

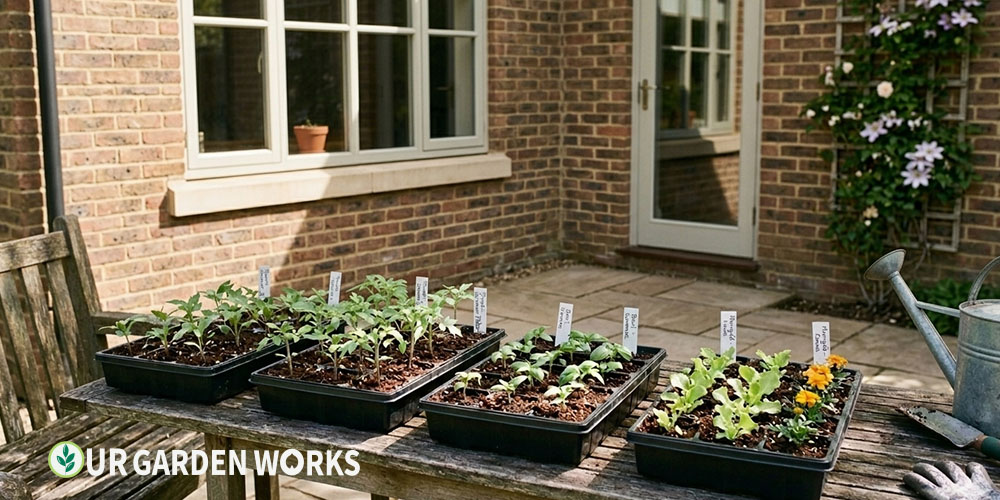
You’ve done everything right. 6 weeks of seed starting, the right grow light, the right mix, careful watering. Your seedlings are the healthiest they’ve ever been. And then you put them outside and they collapse within 48 hours — limp, pale, and looking nothing like the confident plants that just left your grow light.
This is transplant shock from skipping or rushing hardening off. It happens to experienced gardeners too, usually after a year where everything worked fine and they pushed the process faster.
Hardening off is not optional, and it can’t be significantly shortened. But it also doesn’t need to be complicated. Here’s the exact process that works.
Quick Answer: Hardening off takes 7–10 days minimum. Start with 1–2 hours of sheltered shade outdoors, increase outdoor time and sun exposure gradually each day, and leave plants out overnight only once nights are reliably above 50°F and the seedlings have experienced a full week of outdoor conditions. Rushing produces transplant shock — there’s no shortcut that works.
Why Hardening Off Is Non-Negotiable
An indoor-grown seedling under a grow light has lived its entire life in conditions nothing like the outdoors. The differences aren’t subtle:
- Light intensity: Direct outdoor sun on a clear day is 10–20 times more intense than most grow lights. A seedling accustomed to grow-light intensity gets leaf scorch within hours of direct sun exposure without gradual adaptation.
- Wind: Still indoor air means seedlings have never had to develop the structural strength to hold themselves upright against movement. Wind causes physical stem damage on unadapted seedlings.
- Temperature swings: Indoors, temperature is fairly stable. Outdoors, a warm afternoon and a cool night require physiological adjustment the plant hasn’t made.
- Humidity: Indoor air (especially in heated homes) is often drier than outdoor air in spring, but outdoor air is more variable — and the transition causes water stress even when you’re watering correctly.
The goal of hardening off is to give the plant time to adapt to each of these differences gradually — increasing leaf thickness and UV tolerance, developing stronger cell walls, and building the structural stem strength that comes from wind exposure.
None of these adaptations happen in a day or two. The 7–10 day minimum exists for biological reasons, not arbitrary ones.
The 7-Day Hardening Off Schedule
This schedule works for tomatoes, peppers, cucumbers, squash, basil, and all other warm-season crops. Cool-season crops (broccoli, kale, lettuce, peas) are more cold-tolerant and can move through this schedule slightly faster.
| Day | Outdoor Time | Location | What to Watch For |
|---|---|---|---|
| Day 1–2 | 1–2 hours | Sheltered, full shade. Protected from wind. | Any wilting = too long. Bring in immediately if leaves droop. |
| Day 3–4 | 3–4 hours | Dappled or indirect light. Light breeze OK. | Slight leaf curl at midday is normal. Severe curl = too much too fast. |
| Day 5 | 5–6 hours | Morning direct sun only. Shade from midday. | Watch for any bleached-looking patches on leaves (sun scorch). Shade if it appears. |
| Day 6 | Most of the day | Full sun with midday shelter available. | Leave in full sun unless leaves show active stress. Water in the morning. |
| Day 7 | Full day outside | Full sun, normal conditions. | Bring in only if frost is forecast. The plant should tolerate conditions without wilting. |
| Day 8+ | Overnight outside | Full outdoor exposure including nighttime. | Only if nights stay above 50°F for frost-tender crops. Check forecast. |
💡 Start hardening off 10 days before your planned transplant date
Build in 2–3 extra days beyond the 7-day minimum as a buffer for bad weather days when you can’t put plants out, for any days where seedlings showed stress and you backed off the schedule, and for the variability of spring weather. Starting 10 days before you want to transplant gives you this buffer without extending your indoor growing period.
Choosing the Right Outdoor Location for Each Stage
Days 1–3: The Sheltered Shade Zone
For the first three days, you want a location that provides outdoor air and temperature without the two most stressful elements: direct sun and wind. Good locations:
- North side of the house (no direct sun)
- Under a large shade tree
- On a covered porch facing away from prevailing wind
- Against a fence in full shade
What you’re doing in these first days is getting the plant accustomed to outdoor air temperature and humidity variation. Even without sun stress, this is a significant change from indoor conditions.
Days 4–5: The Filtered Light Zone
Move to a location with dappled or indirect light — morning sun if possible, because it’s less intense than afternoon sun. Under a tree with partial canopy, on the east side of the house where morning sun is filtered, or in a spot that gets direct sun for 2–3 hours maximum.
Days 6–7: Full Exposure
Your normal garden location. Full sun, normal wind exposure. By Day 6 the plant should be physiologically ready for this — the gradual introduction over the previous 5 days has done the work.
Signs You’re Moving Too Fast
These are the warning signs that tell you to slow down and give seedlings another day at the current stage before advancing:
- Wilting within the first hour outdoors: Bring inside immediately. You’ve exceeded the plant’s current tolerance. Back up one step in the schedule tomorrow.
- Pale, bleached patches on leaves (sunscald): Too much direct sun too fast. The chlorophyll was destroyed by UV intensity the leaf wasn’t prepared for. Move back to shade. The affected leaves won’t recover but the plant will.
- Crispy, brown leaf edges: Wind damage combined with low humidity. Find a more sheltered location and hold at this stage for an extra day.
- Purple leaf discoloration (phosphorus lockout): Often happens when outdoor temperatures are colder than expected. If night temperatures are dropping into the 40s°F, bring plants in and wait for warmer conditions.
⚠️ One bad day can set you back a week
A single day of sun scorch or severe wilting doesn’t just stress the plant in the moment — it sets back the hardening timeline significantly. An overstressed plant needs recovery time before it can continue the adaptation process. It’s always better to move more slowly through the schedule than to rush and trigger a stress response you then have to recover from.
Special Considerations by Crop
Tomatoes and Peppers — Extra Care Needed
These are the most commonly hardened-off crops and the ones where rushing most often causes problems.
Peppers in particular are sensitive to cold temperatures — nights below 55°F can cause leaf drop and flower drop even in a hardened plant. Don’t leave peppers out overnight until nights are consistently above 55°F. For tomatoes, 50°F is the threshold.
Basil — The Most Sensitive of All
Basil is more cold-sensitive than tomatoes and turns black at temperatures below 50°F — even briefly. A clear spring day that drops to 48°F overnight will damage hardened basil.
Add 3–5 extra days to the basil hardening schedule and don’t leave it outside overnight until nighttime temperatures are reliably above 55°F. See our basil growing guide for the full cold temperature management approach.
Broccoli, Kale, and Cool-Season Crops
These crops actively prefer cold and can tolerate light frost. You can move through the hardening schedule faster (5–7 days), start in cooler outdoor temperatures, and leave them outside in nights as low as 28–32°F once fully hardened. They don’t need the same temperature threshold as warm-season crops.
Cucumbers and Squash
Very sensitive to cold — even hardened cucumbers and squash can set back if temperatures drop below 50°F.
These crops are also typically started only 3–4 weeks before their outdoor transplant date, so timing is tighter. Don’t rush the hardening schedule to compensate for starting these late indoors.
What to Do If Bad Weather Interrupts Your Schedule
A week of cold rain happens every spring. Here’s how to handle it without losing your place in the hardening schedule:
- One or two skipped days: The plant doesn’t significantly de-adapt in 1–2 days. Resume where you left off when weather permits.
- 3–5 skipped days indoors: Back up one step in the schedule. The plant has partially de-adapted and needs a re-introduction day before advancing.
- A full week back indoors: Start the schedule over from Day 1. The adaptation is largely lost after a week back in indoor conditions.
Using Cold Frames During Hardening Off
A cold frame — a box topped with a transparent lid — provides an intermediate environment between fully indoor and fully outdoor.
Seedlings in a cold frame get outdoor temperature variation and light while being protected from wind and heavy rain. Opening the lid progressively each day mimics the gradual hardening schedule and is an excellent approach in climates with unpredictable spring weather.
The Day Before Transplanting
On the final day of hardening off, before you transplant, do these three things:
- Water well in the morning — fully hydrated plants tolerate transplant stress better than dry ones. Water the night before and the morning of transplant.
- Transplant in the evening or on a cloudy day — even hardened plants benefit from not having to deal with peak midday sun on the day of transplanting. Evening transplanting means the plant has a cooler night to begin establishment before its first full day in the ground.
- Check soil temperature — even with hardened plants ready, soil temperature matters more than calendar date. Confirm with a thermometer that soil at 4 inches deep has reached the target temperature for your crop. Use our frost dates tool to know your window and confirm with the thermometer.
Frequently Asked Questions
Can I use a cold frame to harden off seedlings faster?
A cold frame doesn’t shorten the biological adaptation timeline, but it does make the process easier — you can leave plants in the cold frame and progressively open the lid rather than carrying trays in and out each day. The adaptation still takes 7–10 days; the cold frame just provides a manageable intermediate environment. For gardeners with dozens of trays, this is a significantly easier approach than daily tray-moving.
My tomatoes wilted badly on Day 1 — are they ruined?
Probably not. Bring them inside immediately, water if the soil is at all dry, and let them recover in a cool (not dark) indoor location. Most plants that wilt from hardening stress recover fully within 24–48 hours indoors. Once they look normal again, restart the schedule from Day 1 with a more sheltered location and less time outside. The stress set them back but didn’t permanently damage them in most cases.
Do I need to harden off seedlings I bought from a nursery?
Yes — but probably a shorter version. Nursery transplants are typically grown in a greenhouse (more like indoor conditions) but may have been in an outdoor display for a few days. If they’ve been sitting outside at the garden center for a week, they may already be hardened. If they came straight from a greenhouse, give them 3–5 days of gradual outdoor exposure before transplanting.
Is it OK to leave seedlings outside overnight on Day 5?
For most warm-season crops, only if nighttime temperatures are above 50°F and no frost is forecast. Check the 10-day forecast. If there’s any chance of frost or temperatures in the 40s°F, bring frost-tender crops in for at least another 2–3 nights. Cool-season crops (broccoli, kale, peas) can safely stay outside overnight from Day 4–5 in temperatures as low as 28°F once the daytime hardening has progressed adequately.
Related Articles in Our Seed Starting Guide
- How to Start Seeds Indoors: Complete Step-by-Step Guide (2026)
- 15 Seed Starting Mistakes That Kill Seedlings (And How to Avoid Them)
- How to Set Up a Seed Starting Station for Under $100
- When to Start Seeds Indoors — Region-by-Region Schedule (2026)
- How to Grow Basil Indoors and Outdoors — Complete Guide (2026)
- Free Frost Dates Lookup Tool
Final Thoughts
We hope this guide means your seedlings make the transition from grow light to garden without the drama of transplant shock.
The 7-day schedule feels slow the first time you follow it — and then you see how confidently hardened plants establish compared to rushed ones, and you never skip it again. For timing help on when to start this process, our free seed starting calculator gives you exact dates for every crop in your season.
Share this post with a fellow gardener who’s ready to get growing — and let us know in the comments how many days your hardening process takes and whether you’ve had transplant shock setbacks before. Happy growing!
