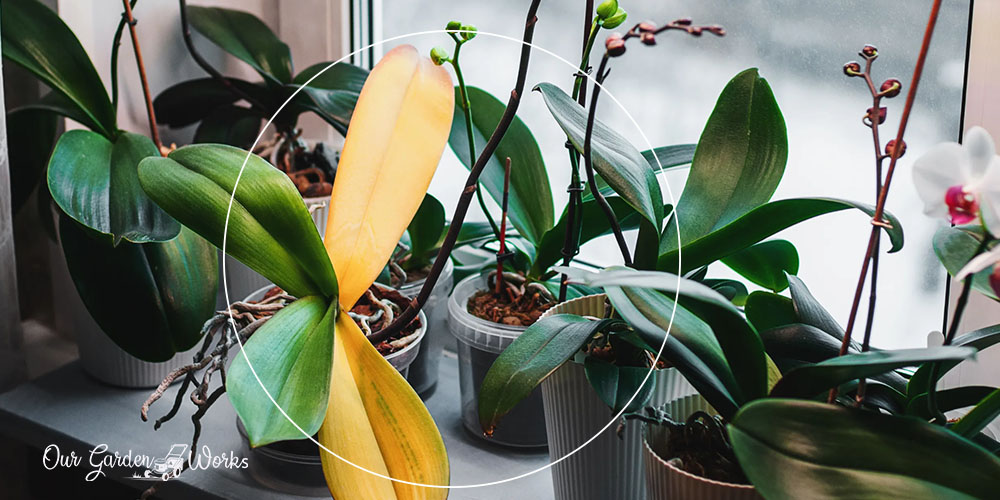
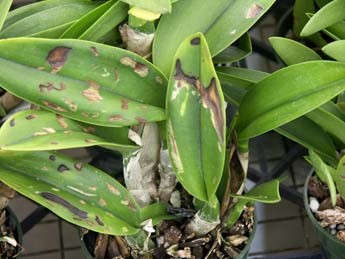
Orchid leaves turning yellow is a stress signal that helps alert orchid growers that something is not working right.
Orchids are prized for their long-lasting foliage that lasts for weeks to months. They rarely get sick but when they do, they easily get into risky situations like root rot and total dehydration.
In this post, discover the common cause of yellowing leaves in orchids so you can provide the best treatment and save them as soon as possible.
We will also share some tips on how to save a dying orchid using the techniques recommended by professional orchid growers.
7 Common Causes of orchid leaves turning yellow and How to treat them
Orchids have a different biological structure than houseplants, which makes it hard for new plant parents to diagnose the cause of yellowing leaves. As tropical plants, orchids prefer an airy and light to a soilless environment.
Orchids also require humid air and indirect light, any adjustments to these conditions can stress them causing the following problems:
#1 Underwatering (Drought stress)
Orchids usually develop yellow and wrinkled leaves due to drought stress.
Possibly, your potting medium might be draining too fast, leaving the roots still thirsty after watering. Since orchids don’t need too much watering, some gardeners overuse fast-draining potting materials or skip watering their orchids leading to neglect.
The telltale signs of drought stress not only manifest on the leaves but also on the roots. A well-watered orchid has green and plump roots. Dehydrated and thirsty orchids have yellowing and limp leaves with roots that turn light gray.
The entire orchid potting medium must be moist so that the roots can absorb ample moisture. The potting materials must hold water long enough for the roots to get adequate moisture.
Ideal materials to add are chunky materials like:
- Pine bark.
- Sphagnum moss.
- Charcoal.
- Bark chips.
The ideal watering routine for orchids is every 7 days during spring and summer and bi-weekly every fall and winter.
As the orchid uses up moisture through its plant processes, its roots will slowly turn light gray. If left unwatered, the root will continue to dry and the leaves will start to get limp, wrinkled, and yellow.
How to rehydrate under-watered orchids
The fastest way to rehydrate mildly dehydrated orchids with yellowing leaves is to deeply water them. However, some orchids have been severely dry to the point that it is on the verge of dying.
For severely or dying orchids due to extreme drought, here are some methods that you can try:
Microfiber method:
Extremely dehydrated orchids must be placed in a special treatment pot before placing them in a new pot. They need to recover first so they can go back to their own natural habitat.
The microfiber method allows the dried roots to slowly absorb moisture through microfiber strips without blocking the air. We call this method orchid ICU pot recovery.
Here’s how to make it at home:
(1) Cut the strips of microfiber cloth and dip them in water. Squeeze each strip and drape them around the viable roots of the orchid.
(2) Make sure to leave spaces between the strips to let the roots breathe and recover well. Leave a few inches at the end of the strip so it will stay at the bottom of the cup.
(3) Place the orchid with microfiber strips in a cup with a hole at the bottom Under the cup place a small saucer with water.
The water from the saucer will be gradually absorbed by the microfiber which will trigger the development of humidity in the cup.
When the dehydrated roots finally absorb enough moisture and turn green and plump, that’s when you can place them back in their pot.
Soaking method
Some gardeners prune the dried orchid, place them in a new pot with holes, and soak the whole potting medium in water for 30 minutes to an hour. Then let the pot sit in areas with indirect light.
In doing this method, the potting material should be chunky and doesn’t hold too much water, like styrofoam, to prevent root rot.
Reminder: Do not attempt to remove the yellowing leaves of orchids. Unlike other plants, orchids will suffer from injury when their leaves are forcibly removed. Plant injury will worsen the stress of the plant which will make it weaker and more susceptible to pests and diseases. Bear with the unsightly yellow leaves for the time being until it naturally falls on their own.
#2 Low humidity (Drought stress)
Orchids have roots that not only acquire moisture from the soil but also from the air through humidity. They are tropical plants and their ideal humidity level is around 40% to 60%.
If the air is too dry, especially during the cold months, the orchids may fail to maintain their plump green leaves and end up with yellowing patches.
How to improve indoor humidity for stressed orchids
The immediate thought most people have when dealing with humidity issues is to buy a humidifier.
However, before you spend some money on any gadgets, here are some natural ways to improve the indoor humidity of your home that will suit the needs of your stressed orchids:
- Place more houseplants indoors.
- Air-dry your damp laundry indoors.
- Place your recovering orchids in the bathroom.
- Place a dish of water under the pots.
Place an indoor fountain or mini water garden.
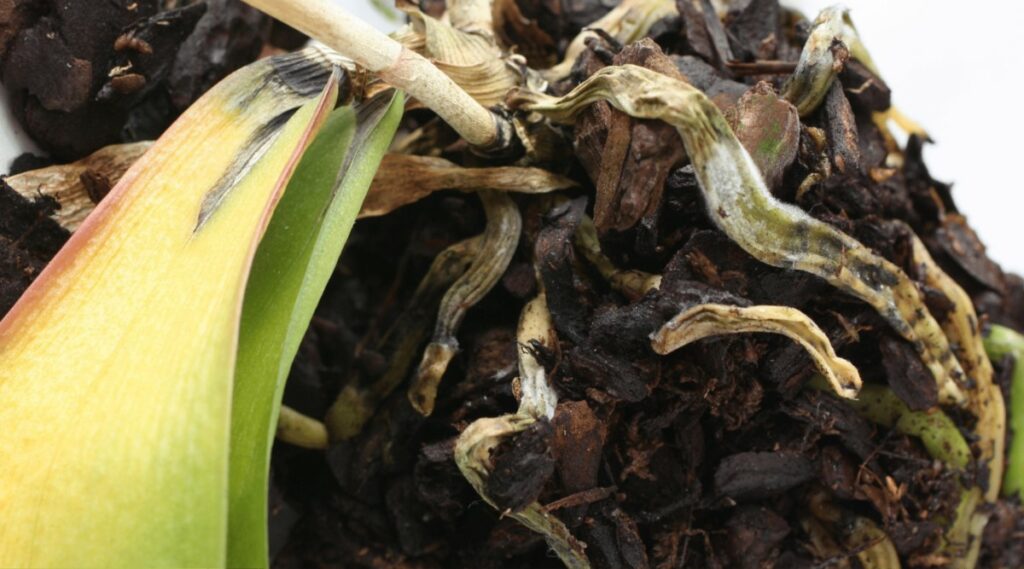
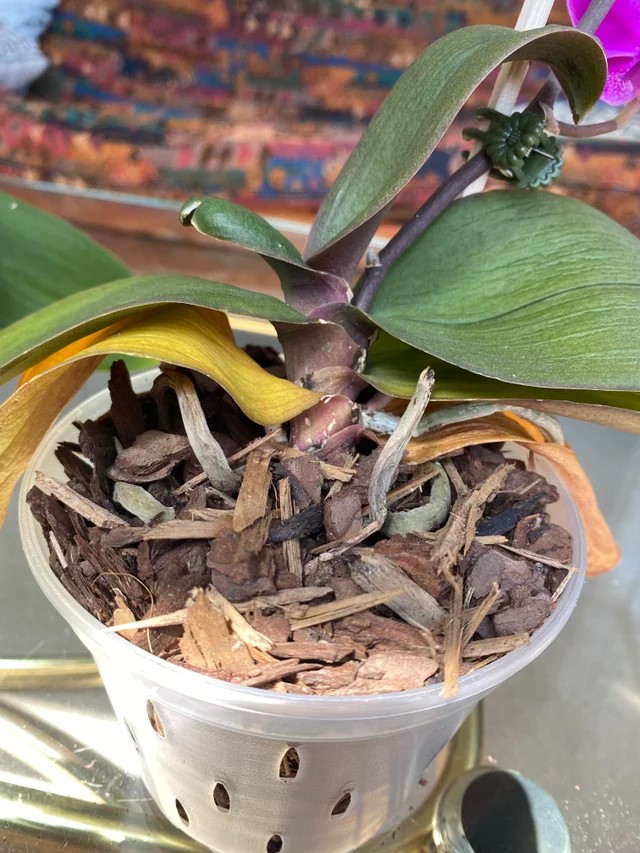
#3 Root rot
Orchids are not a fan of wet feet. They don’t need too much moisture from the roots because they also absorb moisture through humidity.
Watering orchids more than once a week can drown the roots because they also use them to absorb oxygen during transpiration.
When the roots get soaked and rot, they will fail to transport nutrients and moisture to leaves leading to chlorosis or yellowing patches. Simply put, the orchid is suffering from nutrient deficiency and stress due to its rotten roots.
Aside from excessive watering, root rot also comes from:
- Overpotting or poorly draining potting medium.
- Pots without drainage holes
- Overhead watering.
Most orchids bought from nurseries have very packed peat moss and beautiful pots without drainage holes. These factors can affect the airflow around roots and retain too much water, causing overwatering and rotting issues.
When you receive an orchid as a gift or bring home orchids from the nursery, check the potting medium they use. If it’s too cramped, dissect the potting medium and let the roots breathe.
Reduce the potting medium or replace them with more chunky material like pine bark chips, charcoal, or bark.
How to treat orchid leaves turning yellow due to root rot
When treated early, orchids with root rot can still be saved. The best treatment is to re-pot them into a more well-draining potting medium. Here’s how:
(1) Remove the orchid from its pot and inspect the rotten parts that are causing the yellow leaves. There are 3e types of rotting in orchids which include root rot, stem root, and crown rot.
A single orchid can have one to three types of rotting, especially if it has already spread throughout the plant.
If the core part of the orchid is already rotten, it may have a few chances of survival, unless it has developed a viable Keiki that you can cut and propagate in a new pot.
If the orchid only suffered a few rotten roots, then it can still survive.
(2) Prune or cut the rotten roots that are mushy and black using clean pruning shears or scissors. The green and plump roots are the viable ones that the plant will use to survive.
(3) If the orchid is soaked, you can let the roots dry out for a day or two before repotting the plant.
However, if only a few roots are rotten, re-pot the orchid in a new pot with more chunky materials. Do not compress the potting medium and allow it to be as airy as possible.
Delay the fertilization as it may stress the orchid even further. Wait for around a week or two before you fertilize it with half the strength of orchid fertilizer.
#4 Fertilizer burns
Orchids are no exception to overfertilization, which causes yellowing leaves due to chemical burns. House plant fertilizers are too strong for orchids.
According to the American Orchid Society, orchids prefer a ‘weakly, weekly’ approach during fertilization. This means you fertilize them with ¼ strength fertilizer during weekly watering instead of once-a-month fertilization.
If you mistakenly applied too much fertilizer on your orchids, the excess salts will cause a chemical burn on the roots. Due to the injury, the roots will fail to absorb nutrients and moisture in the soil which causes yellowing leaves.
How to treat over-fertilized orchids
Just like with over-fertilized plants, the accumulated salt in the pot should be leached through running water. Here’s how you can do it with your orchids:
- Place the pot in the sink.
- Let the flowing water run through the potting medium for 10 to 30 minutes. Through this process, the fertilizer salts will dissolve naturally.
- Then let the pot drain properly for several hours in the sink. Don’t fertilize the orchid for a week or two to let the roots recover.
- Once you see new growth, that’s the only time you can start fertilizing the orchids again but decrease the strength in half. Add more water and gradually increase the strength as the orchid regains its health.
Pro tip: Liquid orchid fertilizers are the best option for feeding orchids. They absorb it easily and allowing them to transport the nutrients faster throughout the plant system. Gardeners can manage their strength better by decreasing the dilution measurements.
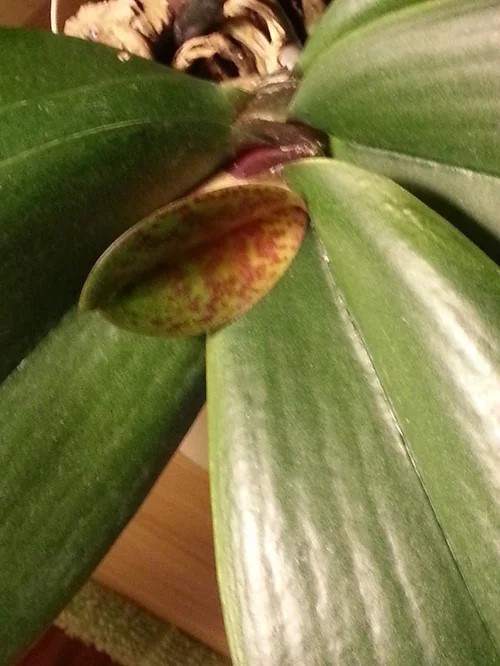
#5 Temperature change injury: Heat or cold injury
Orchids are tropical plants which means they prefer moderately warm temperatures to thrive.
If they are exposed to frost or extreme heat, they experience some injuries like yellowing and browning of leaves and even plant health decline. However, some orchid varieties need occasional winter chill to bloom better for the next season.
Late spring frost, cold drafts, and heat waves of summer can be detrimental to orchids. They need the temperature and airflow they need to maintain the leaf temperature and continue with the chlorophyll process. They grow best at 50°F to 80°F with no threat of frost.
If the orchid suffers from temperature injury, it will also show other signs other than yellowing leaves, such as:
- Necrotic spots and sunken areas on the leaves.
- Leaf lesions.
- Stunted growth.
How to treat temperature-stressed orchids
Cold and heat-stressed orchids are vulnerable to pests and disease. So, you should be extra careful not to add salt to the wound of your poor orchids.
Here’s how you can treat them:
Heat-stressed orchids
Orchids are particularly more sensitive to heat stress which causes them to recover at a much slower pace than cold damage.
- Frequently water and mist the orchid and place it in a partially shaded area.
- Sparingly use fertilizers to not stress the orchid any further. Allow it to recover without forcing it to grow new leaves through fertilization.
- Make sure to leach the potting medium once in a while to remove the accumulation of salts.
Cold-stressed orchids
Compared to heat stress, orchids adapt better to cold stress. You only need to move them to a new location and do the following:
- Improve the humidity around the orchid and keep it away from direct sunlight.
- Don’t water them until they start developing new growth.
- When new roots start to emerge, you can begin fertilizing them with ¼ strength every week.
#6 Too much sun
The natural habitat of orchids is under the canopies of trees. They will die if exposed to direct sunlight since their leaves can only handle limited heat. When the limit is reached, the plant will stop the production of chlorophyll leading to leaf discoloration until it dies.
Orchid leaves heat up when performing their plant processes. It needs humidity and shade to cool off the leaves, maintain chlorophyll production and prevent leaf burns.
How to treat orchid sunburns
If you suspect that the orchid leaves turning yellow is due to excessive sunlight exposure, the plant can still be saved as long as there are still some viable leaves and roots. Move them to a shady part of the garden with partial sun.
If you think that your orchid not only suffered sun damage but also heat stress, consider repotting it on a clay pot. Clay pot improves the humidity around the roots which will help them recover faster.
#7 Transplant shock
Orchids also experience transplant shocks which manifest as limp and yellowing leaves. They often show these signs when they are transplanted at the wrong time and environment.
Orchids take around 3 to 4 weeks to recover from transplant shock. They are more susceptible to plant pests and diseases during this period. So, make sure you keep an eye on them while they recover.
How to treat orchids with transplant shock
Transplanting is a normal procedure in growing plants. However, it comes with risks since the orchid will need to adapt to its new environment which creates temporary stress.
To avoid putting your orchids in extreme transplant shock, here are some reminders:
- Do not re-pot your orchids during the cold months of the year. Unlike other plants that need to be dormant, orchids must be in a warm environment upon transplant to ensure that they can regenerate their severed roots and actively adapt to their new pot.
- Ease the stress of the orchid by maintaining the humidity at 60% as a minimum.
- Increase the watering for the first few days since new potting soils tend to drain faster than the old ones.
- Be patient and don’t force their growth through fertilization. Allow the orchids to recuperate and adapt in their own time.
Do yellow orchid leaves turn green again?
Some people assume that orchid leaves turning yellow can still turn back to green.
However, once leaves experience dryness and discoloration, they can longer go back to their former color or form. They will wither, die, and fall, and new growth will replace them.
Can you pull or cut the yellow orchid?
Do not cut or prune the yellowing orchid leaves to avoid causing wounds to the stem. Unlike other plants, orchid leaves appreciate their independence in cleaning themselves. Once it is ready to let go of its old leaves, the joint where it is connected to the leaf will be fully healed.
If you meddle in this process, the area where the leaves are attached will be an open wound that can attract pests and diseases.
Final Thoughts
We hope that this post helped you learn more about orchids and to deal with orchid leaves turning yellow.
It is a single symptom that can come from varying causes. Knowing where to check and what to consider is crucial in providing the right treatment to save your orchids from total plant health decline.
Learning to read what your plants are telling you is the most valuable skill in plant care, and once you start recognising the patterns, you’ll catch problems before they become serious. Share this with a fellow plant lover and let us know in the comments what was causing yours!