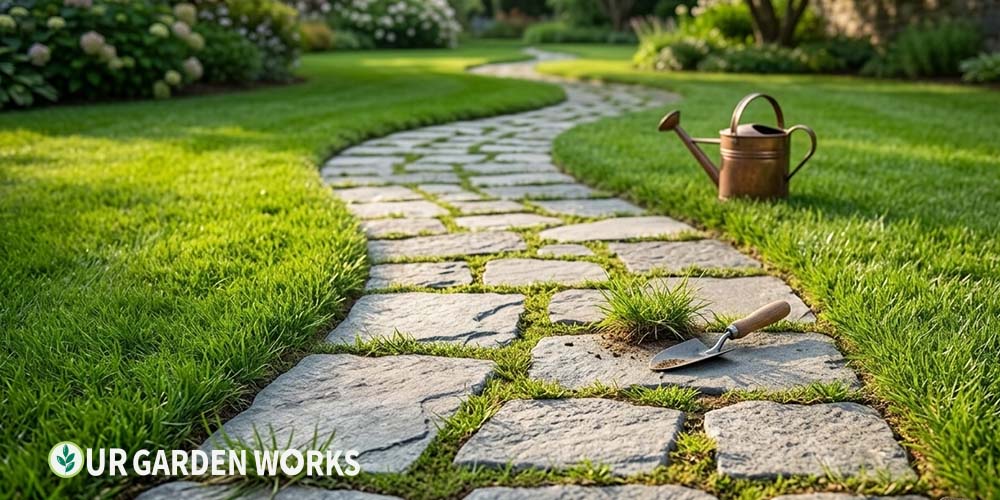
A flagstone path is one of those projects that looks intimidating from the outside and turns out to be mostly patience once you understand the order of operations.
The stones themselves aren’t hard to place. The part that actually determines whether your path lasts twenty years or heaves apart after one winter is everything underneath them that nobody sees once it’s finished.
We’ve laid more than a few flagstone paths over the years, and the mistakes we see most often all trace back to skipping the base. People get excited about the stones — picking colors, arranging patterns — and treat the foundation as an afterthought. Flip that order and the project goes much better.
This guide walks through the whole process in the sequence that actually works, from excavation through the final joint fill. By the end, you’ll have a clear path (literally) to a flagstone walkway that stays level and weed-free for decades.
How to Lay a Flagstone Path: Excavate 6–8 inches deep along your path line, add a 4-inch compacted gravel base, top with 1 inch of leveling sand, then set flagstones with ½–1 inch gaps. Tamp each stone firmly into the sand, check level as you go, and fill joints with polymeric sand or soil and creeping groundcover. Budget a full weekend for a 20-foot path.
What You’ll Need
Materials and Tools
- Flagstone (irregular natural stone — bluestone, sandstone, or limestone are common choices)
- Crushed gravel or road base (¾-inch minus is ideal) for the foundation layer
- Coarse leveling sand
- Landscape fabric (optional but recommended under the gravel)
- Garden hose or string and stakes to mark the path line
- Flat shovel and digging spade
- Hand tamper or plate compactor (rent for larger paths)
- Rubber mallet
- 4-foot level and a long straightedge board
- Polymeric jointing sand, or soil and groundcover plugs for planted joints
Step 1 — Plan and Mark Your Path
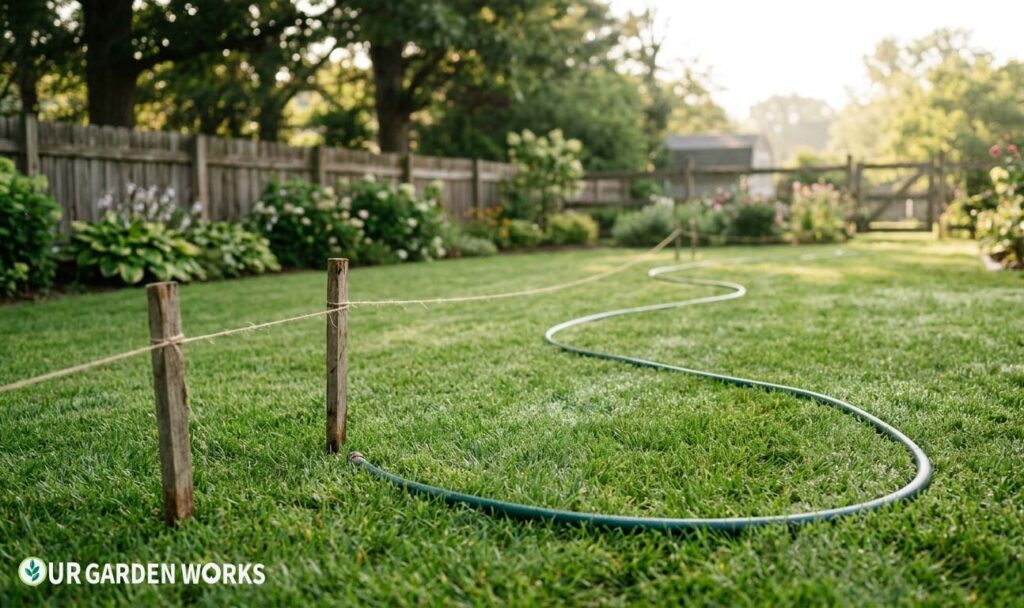
Decide on your path’s width and route before you dig anything. A single-file path needs at least 24 inches of width; a path meant for two people walking side by side, or for a wheelbarrow, needs 36–48 inches. Lay a garden hose along the route to preview the line, then mark both edges with stakes and string or a can of marking paint.
Walk the route a few times before committing to it. It’s much easier to adjust a hose on the lawn than to redo excavation after the fact. If the path curves, our guide to curved versus straight paths covers how gentle curves should be to look intentional rather than awkward.
Step 2 — Excavate to the Right Depth
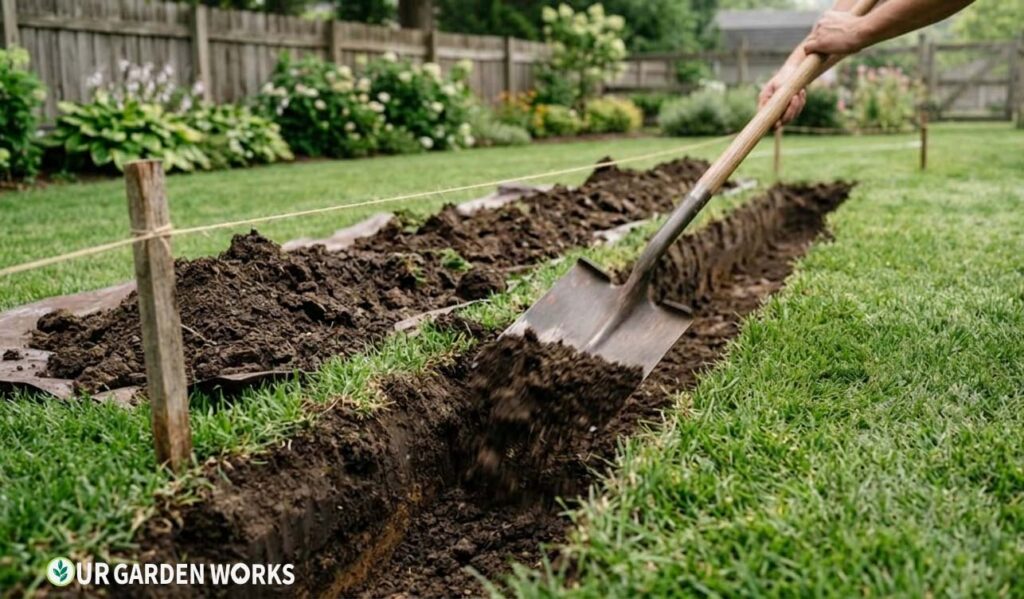
Directions
- Remove sod and soil to a depth of 6–8 inches across the full marked width of the path.
- Keep the excavation edges as clean and straight as you can — this makes the gravel base much easier to contain.
- Check the slope. A path should have a very slight grade (about 1 inch of drop per 8 feet) for drainage — dead flat paths pool water after rain.
- Lay landscape fabric across the excavated area before adding gravel. This single step is the most overlooked weed-prevention measure in the entire project.
💡 Don’t skip the fabric
Landscape fabric under the gravel base blocks weeds and grass from pushing up through your joints from below – which is a different problem than weeds blowing in from above. Skipping it doesn’t ruin the path, but you’ll be pulling persistent grass runners out of your joints within a year or two.
Step 3 — Build the Gravel Base
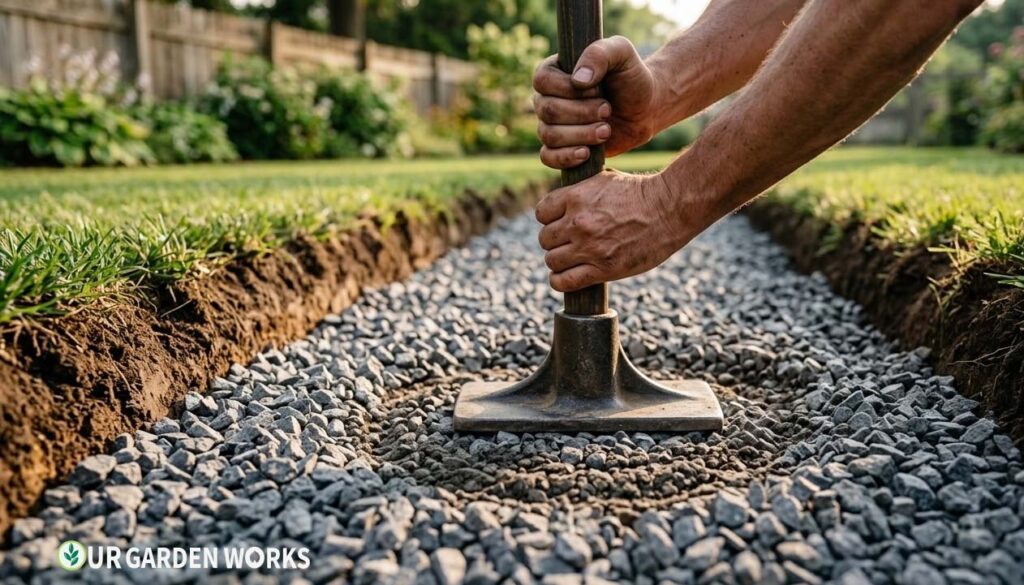
Add 4 inches of crushed gravel across the excavated area, spreading it as evenly as you can with a rake. This base layer is what actually prevents your flagstones from sinking, shifting, and heaving with freeze-thaw cycles — it’s doing more structural work than the stones themselves.
Tamp the gravel firmly using a hand tamper for small paths or a rented plate compactor for anything longer than 15–20 feet. Compact in two passes if the gravel is loose. A properly compacted base should feel solid underfoot with no give when you walk across it.
Step 4 — Add the Leveling Sand Layer
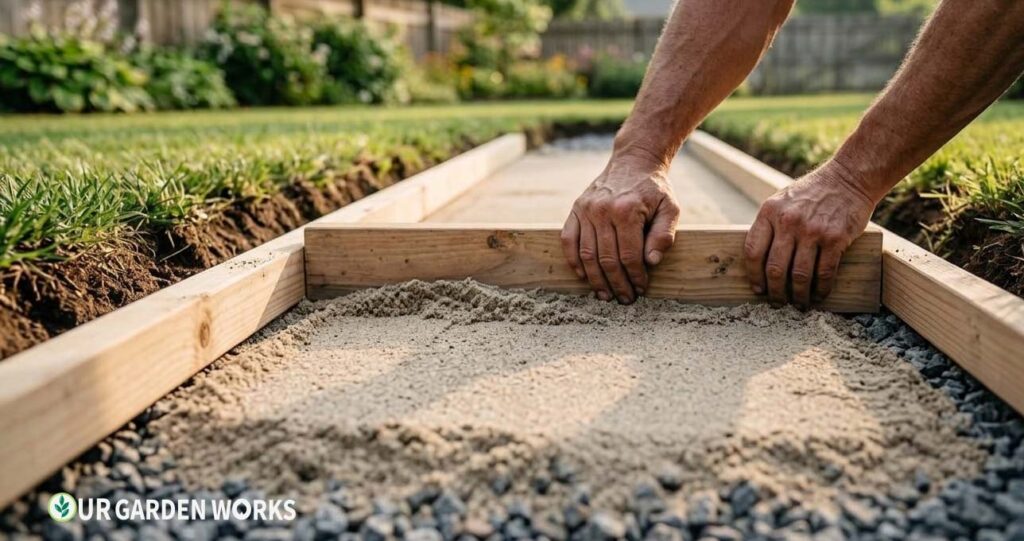
Spread 1 inch of coarse sand evenly over the compacted gravel. This thin layer is what lets you fine-tune each stone’s height and tilt during placement — gravel alone is too coarse to make small adjustments in.
Use a screed board (a straight piece of lumber dragged across two guide rails) to level the sand to a consistent depth across the whole path. Don’t compact the sand layer itself — you want it loose enough to nestle stones into.
Step 5 — Set the Flagstones
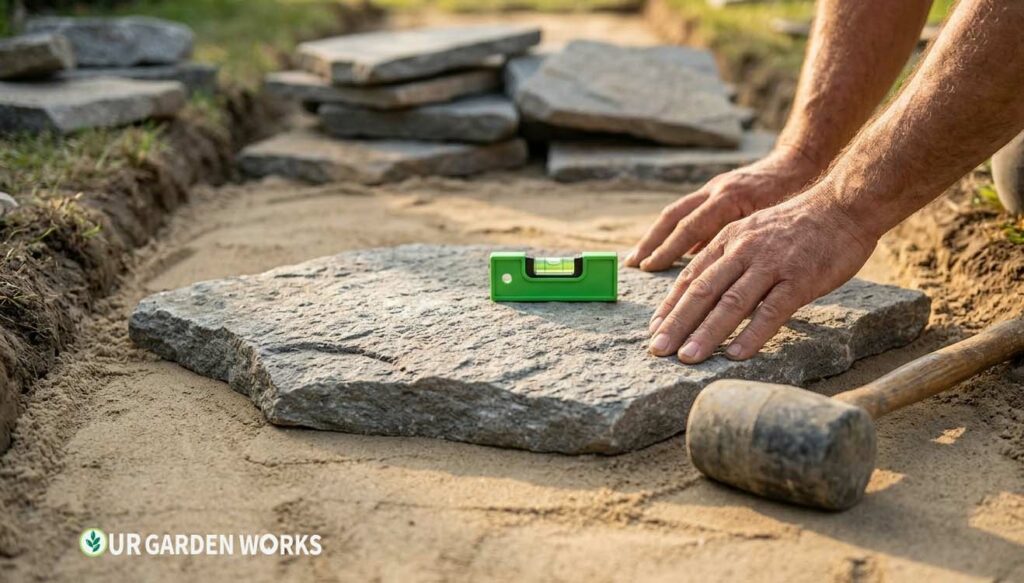
Directions
- Start at one end of the path and work toward the other, dry-fitting stones before committing to a final layout. Lay out your full stone selection on the grass nearby first so you can match shapes and sizes as you go.
- Set each stone into the sand and press down firmly. Use a rubber mallet to tap it level — check with your 4-foot level resting across multiple stones, not just on one.
- Leave gaps of ½ to 1 inch between stones for jointing material. Irregular flagstone naturally produces irregular gaps — embrace it rather than forcing a tight, uniform fit.
- If a stone rocks or sits unevenly, lift it, adjust the sand beneath it (add a bit where it’s too low, scoop some out where it’s too high), and reset it.
- Step back periodically and look at the overall flow of the path from a distance — small inconsistencies in joint width are far more noticeable from above than they feel while you’re working close to the ground.
Step 6 — Fill the Joints
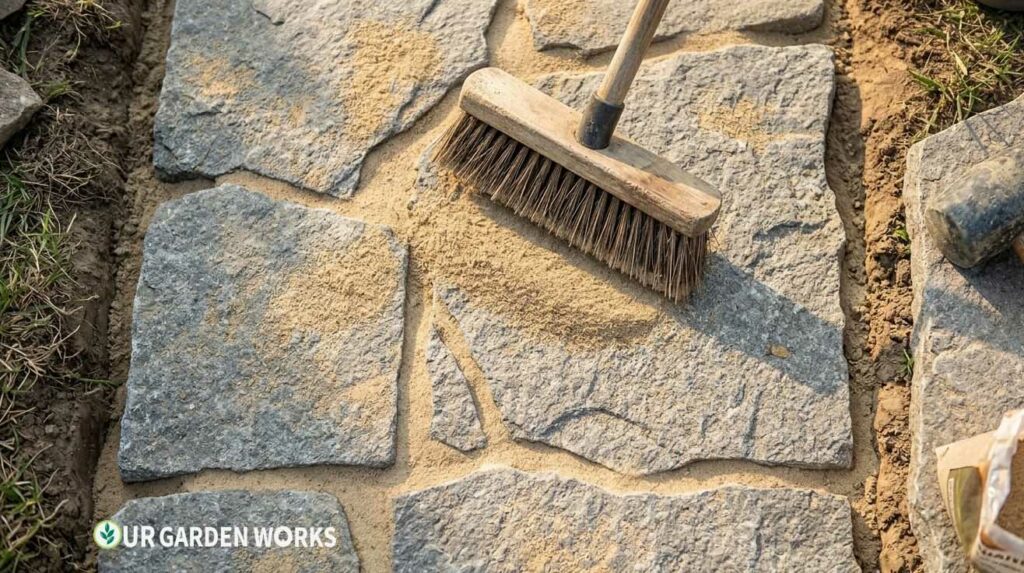
This is the step most DIY flagstone paths skip entirely, and it’s the difference between a path that looks finished and one that looks like it’s still under construction. You have two solid options, and the right one depends on the look you’re after.
Polymeric sand: Sweep it into the joints, tamp it down, mist lightly with water to activate the polymer binder, and let it cure for 24 hours. This locks the stones in place and resists weed growth far better than plain sand. It’s the lower-maintenance option.
Soil and groundcover: Fill joints with a sandy soil mix and plant low groundcover like creeping thyme or Irish moss between the stones. This option looks softer and more cottage-garden in style, but needs more upkeep — see our guide to plants for garden paths for varieties that handle light foot traffic well.
⚠️ Don’t use mortar joints outdoors without a real footing
Mortaring flagstone joints looks clean in photos, but without a proper concrete footing beneath the entire path, the rigid mortar cracks as the ground naturally shifts with seasons. Sand-set flagstone with flexible joints is far more forgiving of minor ground movement and is the standard approach for residential garden paths.
Frequently Asked Questions
How much does it cost to lay a flagstone path myself?
For a 20-foot path at 3 feet wide, expect $300–600 in materials depending on stone type and local pricing, versus $1,500–3,000+ if you hire a contractor for the same footprint. Flagstone itself is usually the biggest cost — irregular natural stone runs $4–12 per square foot depending on type and region.
Do I really need a gravel base, or can I just set stones in the dirt?
Setting stones directly in dirt works temporarily but fails within a season or two as the stones sink unevenly, especially after rain softens the soil. The gravel base is what prevents this — it’s compacted, well-draining, and resistant to the freeze-thaw heaving that destabilizes stones set straight into native soil.
Can I lay flagstone over an existing concrete path?
Yes, with a thin mortar bed instead of the gravel-and-sand base described above, since concrete already provides the stable, well-draining foundation that gravel is meant to create. This is a faster project than building from scratch, though you lose the ability to adjust path width or shape.
Related Articles in Our Garden Paths Guide
Final Thoughts
We hope this guide has shown you that a flagstone path is well within reach for a determined weekend project — the secret really is in everything you do before the first stone goes down. For all our backyard and landscaping guides, our backyard design guide hub links to everything in this series.
Share this post with a fellow gardener who’s ready to start their own path project — and let us know in the comments what stone you’re using and how big your path will be. Happy growing!