

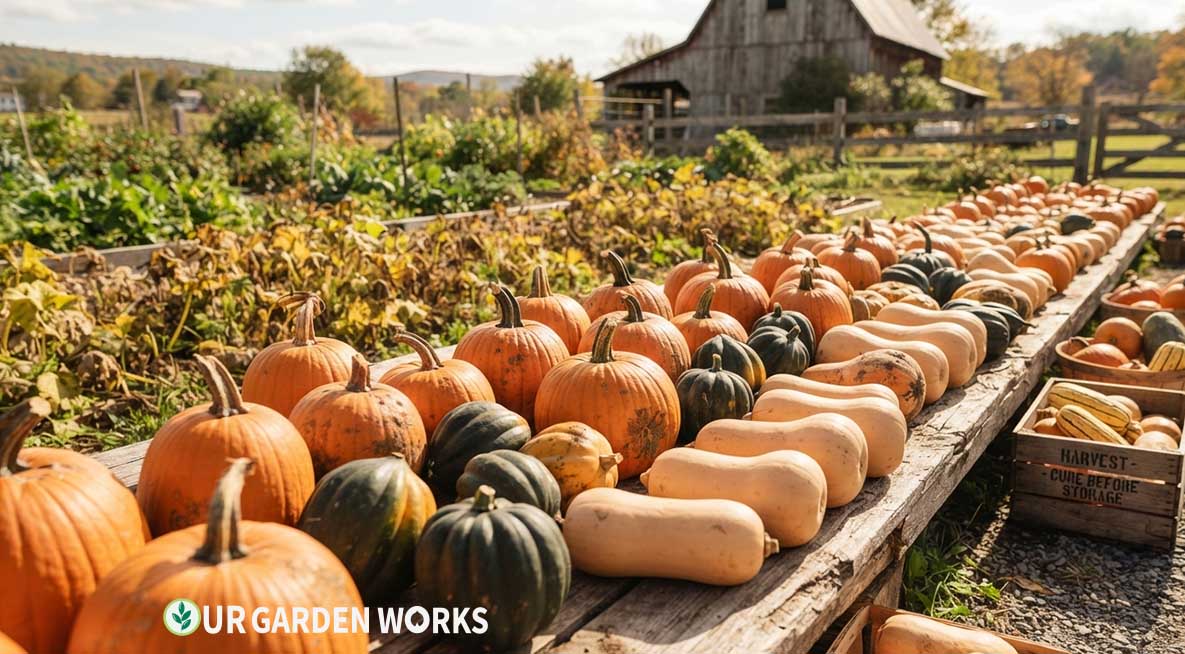
Winter squash rewards patience in a way few other vegetables do. Harvest too early and the flesh stays watery and bland. Skip curing and even a perfectly timed harvest rots in storage within weeks instead of lasting months.
Both of these mistakes are completely avoidable once you understand the two-stage process winter squash actually needs — knowing when to harvest, and then what to do immediately after.
Quick Guide: Harvest winter squash when the rind is hard enough to resist a fingernail scratch and the stem has started to dry and turn brown. Cure for 1–2 weeks in a warm, dry spot (80–85°F if possible) before moving to cool, dark storage. Properly cured winter squash stores for 2–6 months depending on variety.
How to Tell When Winter Squash Is Actually Ready
The fingernail test is the most reliable single check. Press a fingernail firmly into the rind — if it resists and doesn’t puncture easily, the squash has matured enough to harvest.
A rind that dents or punctures easily under light pressure means the squash needs more time, even if the color looks fully developed. Color change happens before the rind fully hardens, which is why color alone is an unreliable harvest signal.
| Variety | Color at Maturity | Typical Days to Maturity |
|---|---|---|
| Butternut | Deep tan, no green streaks | 80–100 |
| Acorn | Dark green to orange, dull (not glossy) finish | 75–95 |
| Spaghetti squash | Pale to bright yellow | 85–100 |
| Hubbard | Blue-gray to deep orange depending on type | 90–110 |
| Pumpkin (storage type) | Deep orange, rind firm | 90–120 |
The stem is the second key indicator. A mature squash’s stem dries, hardens, and turns brown or tan, in contrast to the green, flexible stem of an immature fruit still actively growing.
How to Harvest Without Damaging the Fruit
Directions
- Cut the stem with clean pruning shears, leaving 2–3 inches of stem attached to the squash.
- Never carry squash by the stem — it can break off, creating an open wound that invites rot during storage.
- Handle each squash gently. Even small bruises or scratches in the rind become entry points for decay over a long storage period.
- Harvest before the first hard frost, since freezing temperatures damage the rind even on otherwise mature fruit.
⚠️ A broken stem doesn’t mean the squash is ruined
If a stem breaks off accidentally, that particular squash should be used soon rather than stored long-term, since the open wound is a genuine rot risk. It’s still perfectly edible — just plan to eat it sooner rather than cure and store it.
Why Curing Is Not Optional
Curing is the step most home gardeners skip, and it’s exactly why so many “stored” winter squash actually rot within a few weeks instead of lasting through winter as the name promises.
During curing, the squash’s rind continues to harden and any minor surface wounds from harvest begin to heal over with a protective callus.
This callusing process is genuinely similar to the wound-sealing that happens with cut succulent leaves or stem cuttings — exposed plant tissue needs time to seal before it’s safe to store in conditions where moisture and organisms could exploit an open wound.
Skipping straight to cool storage without curing first means storing squash with surface vulnerabilities still wide open, which is exactly when rot organisms get their foothold.
How to Cure Winter Squash Correctly
Directions
- Move harvested squash to a warm, dry, well-ventilated spot — ideally 80–85°F, though anywhere reasonably warm and dry works.
- A sunny spot outdoors (if no rain is forecast) or a warm room indoors both work well.
- Cure for 1–2 weeks, turning occasionally to expose all sides evenly.
- After curing, the rind should feel noticeably harder than at harvest, and any minor cuts should look dry and sealed rather than fresh.
Storing Cured Squash Long-Term
Once cured, move squash to a cool, dark, dry location — a basement, unheated closet, or pantry around 50–55°F is ideal. Avoid the refrigerator, which is too cold and humid for most winter squash varieties.
Don’t let squash touch each other in storage. Direct contact traps moisture between fruits and can spread rot from one piece to its neighbors.
Check stored squash every couple of weeks, removing any that show soft spots or mold promptly before it spreads to others nearby.
How Long Different Varieties Actually Store
| Variety | Storage Life (cured, proper conditions) |
|---|---|
| Acorn | 5–8 weeks (shortest-storing common variety) |
| Butternut | 3–6 months |
| Spaghetti squash | 1–3 months |
| Hubbard | 5–6 months (one of the longest-storing types) |
| Pumpkin (storage type) | 2–4 months |
Acorn squash’s shorter storage life is a fixed trait of the variety, not a sign of poor curing — even perfectly cured acorn squash simply doesn’t last as long as a Hubbard does, due to differences in rind thickness and natural moisture content.
Why the Fingernail Test Is More Reliable Than Color
It’s worth understanding why rind hardness, not color, is the gold-standard maturity check. As winter squash matures on the vine, the rind undergoes a genuine structural change — cell walls thicken and the surface develops a waxy, protective cuticle layer that resists punctures.
Color development, by contrast, can happen somewhat independently of this structural hardening, particularly in warm weather where pigment changes can occur faster than the rind has actually finished toughening. A squash can look fully colored while the rind underneath is still too soft to survive long-term storage.
This mismatch is exactly why relying on color alone leads some gardeners to harvest squash that looks ready but spoils faster than expected — the fingernail test checks the trait that actually predicts storage life, while color checks a related but separately timed process.
Adjusting Curing for Humid or Rainy Climates
The standard curing advice assumes reasonably dry conditions, which isn’t a given everywhere. In humid climates, outdoor curing can struggle to actually dry and harden the rind the way it would in a drier region.
If you’re gardening somewhere humid, prioritize indoor curing in a warm room with a fan for air circulation over outdoor curing, even if the temperature outside seems adequate. Moving air matters more than raw temperature in humid conditions, since it’s what actually helps moisture evaporate from the rind surface.
In persistently rainy weather, bringing squash indoors immediately after harvest, rather than attempting any outdoor curing time at all, avoids the risk of rind damage from prolonged dampness before curing even has a chance to begin.
Frequently Asked Questions
My squash got hit by a light frost before I harvested — is it ruined?
A light frost on the fruit itself (not the vine) usually doesn’t ruin it, especially if harvested and used promptly rather than cured for long storage. A hard, prolonged freeze is more concerning and can cause internal damage that shows up as soft spots within days of harvest.
Can I cure squash indoors if I don't have a warm outdoor spot?
Yes — a warm room, a sunny windowsill, or even near (not touching) a heat source indoors works fine for curing. The key factors are warmth, dryness, and decent air circulation, none of which require being outdoors specifically.
How do I know if a squash has gone bad in storage?
Soft spots, visible mold, an off smell, or a rind that’s gone mushy in any area are all signs of spoilage. Check stored squash periodically and remove any showing these signs immediately, since rot can spread to squash touching or stored near the affected piece.
Does curing change the flavor of winter squash?
Yes, generally for the better — curing allows some of the squash’s starches to convert to sugars, similar to what happens with cold-hardy vegetables after a light frost. Many winter squash varieties taste noticeably sweeter and richer after a proper cure than they would straight from harvest.
Can I harvest winter squash before it's fully mature if I need the space in my garden?
You can, but expect a less flavorful, more watery result, and the immature squash won’t store nearly as long even with proper curing. If garden space is the real constraint, it’s better to harvest slightly underripe and plan to eat it soon than to expect long-term storage performance.
Should I wash winter squash before curing or storing it?
It’s generally better to avoid washing before storage, since added moisture on the rind surface can interfere with the drying and hardening process curing is meant to accomplish. A light wipe to remove visible dirt is fine, but skip a full wash until you’re ready to actually cook with the squash.
Why This Two-Stage Process Is Worth the Patience
Harvesting and curing winter squash correctly takes more deliberate effort than most vegetable harvests, which are often as simple as picking and eating or storing immediately.
The payoff is real, though — a properly cured squash genuinely can feed a household well into winter from a single fall harvest, at a fraction of the effort a fresh winter vegetable garden would require.
Once you’ve gone through this process once and seen a squash actually last the months it’s supposed to, the extra patience at harvest time stops feeling like an inconvenience and starts feeling like the obvious right way to do it.
Related Articles in Our Vegetable Gardening Guide
Final Thoughts
We hope this gives you the confidence to actually get the multi-month storage life winter squash is famous for, instead of watching it spoil within weeks. The fingernail test and the curing step really are the two details that make all the difference.
For more on growing and storing other fall and winter crops, our vegetable gardening guides cover the rest.
Share this post with a fellow gardener about to harvest their squash patch — and let us know in the comments which variety you’re growing this year. Happy growing!
