It’s too late to split a hive when: (1) the hive has swarmed, (2) it’s too cold, and (3) when the hive lacks a queen, food, and/or workers.
The US$ 24-billion beekeeping industry profits from royal jelly, beeswax, propolis (bee glue), bee bread (pollen pellets), apitoxin (bee venom) and commercial crop pollination. And, of course, honey.
According to a 2018 report, the current US market consumes more than 500 million pounds of honey – 75% imported. Only 25% is local.
Why is that?
Although there are more than 210,000 US beekeepers, most are hobbyists with 24 hives or less. Only about 2,000 have commercial operations with 300+ hives.
And now, the bad news:
Bee populations are declining due to habitat destruction, climate change, fertilizers, pathogens, pesticides, and so on. First observed in 1947, it’s still going on. In 2019 alone, US apiarists lost more than 40% of their colonies.
And that’s not all.
The death of bees threatens industries, human health, well-being, and survival.
Each year, the loss of bees puts at risk 35% of the world’s food production – and at least 90 crops that bring in over $24 billion to the US economy – all of which depend on bee pollination.
The good news? You can be a hero.
You can multiply your beehives and increase bee populations.
At the same time, while hives can be split anytime during the bee season, knowing when it’s too late can save you a lot of time, money, and frustration.
This guide explains when it’s best to split beehives and when it’s too late.
Here’s what you’ll learn:
- Bee seasons and hive splitting
- Hive parts and hive splitting
- Why you should split a hive
- The easier way to split a hive
Aside from helping in the national economy and human survival, what’s in it for you?
Profit. And were not just talking honey.
Compared to the $4.74 billion honey industry, annual profits from hive rentals to fertilize crops in the USA is worth $15 billion.
1. Bee Seasons and Hive Splitting
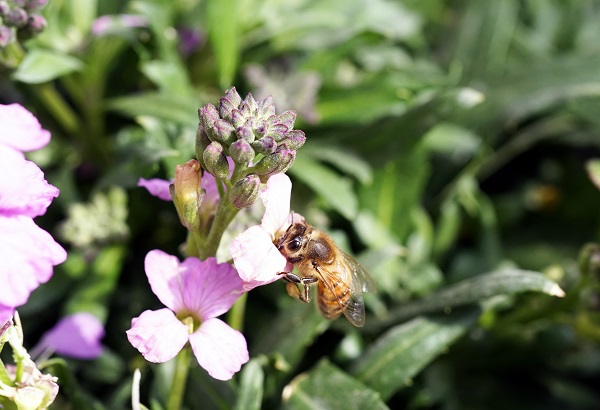
Bees are most active in warm weather (about 95⁰F) and the flowers are in full bloom, which is called nectar flow or pollination season.
If you’re in or around North Dakota, Montana, California, or South Dakota, your bee season begins in the spring, continues throughout the summer – even into the fall. In colder climes, however, bee season is shorter while tropical climates have year-round bee production.
Why is this important to you?
First, your location determines weather, temperature, and rainfall, which determines if you have a longer or a shorter bee season. Second, your bee season determines the best time to split a hive – and when it’s too late.
Here’s a general guide:
Table 1: Season-based Guide to Hive Splitting
| Months | Seasonal Points | Description and Guide |
| From September to December | EARLY to MID-WINTER: A new year begins for a colony of honeybees | Young bees survive the winter; old bees begin to die. Propolis seals cracks to keep out cold air. Bees cluster to keep eggs warm. When field nectar is scarce, drones are starved to death. Note: Egg-laying and brood-rearing rarely stop in subtropical, tropical, and mild winter areas. PRO TIP: The hive is still weak; don’t split it. |
| From December to January | LATE WINTER: Egg laying begins | Colonies with good stores of honey and pollen in the fall will begin to feed the queen, and she begins egg-laying during late December or early January. Colonies that lack food delay brood-rearing until fresh pollen is collected; they emerge from winter with smaller populations. PRO TIP: If a hive is weak, don’t split the hive. |
| From January to February | EARLY SPRING: Days are longer. | Colonies with lots of young bees, pollen, and honey during winter have stronger populations in the spring. Days are longer, hotter, and more sources of pollen and nectar appear. Overcrowding begins. PRO TIP: Split a strong hive before they swarm. |
| From February to April | EARLY to MID-SPRING: Reproduction, nectar flow and honey flow | The queen lays more drone eggs. Bees prepare new queens. Surplus honey and pollen are stored in new combs while broods are reared in older combs. PRO TIP: You reduce honey production if you split a strong, productive hive just before or during a nectar flow. |
| From April to October | MID-SPRING to MID-SUMMER: March to June in central, southern, & western states | Before the main nectar flow, just before the first virgin queen is ready to emerge, the colony swarms when the day is warm. The queen and about half of the bees leave and find a new home. PRO TIP: When swarming happens, it’s too late to split a hive. |
| From October to September | LATE SUMMER to EARLY WINTER | Daylight is at its longest. Hive populations are at a peak. Each hive collects nectar and pollen and stores, honey, for the coming winter. PRO TIP: When it’s too cold, it’s too late to split hives. |
A split can be made at any time of the active bee season, which begins when temperatures warm up in the late spring. The following signs help beekeepers prepare to split their hives before swarming begins.
Seasons and Hive Splitting
- When there’s a mild winter and/or early spring
- When there are early pollen and early nectar flow
- In May before pollination or after pollination until early August (varies each year)
- When food resources are plentiful and there is a rapid increase in colony growth
- When bees are unproductive after the nectar flow (split your hives without affecting the production of honey).
Temperature and Hive splitting
- When night temperatures allow a smaller bee population to stay warm
- At night when the bees are all inside the hive (they may cluster at the entrance)
- At midday when temperatures are above 43.3ºC (110ºF) and bees stay in the hive
- When the days are warm and sunny and the forager bees are busy and out of the hive
Hive Condition and Hive Splitting
- When a queen is more than a year old
- When bees prepare new queens (observe for queen cells) with royal jelly
- When bees rear bee drones earlier (observe for drone cells)
- When a parent colony has at least six up to 10 brood frames (so that each hive has a lot of brood and honey)
At the same time, keep in mind that bees don’t go by our rules. Instead, they behave according to location, weather, pollen and nectar supplies, rainfall, and so on. Consult experienced local apiarists for best information.
PRO TIP: When splitting a hive in the spring, you are using the swarm’s queen cells so there’s no risk of the new hive rejecting the queen, and no need for the hive to acclimatize to the queen.
If you’re just starting, any pro apiarist will tell you to know each part of your hive, which is key to the hive splitting process. Let’s do that now.
2. Hive Parts and Hive Splitting

In apiaries, bee cultivation revolves around hives, defined as manufactured homes for bees. Modern bee colonies can live in multi-storey brood nests in the Langstroth or Dadant design.
In any case, bees and humans work together to create each hive.
While the beekeeper provides the box with cover, base, and about 20 frames with foundations sheets, the bees complete the hive by excreting propolis and creating wax combs.
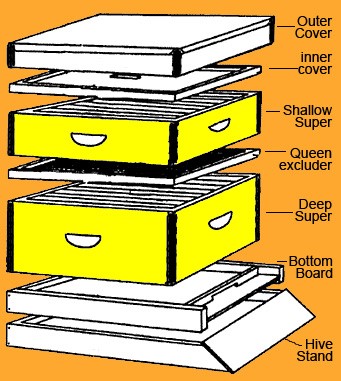
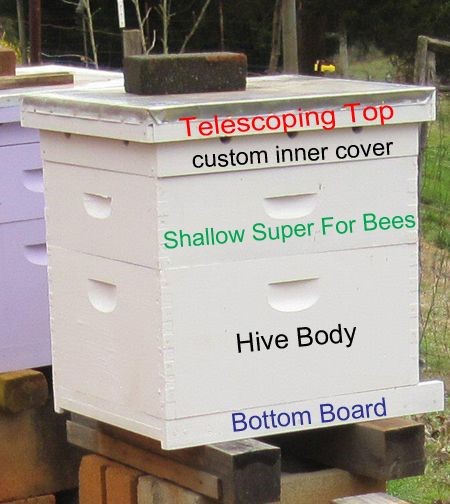
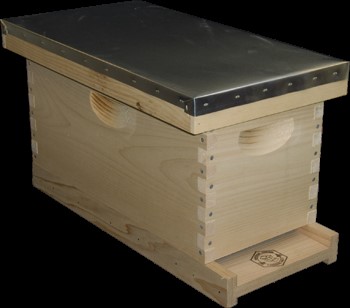
The 10-frame US standard hive has the following key parts.
Table 2: Hive-structure Guide to Hive Splitting
| Parts | Description and Guide |
| Box structure | Bee hives are stacks of four-sided boxes, each with a shallow section, a deep section, a bottom board, and a cover. To hold the supers, a ledge (frame rest) is at the top of the shallow and the deep sections. |
| Top and inner covers | The top (or outer) cover is telescopic for insulation and extends above the super for protection from rain. The inner cover has an opening for the bees to come and go, provides extra insulation, and prevents comb on to the outer cover. When splitting a hive, make sure the new home has the correct covers. |
| Bottom board | This hive base includes a wire mesh to allow air circulation, shed excess moisture and condensation, as well as access to the hive. When splitting a hive, make sure their new home is equipped with a wire mesh at the bottom. |
| Shallow and deep supers | Supers are wooden or plastic frames where foundation sheets are attached. Each level holds 10 frames. The shallow super is where the bees build honeycombs to store honey. The deep super is the hive body (or brood chamber) where the queen lays eggs and bees are reared, along with some food stores. To split a hive, move the deep supers to a new location. |
| Foundation sheets | Foundation sheets of embossed beeswax on the supers (frames) provide the bees with midribs on which they secrete beeswax and build new honeycombs (or combs). Before splitting a hive, make sure the foundation sheets have everything a hive needs to flourish in a new home. |
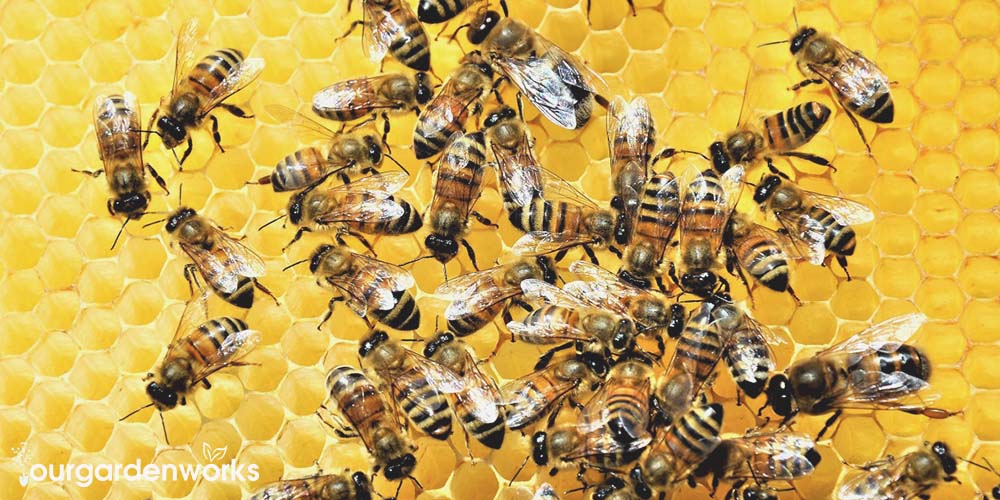
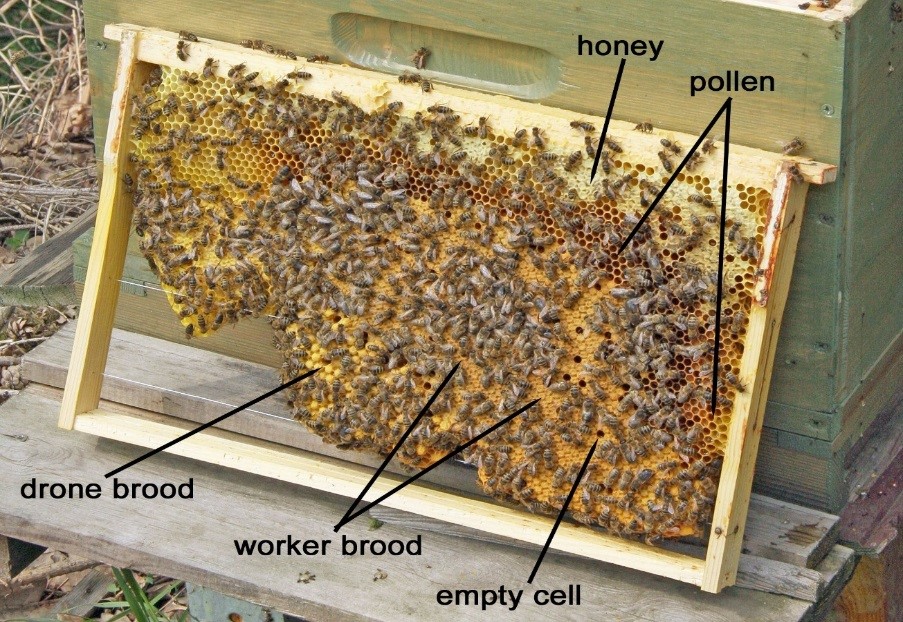
| Honeycomb cells | The bees add more wax to the foundation sheet and draw comb cells on each side of the sheet. The comb cells are used to store food, to raise baby bees, and to provide air circulation. When splitting a hive, include combs with the queen, honey, pollen, and a complete brood. |
| Propolis | To control temperature and humidity in the hive, the bees secrete a type of glue called propolis to seal the cracks. When splitting a hive, help bees save time by ensuring that cracks in their new home are well-sealed. |
| Hive stand | Bees cannot tolerate dampness. To prevent ground dampness from getting into the hive, place the hive on a stand. When splitting a hive, make sure their new home is away from the ground. |
| Queen excluder | This part between the shallow and deep supers has openings that allow smaller worker bees to pass through, but not the larger queen. Thus, the queen lays all her eggs in the brood box while the workers store honey in the shallow supers. When splitting a hive, move the deep supers. |
| Top bar hive | This part is added to provide space for the bees to move freely, and for you to easily inspect their home. There are no frames here. A precise measure ensures that bees will not fill it with propolis or beeswax. When splitting a hive, make sure that the new home’s bee space is exactly 3/8 of an inch. |
3. Why You Should Split a Hive?
If you don’t split the hive, it will split itself by swarming. Thenew hive will have limited resources, produce little or no honey, and may not survive winter. Meanwhile, the parent hive has to rear a new queen and this will delay brood production for a month or more.
Compared to buying bee packages, nucs, or full hives, splitting your own hives is much cheaper. In addition, here are the most important reasons why you should split a hive; to:
- Make up for winter losses
- Increase the number of your hives
- Make nucleus colonies (nucs) or starter hives for sale
- Create mini nucs for queen production
- Prevent overcrowding and natural swarming of strong hives
- Give the bees room to expand and ensure a productive queen
- Ensure continuous brood cycle with a strong queen to prevent Varroa mite attacks
You now know when it’s best to split a hive and when it’s too late. Next, you should update your hive-splitting procedure.
4. How To Split a Beehive?
In the bee yard, the term “splitting” can mean (a) splitting one strong hive into several smaller hives or (b) pulling a smaller (nuc or nucleus) colony from an existing hive into a new hive.
The three most common ways of splitting a hive are:
- The swarm-control split: Before you split the hive, you find the queen and identify the brood in each of their various stages.
- Walk-away split (colony-reared queen): You can’t locate the queen. You split the hive so that each one has eggs, larvae, capped brood, honey, and pollen. The parent hive keeps the queen. The new hive quickly builds queen cells and raise its own queen.
- Walk-away split (purchased queen): Before you split the hive, you use a queen excluder in order to separate the hive into two. When you split the hive, you make sure that the original queen remains in the parent hive.
Your choice depends on three things: (a) you can locate the queen, (b) you want to buy a new and younger queen, or (c) you want the colony to have a queen that they reared.
PRO TIP: Use a queen cage that provides the bees with more access to the queen’s pheromones. The cage provides a safe and controlled area for the queen bee to lay eggs immediately before she is released into a new hive.
Whatever your choice, the easiest way to split a hive is to install a nuc.
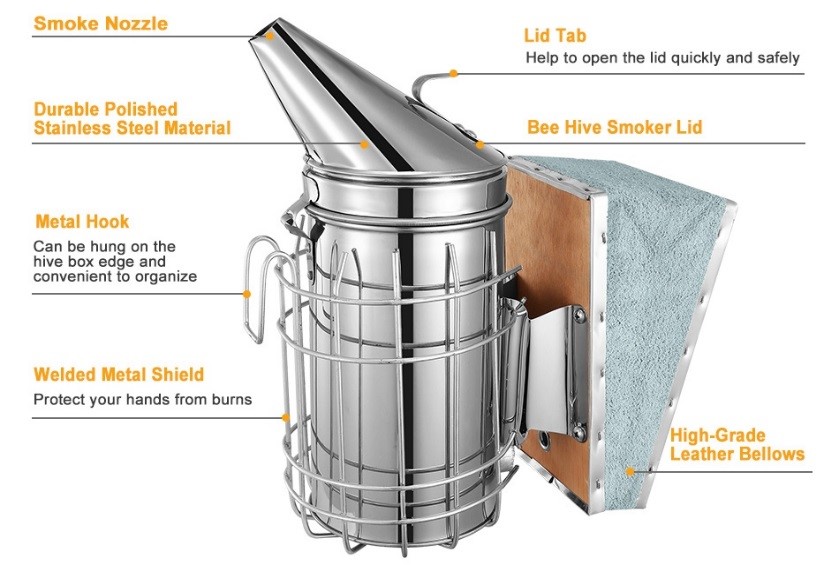
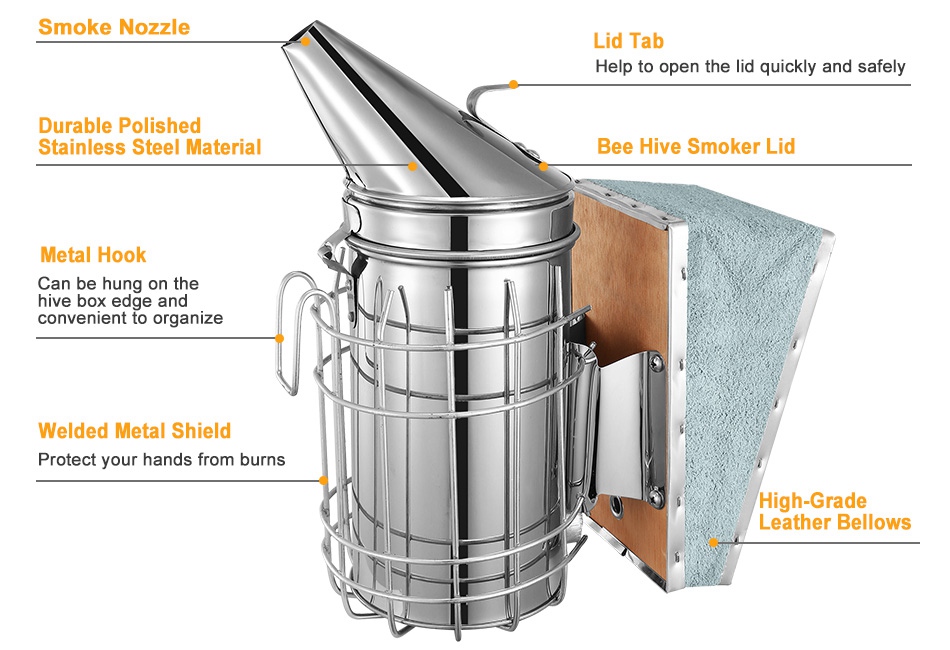
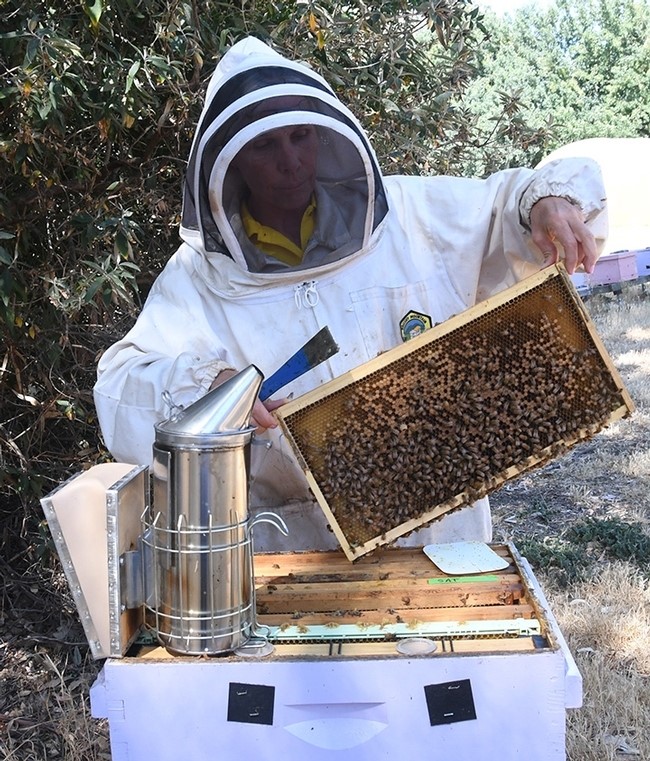
You will only need two things: a hive tool and a bee smoker.

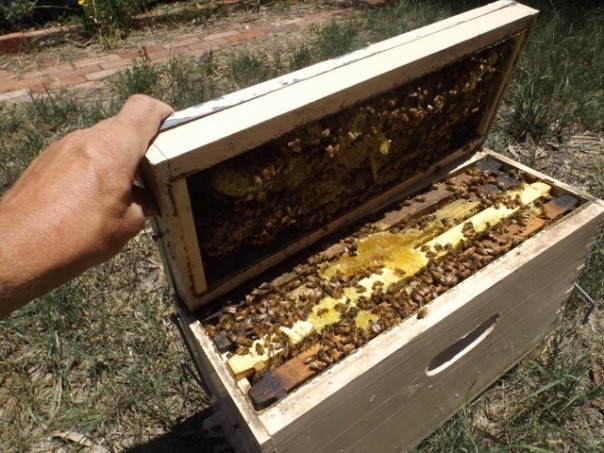
Basically, you take a mini-hive – including the frames – and move it to an empty home where it can grow into a bigger hive. You choose the frames, you place them in a full-sized hive box, and you’re done!
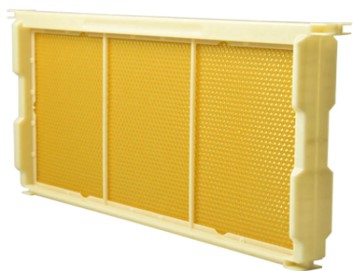
What’s a Nuc?
A 5-frame nuc
Moving a nuc frame
A typical nuc has about 5 frames: two outer frames that hold honey and pollen, and three inner frames that hold brood of all stages (eggs, larva, pupa) as well as adult bees (nurses, cleaners, guards, foragers, drones, queen, and so on).
Here are the four key steps to install a nuc.
1. Prepare your Nuc.
- Make sure that the parent colony is strong and free from pests or diseases.
- Place your nuc alongside the beehive.
- Remove the top cover and top bar hive (if your hive has one)
- Give the nuc a quick pass with your bee smoker, just enough to calm them down.
PRO TIP: In the spring, nucs can grow rapidly. If you’re using an interim box, move them to a standard-sized hive within three weeks.
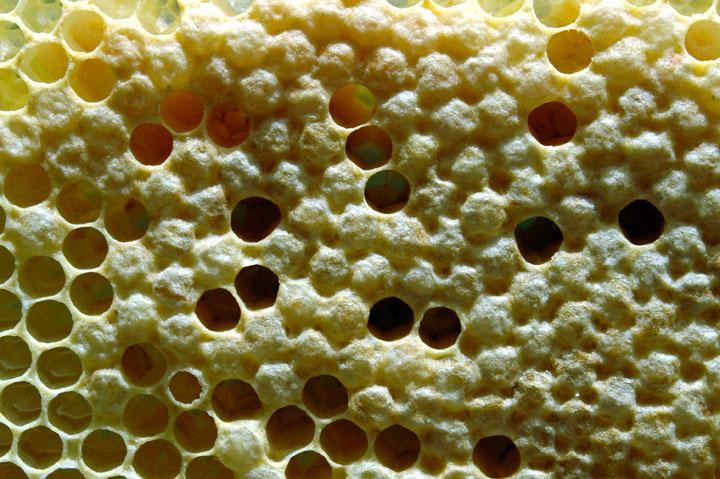
What’s a capped brood? (See picture below)
Careful now. A capped honeycomb cell is different from a capped worker brood comb or a capped drone comb.
- White wax caps at the top of a frame indicate honey cells.
- Light yellow caps on cells from the middle to the bottom are worker brood cells freshly laid by the queen.
- Open cells are cells for heater bees. Open cells in the middle of the comb are darker yellow with nectar that will turn to honey.
- Darker combs are where the brood is being raised for the hive.
PRO TIP: Don’t confuse capped honey cells with newly-capped worker brood cells. Keep in mind that capped honey cells are slightly indented. On the other hand, capped worker brood cells have a slight protrusion.
Capped honey cells
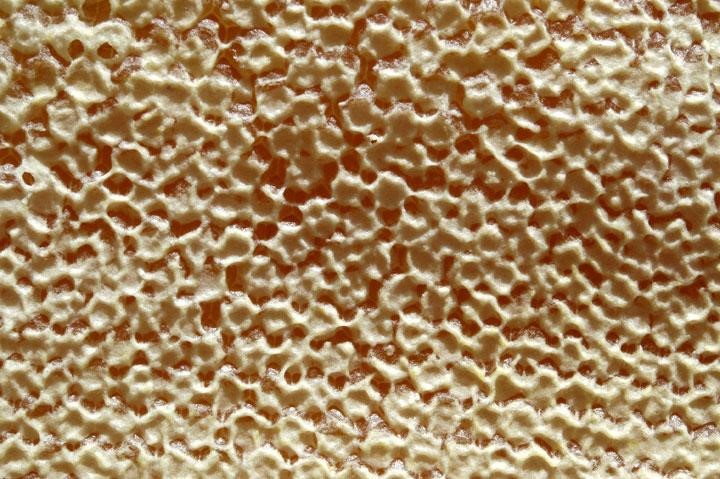
Capped worker cells
2. Choose your frames
- Choose at least two (2) brood frames.
- One frame should have a mostly capped brood and clinging adult bee population.
- The other frame should be covered with honey and bee bread (pollen).
- Make sure there’s at least one healthy queen cell in the frame that you’re moving to.
PRO TIP: Bees work outwards from the center frames towards the outside frames. To move a fully established colony, make sure that center frames go into the center of the new box.
Here’s a video (source) that shows this process with an 8 frame hive.
3. Move the chosen frames
- Move your frames from the parent hive to the new hive box.
- Begin with one of the outer frames in the nuc.
- Lift it up gently. If there is propolis involved, use a hive tool.
- Move the frame gently over the top of the hive. As much as possible, keep the frame above the nuc.
- Insert the frame next to an empty frame in the new hive.
- In the same way, move the remaining frames. Make sure that you keep the frames in the same order.
- If there’s room, you can add empty foundation frames to fill the box.
- Move the new hive far enough to prevent bees from returning to the parent hive.
- Reduce the size of the entrance until the hive population has increased and a guard system has developed.
PRO TIP: After moving all the nuc frames to the new beehive, you can add more frames to maximize the box. Example: if you removed 6 frames from a 10-frame box and moved a 5-frame nuc in, add one more frame to a total of 10 frames.
4. Feed your new hive
- Despite the new hive’s honey reserves, you may have to help until your forager bees have adjusted and can restart their production lines.
- For instance, if their ability to add to their honey reserves is delayed by weather or lack of honey flow, you should provide a bee feeder with light sugar syrup.
- Some beekeepers provide additional feed with a protein patty.
- When the bees stop taking food from the feeder, remove it.
PRO TIP: You can buy a feeder or make it yourself. Here’s a video (source) about free and easy honey bee feeders.
Before You Go
- Be a hero: Urbanization, pesticides, parasitic mites, and a Colony Collapse Disorder are devastating the honey bee population; millions of bee colonies being wiped out. You can easily increase bee populations by splitting hives.
- Be patient and persist: Splitting a hive takes practice. Not every split is successful. Keep trying. Ask and observe experienced beekeepers when they split hives. If you have a chance for hands-on mentoring, grab it.
- It will be worth it: Each year, bee pollination is worth more than $14 billion to U.S. agriculture. In addition, beekeepers profit from honey, pollen, royal jelly, and propolis for health and homeopathic remedies, apitherapy, as well as dietary and fertility stimulation.
Sources
- The United States Department of Agriculture: A reports database
- The Magazine of American Bee Keeping: Bee Culture
- University of California: Starting a Small Beekeeping Operation
- How to determine your beekeeping calendar: A map and guide
- Beekeeping for dummies: A guide with pictures
For more design ideas, project guides, and planting inspiration, our backyard design guide links to every outdoor project and design article we’ve published.
Do you have the captions on Capped honey cells Capped worker cells photos reversed?
Yes I thought the same thing