Changing or moving a light switch is one of the handy skills that you can have, especially during emergencies. Many people think it’s hard to move a light switch, but it’s easier than you think.
If you want to learn how to move a light switch for interior design fees or save on handyman fees, this article’s for you.
Safety First: Dos & Dont’s of Moving A Light Switch
Electric shock is the last thing you may want to avoid in dealing with electrical wirings. So, here are the first things that you should prepare before moving your light switch.
Dos
- Do use proper tools: Using inappropriate tools can damage the switch and the wires. Make sure you have the right type of pliers and screwdrivers to security to secure safety.
- Do take a picture of the wires before removing them from the switch: Pictures of the wirings will make it easier for you to remember how to put back all the parts of the light switch properly.
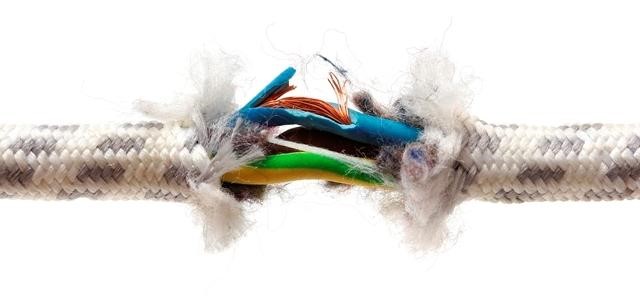
- Do check for frayed wires and loose connections: Bent wires and exposed bare wires may touch the switch box and cause a short circuit to your main breaker and become a bigger problem.
- Do look out for damaged wires: Damaged wires should be peeled and fixed before you connect it again to the switch to avoid electrical problems.
- Do wear shoes or slippers: For safety, precaution make sure you’re not barefoot to prevent shocks and get rid of anything wet around the area.
Don’ts
- Don’t start working on the light switch with the power on: Turn off the power source before you remove screws on the light switch.
- Don’t touch bare wires: Use cloth gloves while working on the switch to keep yourself safe from electrical shocks.
- Don’t hesitate to ask for professional help when something goes wrong: When it comes to electrical matters, a small problem can be a bigger one and put you at risk in a blink of an eye. So, if you see any irregularities, better ask for professional help.
Types of Switches
Before you open your light switch, it’s essential to know what kind of light switch you’re moving to another location.
The type of light switch that you have determines how many terminals you need to connect to the wires and the proper way on how to connect it to the main supply of power.
The following are the basic types of switches:
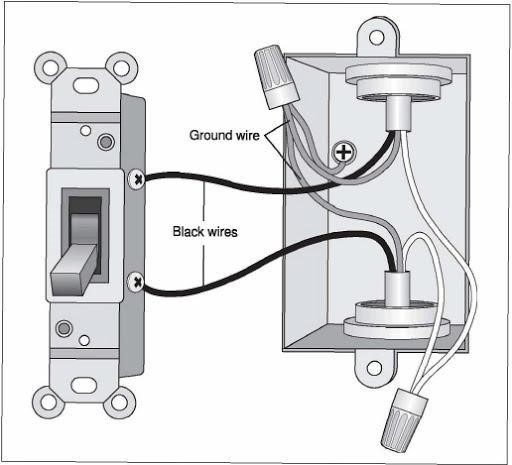
1. Single-pole switch is a type of switch that allows you to control the light in one location. It has two terminals: one for the wire the supplies the power to switch and the other for the outgoing wire. It also has a terminal for a ground wire.
Pro tip: Ground wire is the green or plain wire connected from the switch to the wire buried in the ground. The main purpose of the ground wire is to release the excess electric charges to a safe place to go to avoid shocks and fire.
2. Double-pole switch looks like a sing-le pole but it has an additional two hot terminals because it can handle more loads of electrical charges than the usual switch. It can handle 30 amps of electricity and is commonly used to power heavy-duty equipment and motors.
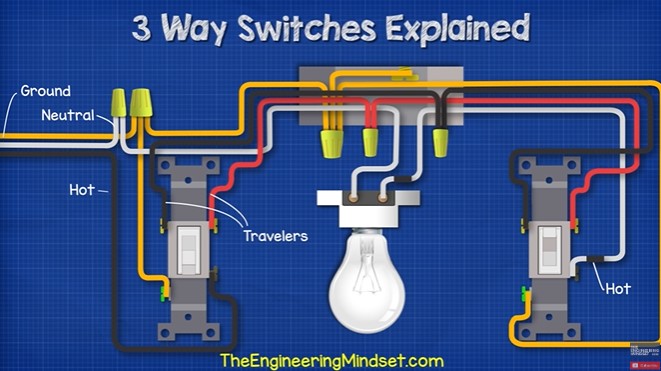
3. Three-way switch is used when the light can be controlled in two different locations. It has three hot terminals; one for the common terminal and the other two for the traveler terminals that sync the power with the other switch.
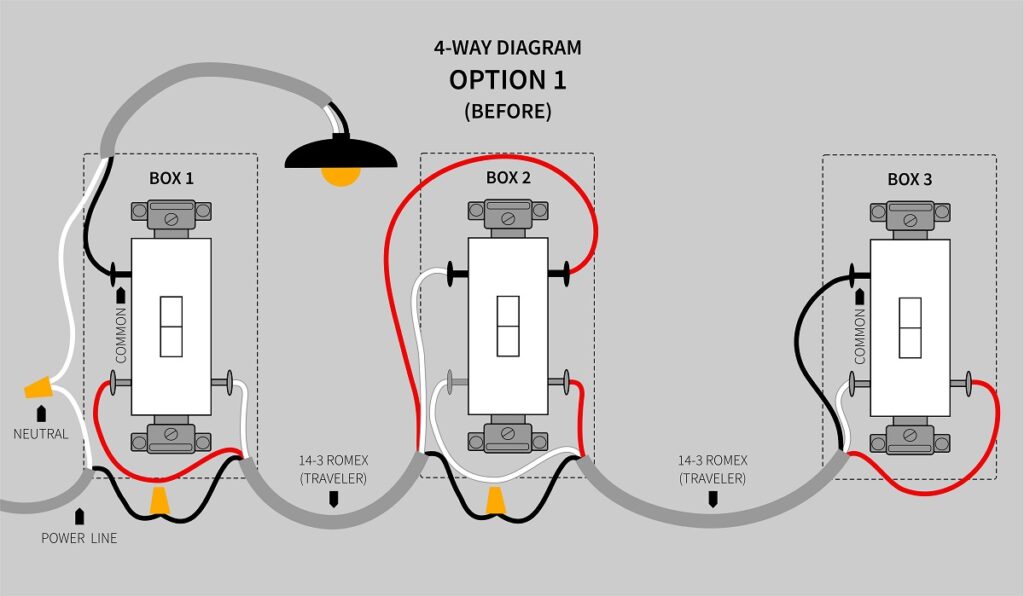
4. Four-way switch is the type of switch that is used to control lights in three or more locations. It is usually used with a three-way switch and commonly found in homes with long hallways or in big conference rooms that have a lot of lights.
Basic Parts of a Light Switch
We hope you recognized your switch above. Now, it’s time to identify the parts of the switch. We’ll use the most basic form of a light switch – the single-pole switch. The parts are as follows:
- Switch box and switchplate: The switchplate is the outer layer of the switch that we touch when turn the lights on or off. The switch box, on the other hand, is the container that holds the components of the switch on the wall.
- Terminals: The terminals are the points that direct the flow of the electric charge that runs through the switch. The number of terminals depends on the light switch that you have.
- Wires: The wires carry the electric charge from the power supply to the switch. Hotwires carry live electric charges and ground wires are used to direct the excess electric charges to the ground where it’s safe. The wires that connect two or more switches are called travelers.

How To Move a Light Switch – 11 Definitive Steps To Follow
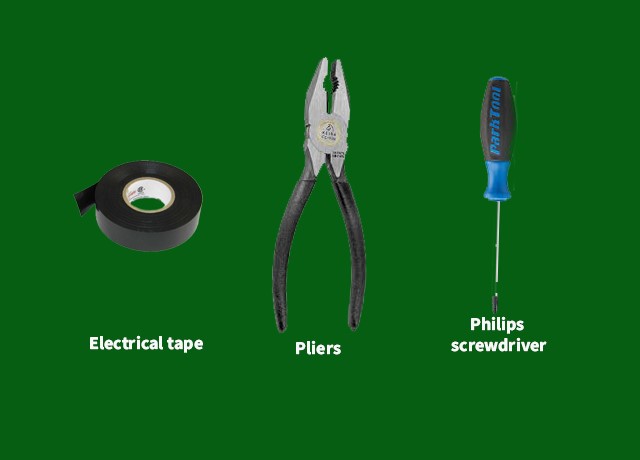
Everything that’s mentioned above will all make sense as soon as you start removing the switch plate. First, you have to prepare the right tools for the job. These include:
- Pliers or wire stripper
- Philips screwdrivers
- Electrical tape
Optional: wall sealants or cement, hammer, and flat nose screwdriver
1. Turn off power from the breaker
To make sure that you turned off the right circuit breaker, keep the light switch on as you turn off the circuit breaker. If the light stays on, then you’ve missed the right circuit breaker for your lights. Keep trying until you get the right one.
2. Take a picture of the wirings
Before you unscrew and detach the light switch, add a note on each wire. This step will help you remember how to put all the right wires to their respective terminals later. Then, take a picture of the wirings and terminals before you unscrew everything.
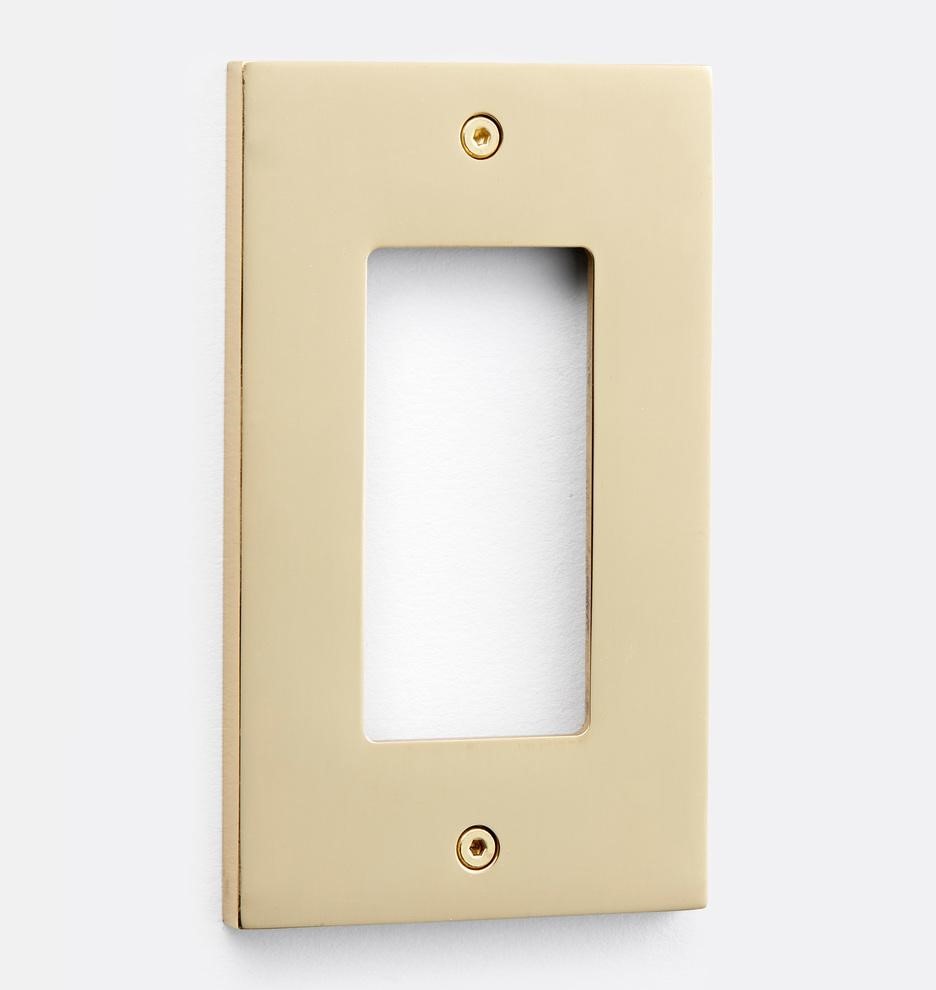
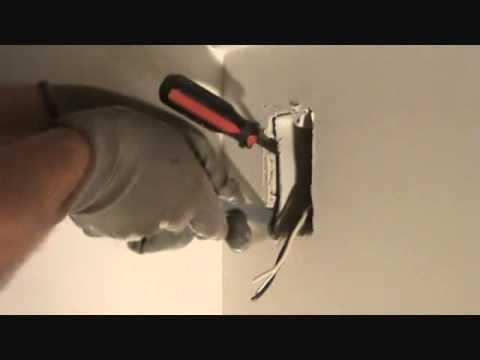
3. Remove Switch Plate
Switchplate is the outer layer of your light switch. It covers the internal components and is usually locked through the four snaps placed on every edge of the switch. Otherwise, it’s is locked through screws like the image below.
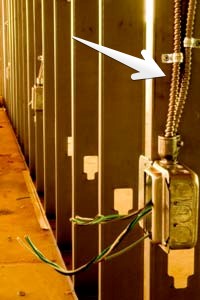
4. Trace the electrical wiring on the wall that connects your light switch
Since you’re going to transfer the light switch to a different location, you have to check the length of the wires that connects the light switch to the circuit breaker.
This step will help you check how far the wires can run to your desired light switch location.
5. Unscrew The Switch and Wires
The light switch will have two to four screws that lock the switch to the switch box. Once the switch is unscrewed, pull it out so you can loosen the screws of the terminals properly. The wires are tied around the screws for safety, so you can loosen the screws and just rotate the wires to untie them.
6. Remove The Box
Some people buy a new switch box and leave the old one in the previous location. However, if you want to use the same switch box, you can do so by unscrewing the switch box from the drywall.
For concrete walls, you may use the flat nose screwdriver and hammer to detach the switch box. Point the flat nose screwdriver to the edges and use the hammer to push it deeper into the wall.
7. Cut a Hole on Your Preferred Switch Location
Use the flat nose driver and hammer to cut a hole on drywall. If you have a cemented wall, you may need a drill to make way for the wires and cut a hole for the light switch. Another option is to expose the wires and switch box on the wall and use wire covering to make it look neat.
8. Put The Box and Screw The Switch To The Wires
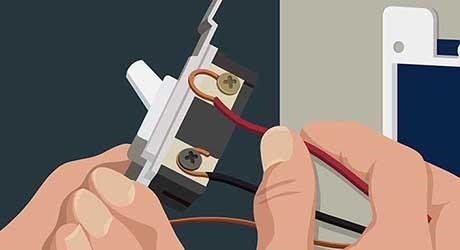
Now it’s time to assemble the light switch on the new location. Use your notes or the pictures you’ve taken as reference in putting the right wires to the right terminals.
If the bare wires are not enough you have to remove a part of the insulation to lengthen the bare wires that you can tie around the screws on the terminals.
How to Remove Insulation on a Wire
- Use the cutter part of the pliers or wire stripper and make a small cut in the wire’s insulation or covering. Make sure to not cut all the way through to avoid damaging the bare wires underneath.
- Now, pull the end of the insulation until it detaches to the rest of the insulation cover. Voila! You now have extra bare wires.
9. Check The Wiring and Look For Exposed Wires
Double-check your work for safety precaution. Look for exposed wires that may touch other components. Make sure all the wires are connected properly.
For safety, you may also wrap the switch with electrical tape to cover each terminal.
10. Test The Light Switch
When you’ve checked everything, turn on the light and eventually turn on the circuit breaker and see if it works. If it’s not working, close the circuit breaker again and re-check the terminal of the switch if they are tightly placed.
When the light turned on, you may now add close the switch and screw the switch plate on.
11. Repair The Old Location of The Light Switch
Restore and repair the hole in your wall by using wall sealants or cement. Just make sure there are no more exposed wires in the area before you work on it.
Tips in Moving a Light Switch on Your Own
Calling for the handyman’s help in moving a light switch that can be done in an hour or two can cost you a hundred dollars. So now that you know how to do it on your own.
Here are some tips so you can do these kinds of home projects with a blend of caution and accuracy.
Tip 1: One of the major causes of electrical failures and appliance damages is from unfixed or undetected loose connections. By using a wire nut, the bare wires are safely tied together and covered with insulation.
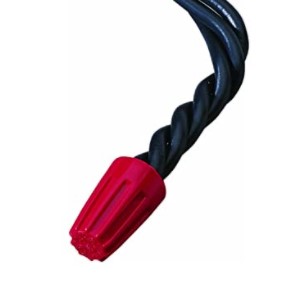
How To Use a Wire Nut
- Check the size of the wires and choose the wire nut that’s appropriate for it.
- Twist loose strands and place them on the side of another wire.
- Then, twist the wire nut until both all of the bare wires are covered.
Tip 2: The best way to figure out if you closed the right circuit breaker is to leave the lights on or the appliances plugged. This is not only for light switches but also if you want to replace or fix an outlet.
When the light or the appliance is still on even if you turned off the circuit breaker, chances are you got the wrong one. Continue checking until you find the right circuit breaker.
Final Thoughts
Electrical wirings are among the high-risk components of our house. Fires and electrical shocks happen if the electrical circuits are damaged or left unfixed.
However, as long as you secure the wires properly, connect the wires to the right terminals, and use the right tools, you can safely move your light switch. Make sure you do your homework and take note of every detail to avoid missing any step.
We hope that you learned a lot from this guide. Once you’ve mastered fixing your light switches, it would be easier for you to understand how plugs and other wirings work.
Learning about electrical circuits is quite intimidating at first, but you can get used to it later on.
If you find this guide helpful and easy to follow, share this post with your friends, and help them save from handyman fees too. Let us know how did this DIY project work for you in the comments below.
For more design ideas, project guides, and planting inspiration, our backyard design guide links to every outdoor project and design article we’ve published.
This is barely a step above useless. Typically switches are fed from above or below, and the lead to the fixture goes up. If you move the switch anywhere outside the bay it’s already in you’ve got at least ten times more work than is described here.
I was able to move my light switch in the garage by adding additional wire. The light came on in the garage but all the outlets on the other side of the wall are not working. Do you have any suggestions on how to fix this?