

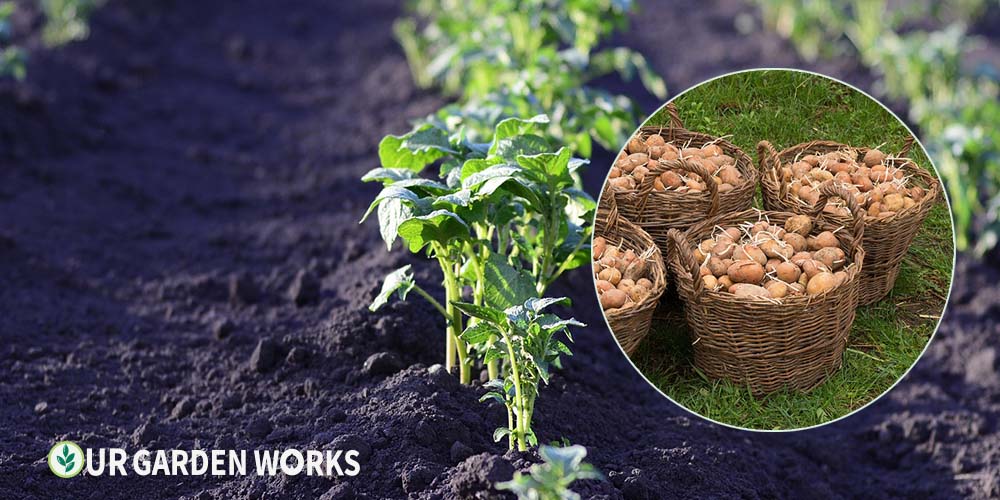
There is something almost magical about growing potatoes. You put what looks like a sad, sprouting grocery store potato into the ground, mound soil over it a few times through the summer, and pull it out in fall to find that one potato has become twenty. The yield-to-effort ratio is hard to beat.
Potatoes are also one of the most space-efficient crops in a home garden — you can grow a meaningful harvest in a raised bed, in bags, or in a dedicated in-ground row.
And unlike most vegetables, they have a natural built-in storage mechanism: leave them in the ground until the tops die back and they’ll hold perfectly until you’re ready to harvest.
In this guide, we’ll cover everything you need to know to grow potatoes from seed potato selection through curing and storage — including the hilling technique that most beginners skip and the harvest timing signs that tell you they’re ready.
Quick Answer: Plant seed potatoes in spring when soil reaches 45–50°F, 2–4 weeks before your last frost. Plant 4 inches deep, 12 inches apart. Hill soil over the plants as they grow. Harvest when tops die back — early varieties in 70 days, main-season varieties in 90–120 days.
Seed Potatoes vs. Grocery Store Potatoes
Use certified seed potatoes — not grocery store potatoes. Grocery potatoes are often treated with sprout inhibitors to extend shelf life, and they may carry diseases not permitted in commercial growing regions. Certified seed potatoes are guaranteed disease-free and untreated.
Choosing Your Variety
| Type | Varieties | Days | Best For |
|---|---|---|---|
| Early / new potatoes | Yukon Gold, Red Pontiac, Norland | 70–90 | Boiling, roasting, eating fresh |
| Mid-season | Kennebec, Katahdin, Chieftain | 80–100 | All-purpose cooking |
| Late / storage | Russet Burbank, Elba, Butte | 90–120 | Baking, storing through winter |
| Fingerling / specialty | Russian Banana, French Fingerling | 70–100 | Roasting, salads, gourmet cooking |
| Blue / purple | All Blue, Purple Majesty | 80–100 | Color, flavor, novelty |
How to Grow Potatoes: Step by Step
Step 1 — Prepare Seed Potatoes (1–2 Weeks Before Planting)
Directions
- Buy certified seed potatoes 1–2 weeks before your planting date.
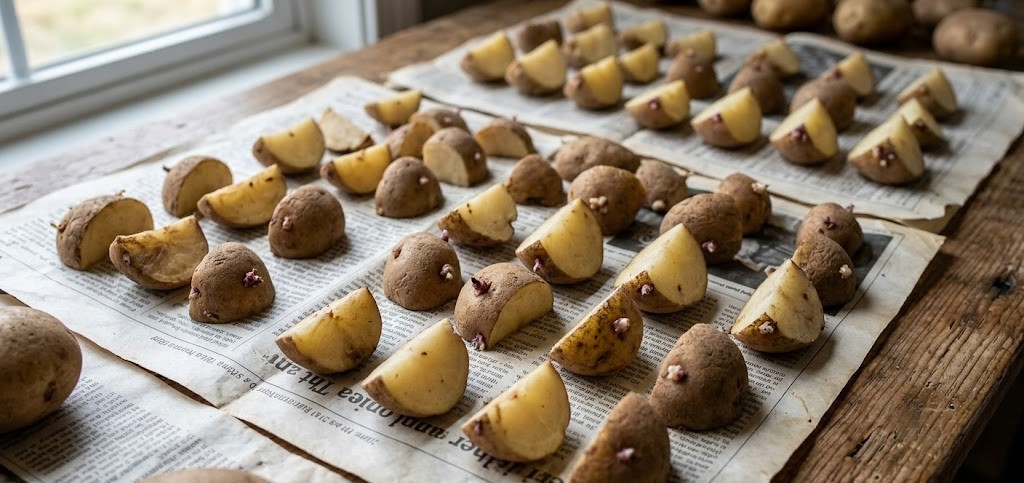
- If potatoes are small (golf ball size or under), plant them whole. If larger, cut into chunks each containing 2–3 “eyes” (the sprout buds). Each chunk should be at least 1–1.5 ounces.
- After cutting, let the cut surfaces dry in open air for 24–48 hours. This “curing” lets a protective callus form over the cut, reducing rot risk underground. Don’t skip this step.
- Optionally, place seed potatoes in a warm, bright spot for 1–2 weeks before planting to encourage pre-sprouting (“chitting”). Pre-sprouted potatoes establish faster after planting.
Step 2 — Prepare Your Bed
🥔 Potato Soil Requirements
- pH: 5.0–6.0 — more acidic than most vegetables. Lower pH reduces potato scab disease.
- Soil type: Loose, well-draining, deep. Compacted soil causes misshapen tubers.
- Amendments: Work in compost but avoid fresh manure or heavy nitrogen — it promotes leafy growth and less tuber development.
- What to avoid: Lime (raises pH, increases scab). Wood ash (same problem).
Step 3 — Plant
Directions
- Dig trenches 4 inches deep and 24–30 inches apart.
- Place seed potato pieces cut-side down, eyes facing up, 12 inches apart in the trench.
- Cover with 4 inches of soil and water lightly.
- Sprouts emerge in 2–4 weeks depending on soil temperature.
Step 4 — Hill the Plants (The Most Important Step Most Beginners Skip)
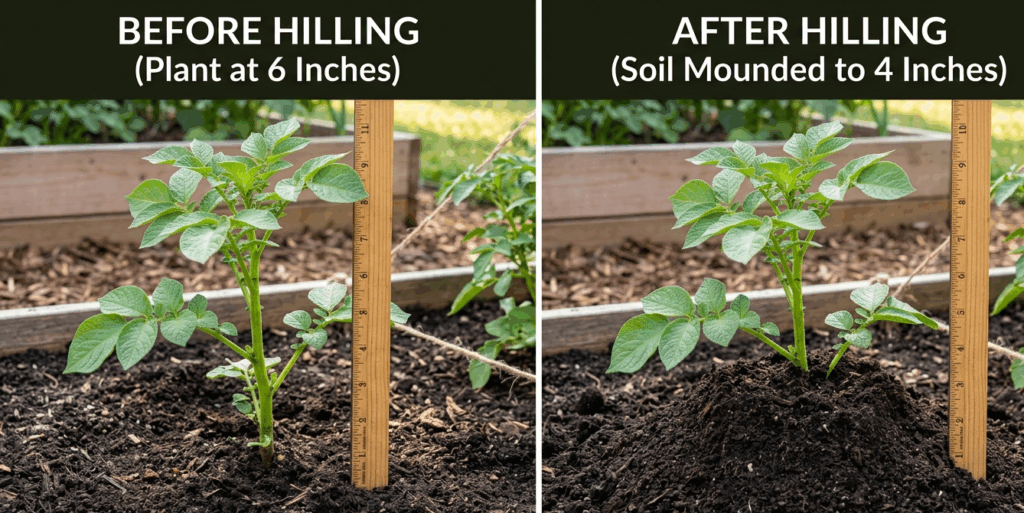
Hilling is the practice of mounding soil up around the base of potato plants as they grow. It’s the single most important technique in potato growing — and the one most beginners skip because it seems like extra work for no reason. Here’s why it matters: potatoes form on stems, not roots. Every bit of buried stem can develop tubers. More buried stem = more potatoes.
Additionally, any tubers exposed to sunlight turn green and produce solanine — a toxic compound. Keeping soil mounded over the developing tubers prevents greening.
Hilling Schedule
- First hilling: When plants are 6–8 inches tall, mound soil or straw up around the base leaving only the top 2–3 inches of foliage exposed.
- Second hilling: 2–3 weeks later, when new growth has added another 6–8 inches. Mound again.
- Continue as needed: Most plants need 2–3 hillings total. Stop when the plants begin to flower — tubers are now sizing up and further hilling isn’t necessary.
Step 5 — Water and Fertilize
Watering: 1–2 inches per week. Consistent moisture is especially critical from flowering through tuber bulking. Drought during this period causes knobby, irregular potatoes and hollow heart (a brown void inside the tuber).
Fertilizing: At planting, use balanced 10-10-10. Once flowering begins, switch to low-nitrogen, high-phosphorus fertilizer to support tuber development rather than foliage. Avoid high nitrogen throughout — it’s the most common mistake in potato growing.
When to Harvest Potatoes
Timing depends on what you want. You have two harvest options:
New potatoes (early harvest): About 2–3 weeks after flowering, carefully dig around the edges of the plant and feel for small potatoes. These don’t store well but taste amazing roasted or boiled fresh.
Full harvest: Wait until the tops (vines) have died back completely — they’ll turn yellow, then brown, and fall over. This is the plant’s signal that tubers are fully formed and the skins have set. After tops die, wait 2 more weeks before digging — this lets skins toughen for better storage.
How to Harvest
- Use a garden fork, not a spade. Insert it 12 inches away from the plant base and angle it under the root ball.
- Lift the soil block and pull the plant. Most potatoes come up in the root mass.
- Search the loosened soil by hand for any potatoes that broke off the root system.
- Set potatoes in a shaded, well-ventilated spot to dry for 2–3 hours. Brush off excess soil — don’t wash them if you’re storing them.
Curing and Storing Potatoes
For long-term storage, cure potatoes first: keep them in a dark, humid (85–95% RH), warm (50–60°F) location for 1–2 weeks. This toughens the skin and heals any minor cuts from harvest. After curing, store in a cool (40–50°F), dark, well-ventilated location. Properly cured and stored potatoes last 6–8 months.
⚠️ Green potatoes are toxic
Any potato that has been exposed to light turns green — indicating solanine production. Never eat green potatoes or feed them to animals. Proper hilling during the growing season and dark storage afterward prevents this entirely.
Common Potato Problems
- Potato scab (rough, corky patches on skin): Caused by high soil pH. Lower pH below 6.0 and avoid lime or wood ash in potato beds. Varieties like Russet Sebago and Elba are scab-resistant.
- Hollow heart (brown void inside): Caused by drought during tuber bulking or very fast growth after a drought-to-wet cycle. Consistent watering is the only prevention.
- Colorado potato beetle: Yellow-striped adults and reddish larvae that defoliate plants rapidly. Hand-pick or use Bt spray. See our Colorado potato beetle guide.
- Late blight: Dark lesions that spread rapidly in wet conditions. Use a copper-based fungicide preventively in humid climates. Rotate crops — never plant potatoes (or tomatoes) in the same bed two years running.
Frequently Asked Questions
Can I grow potatoes in containers or bags?
Yes — growing potatoes in bags or large containers is one of the best methods for small spaces. Use a minimum 10-gallon container or a dedicated potato grow bag. Start with 4 inches of potting mix, plant seed potatoes, and add more mix as the plants grow — essentially hilling in a bag. Harvest by dumping the entire bag out.
How long do potatoes take to grow?
Early varieties (Yukon Gold, Norland): 70–90 days. Mid-season: 80–100 days. Late/storage varieties: 90–120 days. Count from planting date, not from when sprouts emerge.
Can I plant grocery store potatoes?
We don’t recommend it. Grocery potatoes are often treated with sprout inhibitors and may carry diseases that could contaminate your soil for years. Certified seed potatoes cost very little and guarantee you’re starting clean.
What can I plant after potatoes?
Rotate to non-solanaceous crops: brassicas (broccoli, kale, cabbage), beans, corn, or squash. Avoid tomatoes, peppers, and eggplant — they share the same soil-borne diseases as potatoes.
🥬 Related Articles in Our Vegetable Gardening Guide
Final Thoughts
We hope this guide has made potato growing feel completely achievable — because it is. Potatoes are one of the most rewarding crops to grow at home, and the hilling technique genuinely makes a dramatic difference once you try it.
For all our vegetable growing guides in one place, see our vegetable gardening guide.
Share this post with a fellow gardener who’s ready to get growing — and let us know in the comments which potato variety you’re planting and whether you’re trying bags or beds. Happy growing!
