Isn’t it heartbreaking to see spoiled and wilted carrots in your fridge?
Aside from the wasted money, you will also feel guilty for not doing anything to stop the spoilage. As food becomes so precious during this pandemic, we will teach you how to preserve carrots and prolong their shelf life for a more sustainable living.
Food preservation is an ancient method that remains a handy skill even in the modern world. Who knows you might even get a lot of tips from this post that will prepare for a zombie apocalypse (haha!).
9 Ways To Preserve Carrots and Extend Their Shelf Life
Believe it or not, learning how to preserve carrots will open your eyes to nine preservation methods.
These methods are classified into two categories, such as short-term and long-term preservation methods.
Let’s start with the short-term ones!
Short Term Preservation
Short-term preservation methods can only extend the life of your carrots for several weeks. They are also easy and don’t involve any complicated steps.
1. Soak in Water
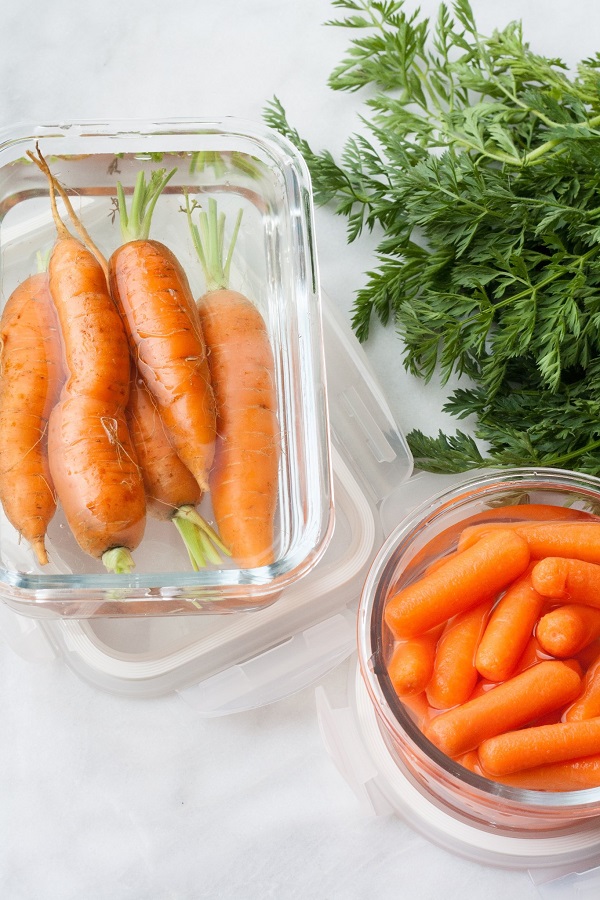
If you bought a bunch of carrots and can’t cook them all at once, you can prolong them for 2 to 4 weeks by soaking them in water. You can have them peeled or retain their skin as you soak them in the water.
Here’s how:
- Clean the dust off your carrots with water.
- Since carrots are root crops, the greens will suck out the moisture from the carrots when you soak them in water. So, you need to chop off the greens to preserve the moisture inside the carrots.
- Using a clean bowl or an airtight container, place the carrots inside and add water. Make sure to choose a container with a lid to prevent any bacteria from getting to the carrots. You may use cling wrap to cover bowls in case you have no containers available at home.
- Place it in the lower part of your refrigerator and replace the water every day. You must consume the soaked carrots within two weeks.
If you leave the carrots soaked in water for more than 2 weeks or do not replace the water every day, you will end up with slimy and smelly carrots. Trust us you won’t like it!
2. Chill
Probably the easiest storage hack that you can do with your carrots is to chill them. They will last for several days to a week.
Here’s how:
- Wash the carrots and remove all the dust.
- Cut the greens off to prevent the carrots from dehydrating.
- Prepare a small bowl with water and paper towels.
- Put water around a carrot and cover it with a paper towel to soak it while it is in the fridge. Wrap each carrot and make sure it is soaked with water. Once in a while, rehydrate the paper towels when they get dry.
- Place the soaked carrots in a container and put them in the chiller part of your fridge.
Long-term Preservation
For the long haul, there are several preservation methods that you can do for your root crops like carrots. Using these methods, you can extend the shelf-life of carrots from 8 months to a year.
These methods include:
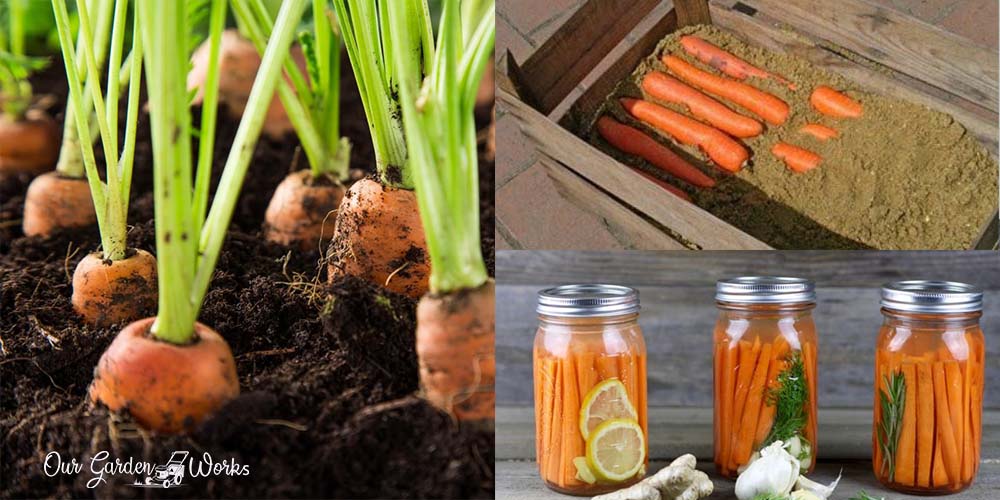
1. Storing Carrots in Damp Sand or Sawdust
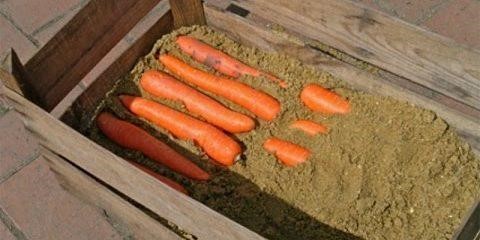
One of the ancient preservation methods used by our ancestors is burying the carrots in damp sand or sawdust in a root cellar.
This method can extend the life of your carrots for several months.
Here’s how you can do it at home.
- Look for a crate-sized container with a lid and fill the bottom part with damp sand or sawdust.
- With the unwashed carrots, remove the green tops and place them distanced from each other. The carrots should not touch each other.
- Cover the carrots with damp sand or sawdust. The moisture from the sand or sawdust will help maintain the 95% humidity required to extend their shelf life.
- Keep the container in your basement, away from the sun.
2. Leaving Carrots in The Ground
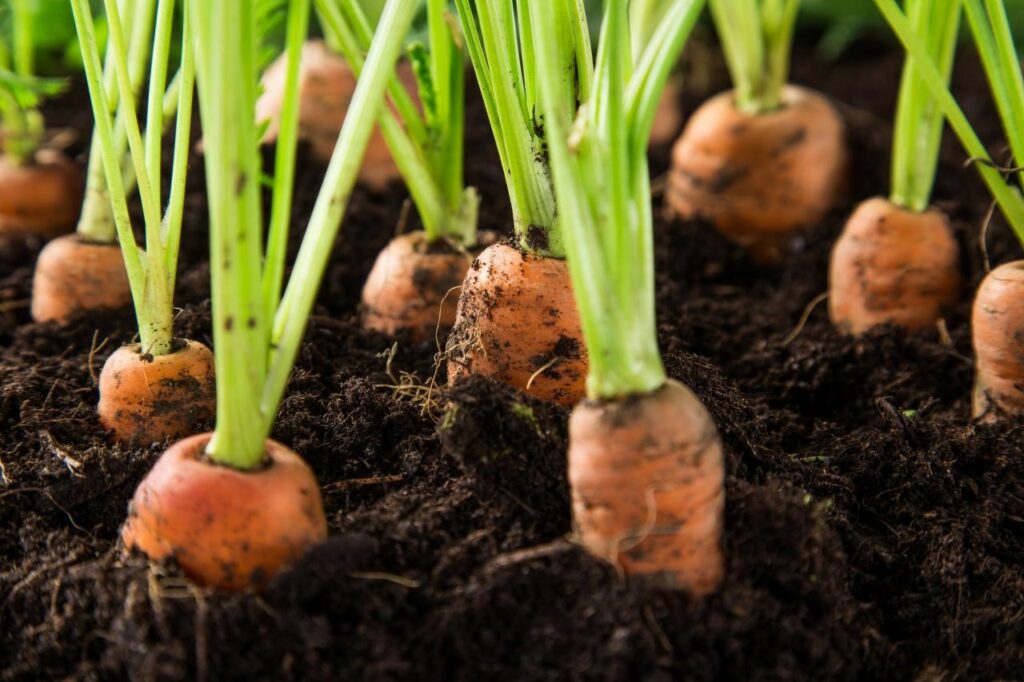
If you are harvesting your carrots from your garden, it doesn’t get easier to preserve them than leaving them on the ground. Carrots that stay on the ground will remain fresh and crispy since it gets the nutrients it needs from the soil.
When the weather becomes colder, you can place mulch or straw over the carrots to keep the soil warm. If the temperature drops to 25°F, you need to harvest the carrots and store them indoors.
3. Freezing carrots
Freezing is the common preservation used commercially for most vegetables including carrots.
It can slow down the enzymes that trigger spoilage and keep some of the nutrients intact. Freezing carrots requires blanching before you freeze the carrots for a long time.
Frozen carrots can last for nine months to a whole year depending on the coldest temperature of your freezer.
If you opt to not blanch your carrots before freezing, they can only last for three months and may have a different texture when cooked.
Now, here’s how to freeze your carrots
- Wash the carrots and remove the green tops.
- Peel and chop the carrots. You may also opt to leave them unchopped.
- Blanch them for two minutes and shock them by placing them in a bowl of ice water.
- Let them sit in ice until they become cold enough to store.
- Remove them from the ice water and store them in a freezer container or silicone bags.
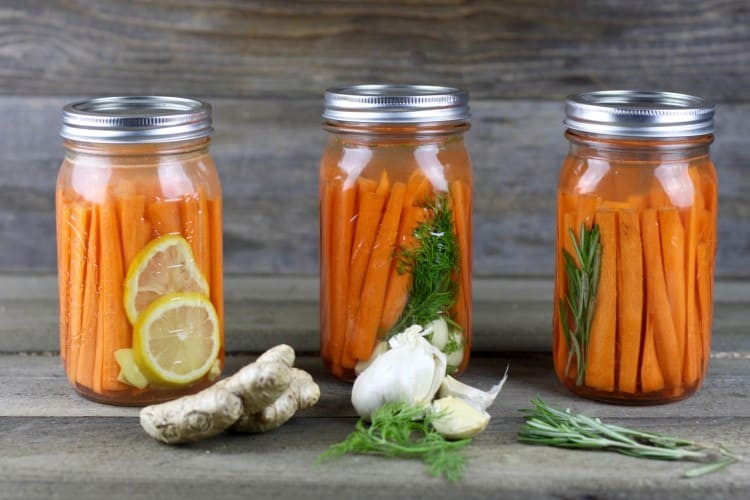
4. Pressure Canning
One of the best ways to preserve carrots for a very long time is through pressure canning. It is often used by some homeowners as a method to send fresh goods abroad to prevent spoilage and leaks during transit.
However, unlike other preservation methods, you will need a pressure canner to do it. A pressure canner looks very similar to a pressure cooker but serves a different purpose.
The steam produced in a pressure canner helps kill microorganisms in low-acid foods like carrots that initiate the spoilage of food.
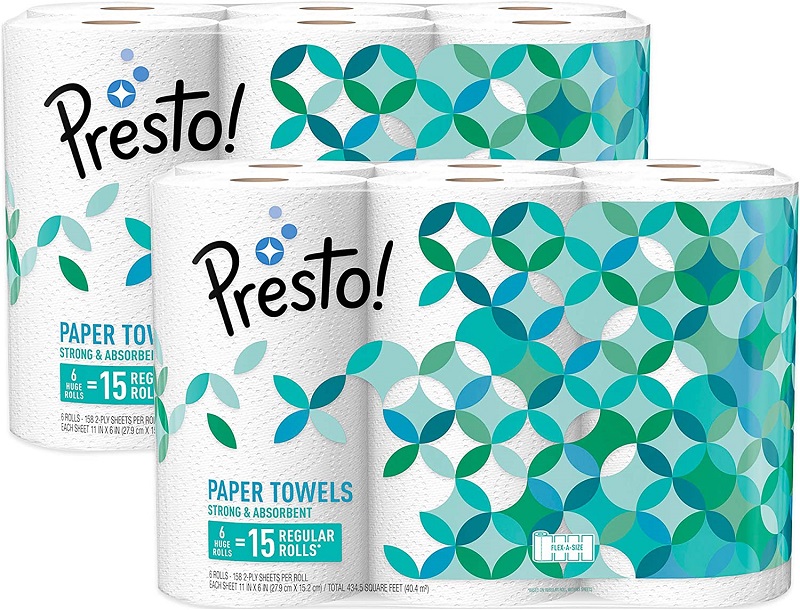
Pressure canning heats jars at 240°F that gets rid of the spores that cause botulism toxin. The popular brand of pressure canner in the market is from Presto 23-Quart Pressure Canner and Cooker.

You might also like: How To Grow Carrots Indoors – An Easy Guide To Follow
How to use a pressure canner for preserving carrots
Materials:
- Pressure canner
- Jar lifter
- Heat-resistant jars
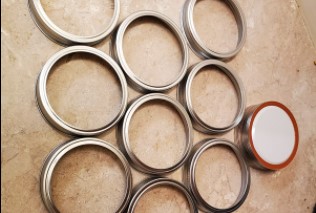
- Canning lids and rings
- Washed carrots
- Timer
Directions:
The processing time for pint-sized jars is 25 minutes and quart-sized jars for 30 minutes at 10 pounds pressure.
- Wash and peel the carrots. Remove both ends of the carrots to remove the dirty parts.
- Slice and trim the carrots to your desired size.
- You may opt to simmer the carrots for 5 minutes or place them raw in clean jars.
- Add water to the pressure canner based on the label instructions and put it on low heat. Some homeowners also add 2 tbsps. of vinegar to minimize the mineral deposits in the jars
- Pour boiling water into the jars and leave an inch of headspace. For added flavor, you may add 1 tsp. of canning salt in quart-sized jars and ½ tsp. of canning salt for a pint-sized jar.
- Make sure that there is an inch of headspace between the water and the tip of the jar.
- Wipe the rim of the jars with a clean dishcloth and cover them with the lid.
- Place the reusable rings and make sure it is fingertip tight and not gripping tight. As you twist the ring, stop at the first resistance and twist it once.
- Place the jars in the pressure canner and cover the pressure canner. Tighten handles on opposite sides.
- Let the water boil and observe steady steam from the vent pipe for 10 minutes.
- Set your timer to 10 minutes to release the air inside the pressure canner.
- After 10 minutes, you’ll be applying 10 pounds of pressure on the jars by putting the 10 pounds cover on the vent pipe. The cover will help build the pressure in the pressure canner
- When the cover starts to jiggle or move that’s when you should start setting the timer for the 25-minute processing time.
- After 25 minutes, leave the pressure canner to cool and turn off the heat.
- Check the gauge level and wait for the pressure to turn zero which would take 30 to 60 minutes.
- Using a jar lifter, remove the jars from the pressure canner and make sure to keep them in a level position.
- Let the jars cool down undisturbed for 12 to 24 hours.
- The next day, wipe the jars and label them with the date to keep track of their shelf-life.
Voila! You have officially canned your carrots!
Pro tip: Every pressure canning recipe depends on your altitude above sea level. Check the user’s guide of your pressure canner based on your location.
5. Dehydration
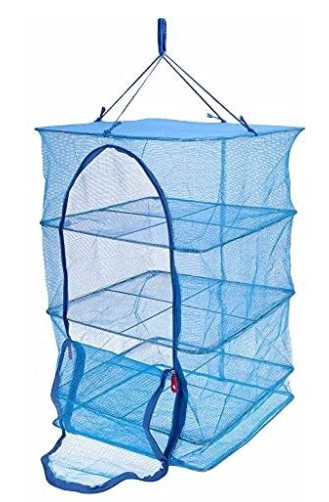
Another ancient preservation method is dehydration. You have two options in dehydrating your carrots by using either a solar dryer or a dehydrator.
Dehydrating carrots using a solar dryer:
- Wash and peel the carrots.
- Cut them into thin strips and place them in the solar dryer.
- Place them in direct sun for two days. Make sure to keep them inside the house at night to prevent dew from rehydrating them.
- Store in an airtight container.
Dehydrating carrots using a dehydrator:
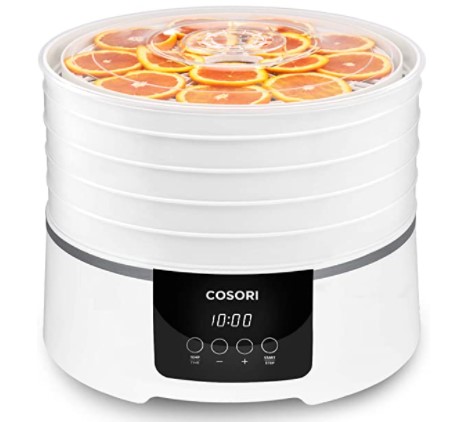
- Blanch the carrots for 2 minutes.
- Spread the blanched carrots on your dehydrator tray, and set it at 125°F for 12 to 24 hours.
- When the carrots are leathery and dry, store them in an airtight container.
6. Fermentation
Another way to preserve your carrots is to make them more nutritious by fermenting them. Here’s how:
Materials:
- Water
- 2 tbsp.salt
- Carrot sticks
- Chopped onions
- Chopped garlic
- 1 tbsp. chili flakes
Directions:
- In a bowl, mix the salt and water to create the brine. Mix it well to dissolve all the granules of salt.
- Place the carrot sticks in an airtight jar along with the onion, garlic, and chili flakes.
- Pour the brine into the jar and cover. Let it ferment for 5 to 7 days.
7. Storing in a Root Cellar

Lastly, if you live in an old house with a root cellar, you can use it to store your root crops like turnips and carrots.
Remove the green tops of the carrots and place them in a dry area in your root cellar. Keep it away from the sun to extend its lifespan for up to 5 months.
Tips in Selecting The Best Carrots in The Market
Since most of the preservation methods are done by ancestors, here are some of the telltale preservation tips that you should take to heart:
- You can remove the air in sealable bags from freezing carrots by putting a straw on its end. Suck all of the air inside the bag and seal it immediately. Now that’s saved you from buying a vacuum machine.
- When pressure canning carrots, make sure to check your jars for any nicks and sharp edges on the rims. These issues will prevent the jars from locking in the pressure inside the jar.
- You should replace the canning lids for every product. However, you can reuse the rings since they are only used to seal the jars properly.
- Some edibles are not good for your carrots. Do not place carrots next to apples and pears. They release ethylene gas that can speed up the ripening process of other edible food in your refrigerator.
- Always cut off the greens of carrots to prevent the greens from accumulating all the moisture from the carrots. Always remember that carrots are root crops and even planting the cutoff tops of a carrot would be enough to keep it alive.
- The depth of the orangeness of carrots denotes their richness in beta-carotene.
- If you’re planning on preserving carrots, avoid excessively cracked, limp, or rubbery ones since those features mean they’re old. The greens should also be bright green and crisp not wilted.
- The sugars of a carrot are concentrated in its core. So, if the core is bigger, that means that the carrot is sweeter.
Further Reading: What Do Carrot Sprouts Look Like & How To Identify Them?
Final Thoughts
We hope that this post has been informative to you in your quest of exploring the world of food preservation.
Preserving food in your home ensures that there’s no wasted food and you get to have a supply of nutritious foods in your house anytime, and it’s one of the things that makes your vegetable garden truly pay off.
If you find this post fun and helpful, please share it with your friends and let us know what other fruits and vegetables you have preserved.
Share your experience in the comments below and inspire more homeowners to start stacking up healthy foods at home.
Thank you Short term carrot storage