

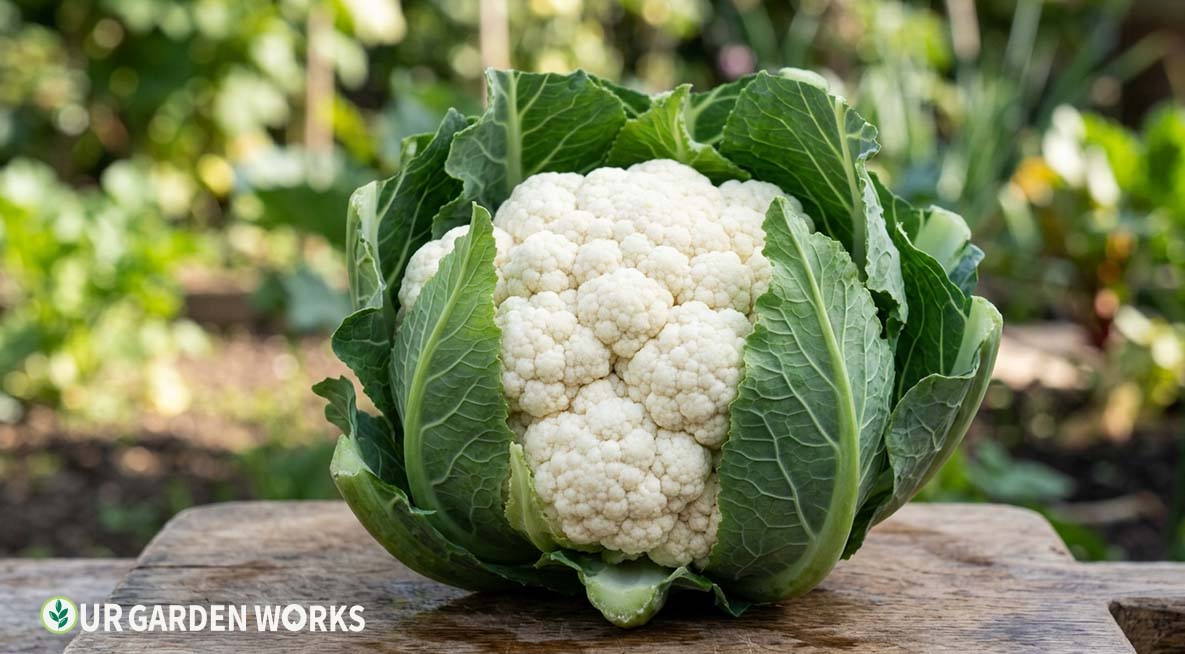
Cauliflower has earned its reputation as one of the most demanding vegetables to grow well — but most of that difficulty comes from one problem: getting the timing right.
Too warm and the head buttons or bolts before it forms properly. Too cold and it develops poorly.
The window of ideal conditions is genuinely narrow. But hit that window, understand the blanching technique, and you’ll produce heads that look and taste nothing like what you buy at the store.
There’s also a shortcut: colored cauliflower varieties (purple, orange, and green Romanesco types) don’t need blanching at all — they maintain their color in full sun. If you want to skip the most finicky step in cauliflower growing, plant a colored variety. We’ll cover both approaches.
Quick Guide (How to Grow Cauliflower): Transplant cauliflower starts outdoors 3–4 weeks before last frost (spring) or 6–8 weeks before first frost (fall — usually better). Blanch white varieties by folding leaves over the developing head when it’s 2–3 inches across. Harvest when heads are 6–8 inches and fully compact but before any separation of curds.
Why Cauliflower Has a Reputation for Being Difficult
If you’ve grown other brassicas successfully and still struggled with cauliflower, it’s not a failure of skill — cauliflower genuinely has a narrower tolerance for temperature swings than broccoli, cabbage, or kale.
Those crops can shrug off a few unusually warm or cool days during head development without much consequence. Cauliflower responds to that same stress by producing a head that’s small, loose, or oddly textured, and once that’s happened, there’s no recovering it — the plant has already committed to the outcome.
Understanding this upfront changes how you should think about the crop. Cauliflower isn’t a “set it and forget it” vegetable the way zucchini or beans can be.
It rewards a gardener who pays attention to the weather forecast around transplanting time and who’s willing to favor the cooler, more predictable fall growing window over the more volatile spring one.
Once you accept that timing is doing most of the work, the rest of the process — feeding, watering, blanching — is genuinely straightforward.
White vs Colored Cauliflower — A Key Decision
| Type | Varieties | Blanching Needed | Notes |
|---|---|---|---|
| White standard | Snowball Y, Amazing, White Sails | Yes | Classic flavor; requires blanching for white color |
| Orange (Cheddar) | Cheddar, Orange Bouquet | No | High beta-carotene; sweeter flavor; self-blanching in some types |
| Purple | Purple of Sicily, Graffiti | No | Mild flavor; turns green when cooked; beautiful raw |
| Romanesco | Romanesco Italy | No | Stunning fractal spiral; nutty flavor; technically a different species |
| Self-blanching white | Snowcrown, Candid Charm | Minimal | Leaves naturally fold over head; reduces manual work |
Romanesco skips the timing pressure and blanching entirely while producing the most visually spectacular vegetable in the garden. If you want classic white heads, choose a self-blanching variety like Snowcrown to reduce the labor of manual blanching.
Soil Preparation and Site Selection
Cauliflower wants rich, well-draining soil with a pH between 6.0 and 7.0, amended generously with compost before planting.
Because the plant is committing all of its energy into producing a single head rather than spreading that effort across a continuous harvest the way broccoli does, the soil needs to be in excellent condition from day one — there’s no second chance to correct a fertility problem partway through the season the way there is with a cut-and-come-again crop.
Choose a planting site with consistent sun exposure and good air circulation, but avoid an area that bakes in intense afternoon heat during the warmer parts of the year your crop will experience.
If you’re growing a fall crop, this is less of a concern since temperatures are already trending downward by the time heads are forming. For a spring crop in a hot-summer climate, a site with light afternoon shade can buy you a few extra days before heat stress sets in.
How to Grow Cauliflower: Step by Step
Step 1 — Start Indoors 5–7 Weeks Before Transplanting
Like broccoli, cauliflower is almost always grown from transplants rather than direct sowing.
The key timing difference from broccoli: cauliflower is even more temperature-sensitive and benefits from a consistent 60–65°F during head development. This is why the fall crop often succeeds where the spring crop fails — fall temperatures hit that sweet spot more reliably than the roller-coaster of spring.
Directions
- Start seeds indoors 5–7 weeks before transplanting date. Germinate at 70–75°F; grow on at 60–65°F (slightly cooler than most seedlings to avoid legginess).
- Transplant outdoors 3–4 weeks before last frost (spring) or 6–8 weeks before first frost (fall).
- Space 18–24 inches apart in rows 30 inches apart. Cauliflower needs more space than broccoli.
- Work in generous compost at planting. Consistent fertility throughout the season is essential — stressed plants produce poorly developed heads.
Step 2 — Blanching White Varieties
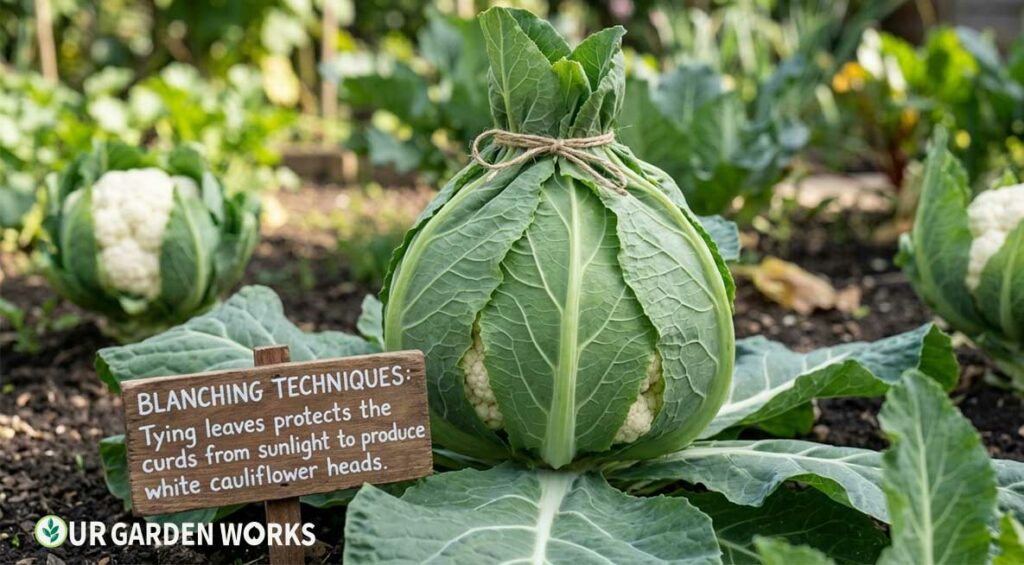
Blanching is the process of shielding the developing head from sunlight to keep it white. Without it, white cauliflower turns cream, yellow, or tan from pigment development triggered by light — still edible, but cosmetically different from store-bought white heads.
How to Blanch
- When the head (curd) is 2–3 inches across — about the size of an egg — it’s time to blanch.
- On a dry day, fold the large outer leaves up and over the developing head.
- Secure them with a rubber band, clothespin, or simply tie with soft twine.
- Check under the leaves every 2–3 days. Heads can be ready in as little as 5 days in warm weather, up to 2 weeks in cool weather.
- Harvest when the head is 6–8 inches across, tightly closed, and still completely firm. Don’t wait for the head to open or separate.
Step 3 — Consistent Water and Feeding
Watering: 1–1.5 inches per week, very consistently. Even mild drought stress causes loose, ricey heads or buttoning. This is the most water-critical brassica crop. Drip irrigation is ideal.
Fertilizing: Like broccoli, cauliflower is a heavy feeder. Apply balanced 10-10-10 at transplanting and again 4 weeks later. Stop feeding once heads begin to form — late nitrogen causes looser heads.
Why Fall Planting Solves Most Cauliflower Problems
We mention the fall advantage throughout this guide because it’s genuinely the single biggest lever you have over your results.
Transplanting cauliflower in mid-to-late summer for a fall harvest means the plant spends its early establishment phase in warm, settled weather — no risk of a sudden cold snap stunting young transplants — and then moves into head formation just as temperatures begin a gradual, predictable decline.
That predictability is what spring planting can’t offer. A spring transplant has to survive an unpredictable stretch of weather that might swing from a late frost to an early heat wave within the same few weeks, and cauliflower’s head formation happens to fall right in the middle of that volatile window.
If you’ve tried cauliflower once in spring and been disappointed, we’d genuinely encourage giving the fall crop a try before writing off the vegetable entirely — for many home gardeners, it’s the difference between a frustrating crop and a genuinely satisfying one.
Frequently Asked Questions
Why did my cauliflower produce a small, ricey head?
Temperature stress is the primary culprit — either too warm (above 80°F) or too cold (below 45°F) during head development. This produces a condition called “ricing” where the curd separates prematurely into a loose, granular mass. The fix is timing — plant for fall and let the cooling temperatures drive head development.
What's the difference between cauliflower and broccoli in the garden?
Both are cool-season brassicas grown essentially the same way. Cauliflower is more temperature-sensitive and benefits from blanching (for white types). Broccoli gives you continuous side shoot harvest after the main head; cauliflower produces one head and is finished. Broccoli is more forgiving for beginners.
Can I eat cauliflower leaves?
Yes — they’re excellent. Large outer cauliflower leaves can be roasted, sautéed, or used like collard greens. The inner, more tender leaves around the head are the most delicate. Don’t discard them — they’re as nutritious as the head itself.
How many cauliflower plants should I grow for a family of four?
Plan for 8–10 plants if you want enough for regular fresh eating with some extra to freeze or pickle. Because each plant produces exactly one head and is then finished, cauliflower requires more total garden space per harvest than a cut-and-come-again crop like broccoli or kale — factor that into your planning if space is limited.
Related Articles in Our Vegetable Gardening Guide
Final Thoughts
We hope this guide has demystified cauliflower growing — the timing and blanching are really all there is to it, and the fall crop consistently delivers better results than the spring one. For all our vegetable growing guides, our vegetable gardening guide links to everything.
Share this post with a fellow gardener who’s ready to grow their own — and let us know in the comments whether you’re growing white or going for a colored variety this season. Happy growing!
