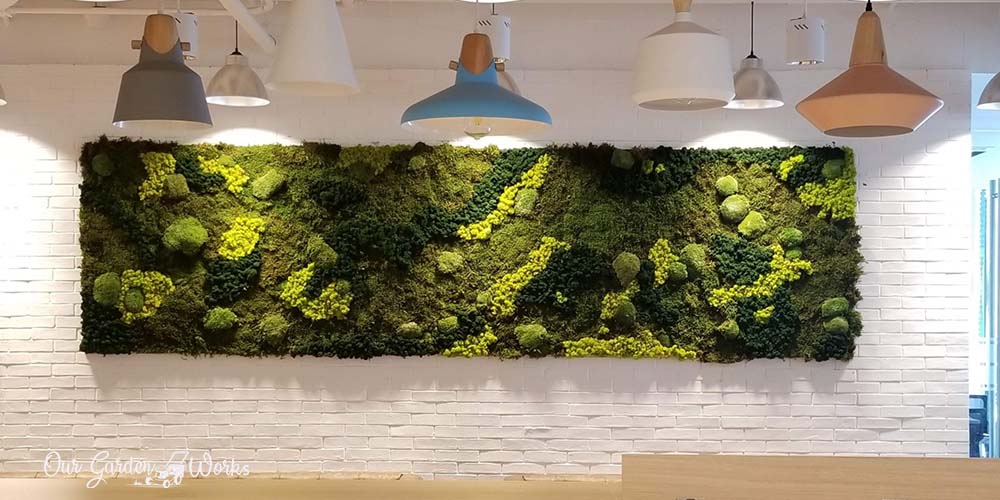
Having a living plant helps give off a zen vibe in a space. As many of us remain in isolation at home, adding a pop of flourishing greens on walls can spruce up our mental health. Living walls have become a trend that is changing how we feel about our indoor spaces.
In this post, learn how to build a moss wall and allow your space to become a catalyst of mindfulness and relaxation.
Release the green thumb out of you and let it show how you creatively design your indoor space this year.
What is a Moss Wall?
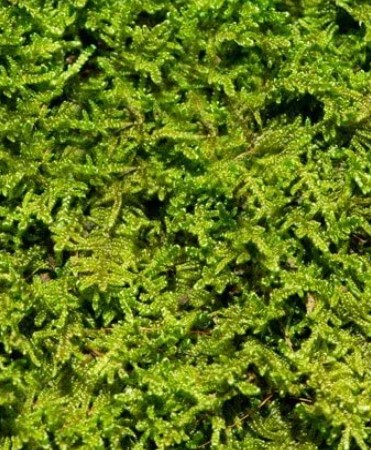
Moss wall is an art of using moss to create a living wall indoors or in places where no living plants can thrive. It is a versatile form of plant cultivation and design, allowing any space to have some greenery. The two types of moss used in walls are preserved and living moss.
The concept of using moss is a practice initially mastered by Buddhist priests in Kyoto, Japan. Saihō-Ji or Kokedera is a UNESCO World Heritage site in Japan that showcases the beauty of 120 different moss species.
The moss growth in the temple is an accidental discovery. According to its history, moss species took over the gardens when the monastery failed to maintain its upkeep.

Considerations in Hanging a Moss Wall
Moss is a plant that requires a lot of moisture to thrive. Living moss placed on a wall must be carefully designed by a professional architect to ensure that retained water will not cause wall damage.
The things you’ll consider when deciding for the type of moss wall is your ability to commit to its upkeep and the benefit you want out of it.
For a more budget-friendly option, most homeowners consider a preserved moss wall. It only needs minimal to no light or a water source.
Moss enthusiasts inject moss with glycerin and non-toxic resin to retain its shape, color, and texture. Unlike live moss that needs regular upkeep, preserved moss can look fresh for years.
The popularity of preserved moss walls skyrocketed because they can fit any wall design without requiring too much maintenance. They help spruce up spaces with no natural light and create a subtle change in their atmosphere.
There is also less need to fortify the wall hangers because the moss wall frame is more lightweight without the moisture involved.
How To Build a Moss Wall in 7 Steps
After having some quick background about moss walls, it’s now time to build your own moss wall.
Let’s begin!
#1 Selecting The Type of Moss
The first step in building your moss is deciding between a living moss or a preserved one. Live moss needs moisture, which may require you to place it near or in an outdoor area. You will also need to plan the drainage where water can pass from the moss wall.
On the other hand, choosing a preserved moss wall doesn’t require much preparation. All you need to consider is the location and the size of the moss wall you aim to create. Preserved moss is ideal for indoor use since you can still achieve the same vibe and look without the upkeep problems.
To help you decide, here are the general differences between live moss and preserved moss:
Dried living moss
- Used in living walls, kokedamas, and terrariums.
- Sold by weight
- Come back to life after rehydration
- Requires a plant base to stay alive
Preserved moss
- Maintenance-free home decor
- Do not grow back
- Do not need light and water
- Come in clumps or attached in a panel
- May come in different colors and shapes

Moss Recommendations
Here are some of the commonly used moss varieties that you can use in building your moss wall:
Preserved moss:
Live moss that grows well in shade:
- Atrichum undulatum
- Aulacomnium palustre
- Bartramia pomiformis
- Bryoandersonia illecebra
- Climacium americanum
- Dicranum scoparium
- Entodon seductrix
- Hedwigia ciliata
- Hylocomium splendens
- Hypnum curvifolium
Live moss that grows well in the sun (outdoor):
- Atrichum angustatum
- Bryoandersonia illecebra
- Bryum argenteum
- Ceratodon purpureus
- Climacium americanum
- Entodon seductrix
- Hedwigia ciliata
- Leucobryum glaucum
- Leucobryum albidum
- Polytrichum commune
Live moss that grows well in partial shade and partial sun:
- Atrichum angustatum
- Atrichum undulatum
- Aulacomnium palustre
- Bryoandersonia illecebra
- Climacium americanum
- Dicranum scoparium
- Entodon seductrix
#2 Selecting The Accessories
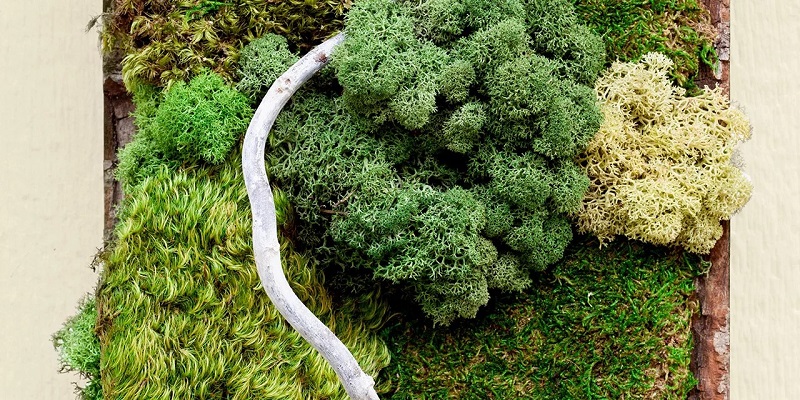
Now, for the fun part, plan on how you’ll design your moss wall. Aside from selecting the moss, you may also add some patterns using other dried or preserved ornaments.
These includes dried twigs, air plants, dried mushrooms, colorful ornaments, or wood branches and shells. Check out the design below for design inspiration.

#3 Find The Right Frame and Glue
Your imagination is your limit when it comes to the size of your moss wall. There are several frames that you can choose from ranging from a big circle frame, to small pentagon ones, as well as the classic rectangular moss wall.
Here are some moss base frame ideas that you can try:
- Corkboard
- Plywood
- 2×4 wood (for the frame)
Handling moss can be quite delicate. So, you must use a glue that will hold it well even if you place the frame vertically.
Moss artists use Liquid Nails to stick the moss on the base plywood or corkboard. They attach it to a caulking gun to ensure seamless use while placing the moss and accessories.
#4 Plan Your Design
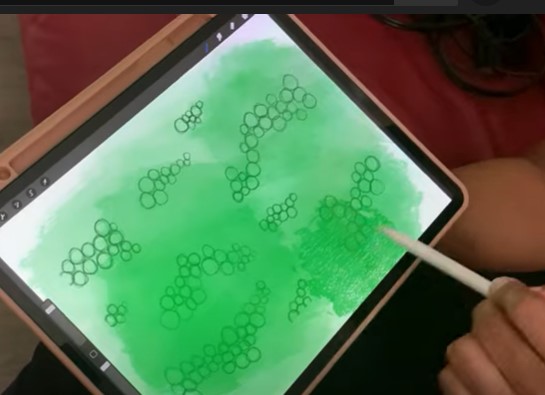
Before you assemble the moss, make sure that you have a clear picture of your desired design. You’ll ruin your moss and your base if you change your mind midway through the project.
You can use any drawing medium whether it’s a pen or paper or an Paint app, draw your design so you’ll know where and how to start.
Here are some design inspiration sources for you to check to trigger the artist in you:
- Artisanmoss.com
- LVZHIHUAN Moss Wall
- Preservedplantsusa.com/
#5 Build The Frame
Once your vision on your design has been met, it’s now time to start the actual work. Build the frame of your moss wall based on your design. Connect the sides and the base. Make sure that the sides can handle the weight of the entire frame.
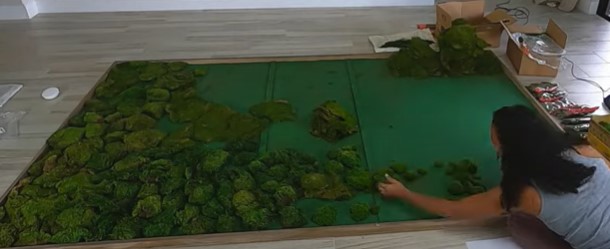
#6 Assembling The Moss and Accessories on The Frame
For the fun part, lay the frame flat on the floor and start placing the moss sheets. The materials you’ll need are just the adhesive, caulking gun, and scissors. The rest of the project lies in the wonders of your hands and creativity.
Create the first layer of moss while the frame is laying flat on the floor. Building the base of your moss wall will take a lot of time. You may initially create a pattern on the wood using a marker so it’s easier for you to place the moss. Professionals no longer need guides since they are well-versed on where goes what.
Once the first layer of moss is done and the glue has already dried up, you may lift the frame. Before you lift it up, make sure to use a vacuum cleaner to get rid of any debris. Once clean, check how the wall looks when placed vertically.
Fill some blank spots and enhance the design of your moss wall by adding in the accessories. The larger the project, the longer it will take you to place everything in place. So, planning the project ahead of time is important to avoid wasting your resources and time in building your first DIY moss wall.
For the second layer of designs, you can use a glue gun to help it stick over the moss and other accessories in your moss wall.
#7 Hanging Your New Live Moss Wall
Once your moss wall is done, place it in areas where it can get a lot of moisture in the air and away from direct sunlight. They don’t need too much light and moisture unlike live moss.
When the air is too dry you may mist them lightly. However, do it only if the air is too dry and you notice that the moss is becoming dull.

Once the moss wall is preserved in a humid area, it can last for an indefinite time. The beauty of using preserved moss is it is zero maintenance.
However, if you choose to have a living moss wall, the moisture level should be constantly checked to ensure that they will remain as vibrant green as possible.
Benefits of DIY moss wall vs. Hiring a Professional Moss Artist
With the extent of the designing process required in creating a moss wall, it can be tempting to hire a professional to do it for you.
There are now indoor plantscaping services that offer their expertise to design your moss wall. The service can cost around $3000 while DIY moss walls can cost 50% to 75% less.
Building your own DIY moss wall allows you to bring out your creativity and express it in the way you like it. You can also change the design and customize the ornaments every year based on your preferences.
The Impact Having a Moss Wall At Home
We all know that having plants indoors has proven some benefits to our health and indoor air quality.
Living moss can also do the same but preserved moss walls go deeper than that. From indoor air quality to the human psyche, here are the benefits of having a moss in your home:
- Improves your mental health: Moss walls give people who live in highly-urbanized areas to have a sense of nature or zen in their space. According to a study, having a life form inside your house helps improve your well-being by 74%.
- Boosts concentration and productivity: Green gives off a sense of calm. Seeing green around your home office can help you be in a calm state when you feel overwhelmed with tasks. A green moss wall can also be beneficial for the productivity of people who thrive in a calm and quiet environment.
- Absorbs sounds: Aside from being a delight to the eyes, moss walls can also serve as a soundproofing material. It adds a dimension to the wall which helps minimize the noise.
- Do not attract pests: Preserved moss is a thin line between a living moss and a fake plant. It is real but not living. It looks alive and well but does not harbor pests and molds into your house unlike real plants and moss.
- Humidity detector: Though preserved moss is no longer alive, it benefits from the humidity in an indoor space. Without enough humidity, its lifespan will decrease and become dull faster than usual. So, when you see that your moss wall is starting to wither, it is an indication that your indoor humidity levels have dropped.
- Versatile interior decoration: The biggest advantage of a moss wall is its versatility. You can rearrange its design however you like without causing too much problem to your interior decorations.
Frequently Asked Questions (FAQs)
How long do moss walls last?
A living moss wall made of real and living moss can last for 25 years. Preserved moss walls that are kept away from direct sunlight and dry temperatures. Moss can stay alive for a long time as long as it gets moisture and shade. It is the reason why it’s among the most cost-efficient plants to have in the garden and indoors.
Do you have to water moss walls?
Living moss walls require frequent misting to preserve its health. It is the reason why living moss walls are mostly recommended for an outdoor area in a home to ensure that the moisture will not cause damage to the wall where it is hung.
Does a moss wall need light?
Like plants, there are varieties of moss that thrives and requires sunlight. However, moss in general are NOT a fan of light and can thrive in shade for several years. They are pretty much like mushrooms that grow in moist and shady environments.
Final Thoughts
We hope that this post helped you learn how to build a moss wall at home. A carefully curated moss wall is a piece of art that can transform a dull nook into a breathing space. Place your moss wall in areas where you want to be calm like a yoga area or even your home office.
Let us know in the comments how long did it take you to build your moss wall. Also, please don’t forget to share this post to your friends to hop on the moss wall trend.
Unleash your creativity and enjoy creating your moss wall!
For more ideas on incorporating moss alongside paths, water features, and other design elements, our backyard design guide covers how to bring it all together.