

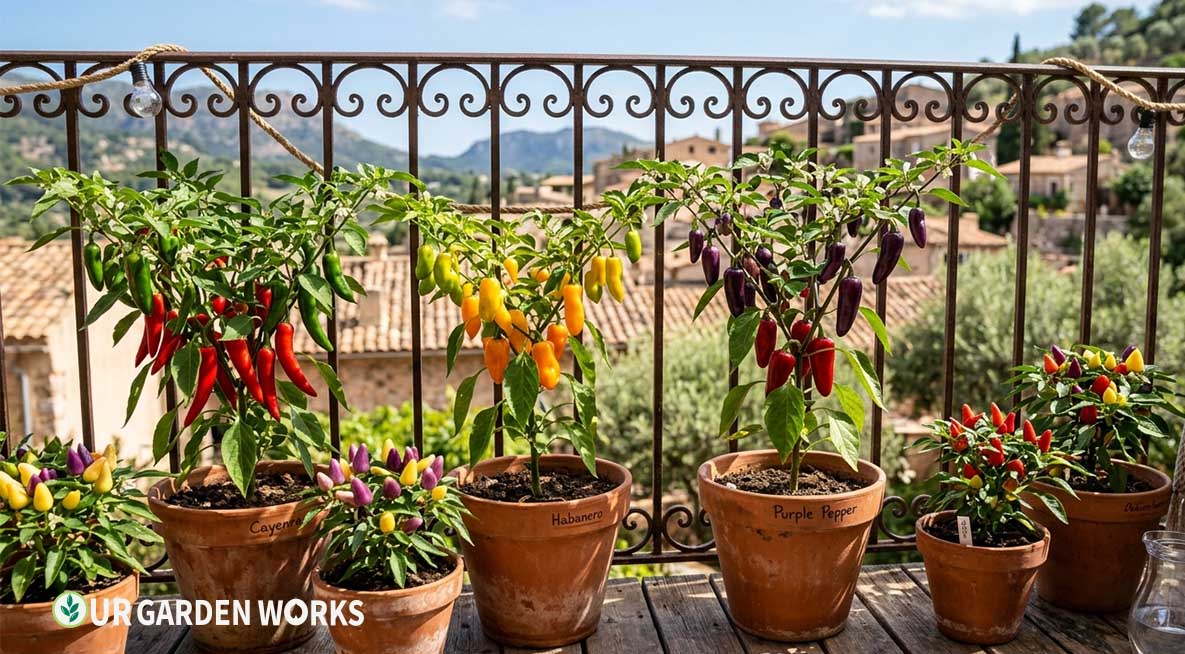
Here’s something that might surprise you: peppers often grow better in containers than in ground beds — especially in cooler climates.
Containers warm up faster than garden soil in spring, and you can position them in the hottest, sunniest spot you have. Peppers are heat-lovers, and a container on a south-facing wall absorbs and reflects significantly more heat than a garden bed in the same garden.
The other advantage: if a cold night threatens in early season, you can move them. In-ground peppers take whatever weather comes. Container peppers give you flexibility that can mean the difference between an early crop and a late one.
Once you’ve grown peppers in containers for a season and seen how much earlier they ripen compared to a friend’s in-ground plants, it’s hard to go back.
How to grow peppers in containers: Use 5-gallon containers for hot peppers and compact sweet varieties; 10-gallon for large bell peppers. Premium potting mix is essential. Position in the hottest, sunniest spot you have. Water when top inch is dry (usually every 1–2 days in summer). Feed with low-nitrogen, high-potassium fertilizer once flowering begins.
Why Peppers Are Such Good Container Candidates
Peppers evolved in warm, often rocky, well-draining environments in Central and South America — conditions that a container can replicate more precisely than most garden beds.
Unlike leafy greens that prefer steady, even moisture, peppers actually perform best with a slight dry-down between waterings, which mimics their native habitat and concentrates flavor and heat in the fruit.
Container growing also solves one of the biggest challenges in pepper cultivation in cooler climates: soil warmth.
Pepper roots stop functioning efficiently below 60°F soil temperature, and many in-ground gardens in Zone 5 and colder don’t reach that benchmark reliably until well into June.
A dark-colored container on a sun-facing patio can reach planting-ready soil temperatures two to three weeks earlier than the same spot in open ground, effectively extending your growing season from both ends.
There’s also a practical harvest advantage. Container peppers at eye level or waist height on a deck or balcony railing are far easier to check daily than plants tucked into a busy garden bed.
Many gardeners find they actually harvest peppers more consistently — and therefore get more total production — simply because the plants are more visible and more convenient to reach.
The 6 Best Pepper Varieties for Containers
| Variety | Type | Min Container | Notes |
|---|---|---|---|
| Cayenne | Hot | 5 gal | Compact, prolific, excellent container performer |
| Thai Hot | Very hot | 3–5 gal | Small plant, enormous yield; ornamental and edible |
| Jalapeño (Mucho Nacho) | Medium heat | 5 gal | Compact variety bred for container growing |
| Lunchbox Mini Sweet | Sweet snacking | 5 gal | Prolific mini sweet peppers; no cooking required |
| California Wonder Bell | Sweet bell | 10 gal | Full-size bell in large container; more demanding |
| Shishito | Mild Asian | 5 gal | Excellent container variety; very productive |
💡 Hot peppers are the best container performers
Compact hot pepper varieties are the easiest and most productive container peppers. A single Thai Hot plant in a 5-gallon pot will produce hundreds of peppers. If you want maximum production per square foot of patio space, plant hot varieties. Bell peppers need larger containers and are more demanding — work up to them after a successful season with compact types.
Choosing a Container — Size, Material, and Drainage
The minimum sizes in the table above are genuinely minimums, not suggestions to round down from.
A pepper plant that’s slightly cramped in its first month will tolerate it, but a plant that stays cramped through fruit set produces a noticeably smaller harvest than the same variety given adequate root room.
If you’re unsure between two sizes, choose the larger one — the cost difference in potting mix is small compared to the yield difference over a full season.
Terracotta is a popular choice for peppers because it’s porous and allows the slight dry-down between waterings that peppers prefer, while also helping prevent the waterlogging that causes root rot.
The tradeoff is that terracotta dries out faster than plastic or glazed ceramic, so in very hot climates it may need more frequent watering.
Whatever material you choose, drainage holes are non-negotiable — peppers are one of the least tolerant common vegetables when it comes to sitting in standing water.
How to Grow Peppers in Containers: Step by Step
Step 1 — Set Up Your Containers
Directions
- Choose containers with drainage holes — peppers rot quickly in waterlogged soil. If you love a pot without drainage, use it as a cachepot (decorative outer pot) with a plastic growing pot inside.
- Fill with premium potting mix amended with 15% perlite for drainage. Add a slow-release fertilizer at the package rate.
- Position the containers in your sunniest, warmest spot before planting — they’re much easier to move empty than full.
Step 2 — Transplant After Soil Reaches 65°F
Wait until overnight temperatures are consistently above 55°F and pot soil reaches 65°F before transplanting. Cold soil stunts pepper growth just as dramatically in containers as in beds. If you’re eager to get started, a cold frame or cloche over the containers extends your planting window by 2–3 weeks.
When transplanting, plant peppers at the same depth they were growing in their starter pot — unlike tomatoes, peppers don’t benefit from being buried deeper along the stem. Burying a pepper stem too deep can actually encourage stem rot rather than the additional rooting that deep-planted tomatoes enjoy.
Step 3 — Watering Container Peppers
Water when the top inch of potting mix feels dry — usually every 1–2 days in summer heat. Unlike tomatoes, peppers tolerate and even benefit from slight drought stress during fruit development (it concentrates heat in hot varieties).
Don’t let them wilt completely, but you don’t need to water as religiously as container tomatoes. Morning watering is always better — it gives foliage time to dry and reduces disease risk.
💡 Slight stress builds heat in hot peppers
If you’re growing hot peppers specifically for spiciness, allowing the soil to dry slightly more than usual between waterings — without ever letting the plant wilt severely — can measurably increase capsaicin concentration in the fruit. This is a deliberate technique some hot pepper growers use intentionally in the final weeks before harvest.
Step 4 — Fertilizing: The Timing Matters
Before flowering: Balanced 10-10-10 liquid fertilizer every 2 weeks. This builds the plant’s structure.
Once flowering begins: Switch to a tomato-specific or low-nitrogen, high-potassium fertilizer (5-10-10). High nitrogen at this stage pushes lush foliage at the expense of fruit — this is the most common container pepper fertilizing mistake.
Through fruiting season: Continue low-N, high-K every 10–14 days. Don’t stop fertilizing until first frost — container peppers need consistent feeding throughout.
Try our free tool: Fertilizer Calculator – How Much Fertilizer to Apply (By Crop & Bed Size)
Step 5 — Overwintering Container Peppers
Here’s the best-kept secret in container pepper growing: peppers are perennials in frost-free climates.
If you bring container peppers indoors before the first frost and keep them in a cool but frost-free location (45–55°F) through winter, they’ll burst back to life in spring 4–6 weeks before your transplant date. Year-2 pepper plants produce earlier and more heavily than first-year transplants.
To overwinter: cut plants back to 6-inch stubs, move to a cool frost-free location (garage, basement), water lightly every 2–3 weeks, and move back outdoors after last frost. They look dead through winter — they’re not.
Common Container Pepper Problems and Quick Fixes
Most container pepper struggles trace back to one of a small handful of causes, and recognizing the pattern quickly saves a season.
Stunted growth with purple-tinged leaves usually points to cold soil — move the container to a warmer spot or wait it out if it’s still early season.
Yellowing lower leaves that progress upward, especially paired with slow growth, often indicates the container has simply run out of available nitrogen between feedings and needs a fertilizer top-up.
Sudden wilting despite moist soil is almost always a drainage problem rather than a watering problem — check that water is actually flowing freely out the bottom of the pot.
Frequently Asked Questions
How many peppers can I expect from one container plant?
Hot compact varieties: 50–200+ peppers per season depending on variety. Shishito: 50–100 pods. Lunchbox mini sweets: 30–60. Full-size bell peppers: 8–15 per plant. Hot peppers dramatically outperform sweet types in container yield per plant.
Why are my container pepper flowers dropping?
Temperature — night temperatures below 55°F or above 75°F cause flower drop. Inconsistent watering is the second cause. Check your overnight temperatures first. If nights are still cool, be patient — flower set will improve as temperatures stabilize.
Can I use the same container potting mix for peppers year after year?
For 2–3 seasons yes, with refreshing. Remove old roots, top-dress with 20% fresh potting mix, reapply slow-release fertilizer, and check pH. After 3 seasons or if any plant showed disease, start fresh with new mix.
Do container peppers need more frequent fertilizing than in-ground peppers?
Yes, significantly. In-ground peppers can draw on a much larger soil nutrient reserve and benefit from the slow breakdown of organic matter throughout the bed.
Container plants depend entirely on what you provide, and regular watering gradually flushes nutrients out through the drainage holes. Expect to fertilize container peppers roughly twice as often as you would the same variety planted directly in well-amended garden soil.
Related Articles in Our Vegetable Gardening Guide:
- How to Grow Peppers: Sweet, Hot & Bell Peppers (Complete 2026 Guide)
- Growing Tomatoes in Containers: Pot Size, Varieties & Watering (2026)
- Growing Cucumbers in Containers: The Vertical Method That Actually Works (2026)
- Growing Strawberries in Containers: Pots, Planters & Hanging Baskets (2026)
- Vegetable Gardening Guide
Final Thoughts
We hope this guide has shown you why container peppers are one of the smartest crops you can grow on a patio or balcony — especially the overwintering trick. For all our vegetable growing guides, our vegetable gardening guide links to everything.
Share this post with a fellow gardener who’s ready to grow their own — and let us know in the comments which pepper variety you’re growing in containers this season. Happy growing!
