

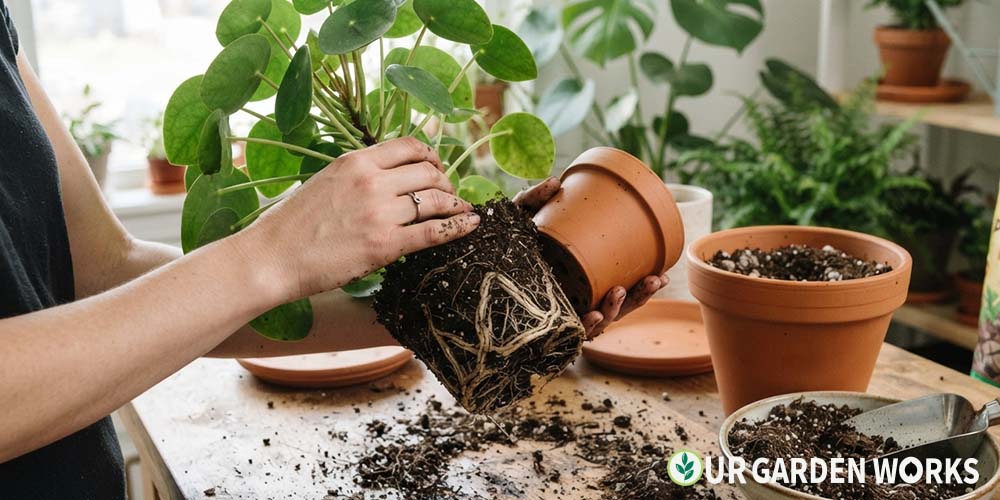
Repotting has a reputation for going wrong, and it usually does for the same handful of avoidable reasons — wrong timing, too much size jump at once, or rough handling of roots that didn’t need to be disturbed.
None of these mistakes are complicated to avoid once you know what they are. This guide walks through the full process in the order that minimizes stress on the plant at every step.
How to repot a plant – Quick Guide: Repot in spring or early summer when the plant is actively growing. Choose a pot only 1–2 inches larger in diameter than the current one. Gently loosen roots, place in fresh soil at the same depth as before, and water thoroughly. Avoid repotting a plant that’s stressed, flowering, or recently purchased.
Step 1 — Confirm the Plant Actually Needs Repotting
Repotting too often is a more common mistake than repotting too rarely. Check for genuine signs before assuming a plant needs a new pot.
- Roots circling visibly at the soil surface or growing out of drainage holes
- Water runs straight through without the soil absorbing it, a sign roots have displaced most of the soil
- Growth has stalled despite otherwise good care
- The plant dries out unusually fast between waterings
If none of these apply, the plant is probably fine where it is. Some plants, including many succulents and orchids, actually prefer being slightly root-bound and shouldn’t be repotted just because time has passed.
Step 2 — Choose the Right Time
Spring through early summer is the ideal window for most houseplants, since this is when active growth gives the plant the energy to recover quickly from the disturbance.
Avoid repotting in winter dormancy, during or right after flowering, or within the first few weeks of bringing a new plant home. Each of these situations adds stress on top of stress, and recovery becomes noticeably slower.
💡 Newly purchased plants need time to adjust first
A plant fresh from the nursery has already been through transport stress and a change in environment.
Give it 2–3 weeks to settle into your home’s light and humidity before repotting, even if the nursery pot looks small.
Step 3 — Choose the Right Pot Size
This is where most repotting mistakes happen. The instinct is to size up dramatically, but a pot that’s much too large holds more soil than the roots can use.
That excess soil stays wet long after the root zone has dried, creating exactly the damp conditions that lead to root rot. Size up by only 1–2 inches in diameter from the current pot.
This gives roots room to grow into without leaving so much extra soil volume that watering becomes a guessing game.
| Current Pot Diameter | Next Size Up |
|---|---|
| 4 inches | 6 inches |
| 6 inches | 8 inches |
| 8 inches | 10 inches |
| 10+ inches | +2 inches |
Step 4 — Remove the Plant Carefully
Directions
- Water the plant a day or two before repotting. A well-hydrated root ball comes out of the pot more easily and intact than a bone-dry one.
- Tip the pot on its side and gently squeeze the sides (for plastic) or run a thin knife around the inside edge (for ceramic) to loosen the root ball.
- Slide the plant out by supporting the base of the stem, not pulling on leaves or the stem itself.
- If it resists, never yank. Squeeze and tap the pot from multiple angles until it releases.
⚠️ Never pull a stuck plant out by force
Forcing a stuck root ball tears roots and can snap the main stem at the base. If a plant won’t release after reasonable effort, cut the plastic pot away rather than risk damage.
Step 5 — Inspect and Gently Loosen the Roots
Once out of the pot, look at the root ball. If roots are tightly circling the outside (root-bound), gently tease them apart with your fingers to encourage them to grow outward rather than continuing the circling pattern.
Trim any roots that are clearly dead, mushy, or black — healthy roots are firm and typically white, tan, or light brown depending on species. Don’t trim more than necessary; the goal is removing damage, not aggressive pruning.
Step 6 — Plant at the Correct Depth
Add fresh soil to the bottom of the new pot, then set the plant in at the same depth it was growing before. Planting too deep buries stem tissue that isn’t meant to be underground, inviting rot.
Fill in around the sides with fresh soil, pressing gently to remove large air pockets without compacting it hard. Water thoroughly until it runs from the drainage holes, which helps settle the soil naturally around the roots.
Why Newly Repotted Plants Often Look Worse Before They Look Better
It’s worth setting expectations here, since a normal adjustment period often gets mistaken for a failed repotting. Roots experience real physical disturbance during the process, even when handled carefully.
For a period of days to a couple of weeks, the plant may direct more energy toward root recovery than toward visible top growth, which can look like stalled growth or mild wilting. This is usually temporary.
Keep the plant out of intense direct light and hold off on fertilizing for at least a month, giving the root system time to recover before asking it to process additional nutrients.
Choosing the Right Soil for the Plant You’re Repotting
Not every houseplant wants the same soil, and using a generic mix across very different plants is a common, quiet source of poor recovery after repotting. Succulents and cacti need a fast-draining mix heavy in perlite or coarse sand.
Tropical foliage plants generally do well in a standard, peat-based or coir-based potting mix with good but not excessive drainage. Orchids need a completely different, chunky bark-based medium rather than anything resembling traditional potting soil.
Using the wrong soil type doesn’t always cause immediate, obvious problems, but it sets up chronic stress — overly wet roots in a succulent’s case, or insufficient moisture retention in a tropical plant’s case — that shows up gradually over the following weeks and months.
Signs the Repot Went Well
Within a few weeks of a successful repot, look for these positive signs rather than just the absence of problems. New leaf growth, even a single small leaf, is the clearest indicator that roots have settled in and are actively supporting growth again.
Stems and existing leaves should regain any firmness lost during the initial stress period. Soil should dry out at a normal, predictable rate rather than staying soggy for unusually long periods, which would suggest the pot size or soil mix isn’t quite right.
If several weeks pass with no new growth and no improvement in firmness, it’s worth checking the root ball again — sometimes a second, gentler intervention is needed if the first attempt left damaged roots untreated.
Frequently Asked Questions
How often should houseplants be repotted?
Most houseplants need repotting every 1–2 years, though fast growers may need it annually and slow growers can go 3+ years. Let the actual signs (roots circling, water running through, stalled growth) guide timing rather than a fixed schedule.
Should I add fresh soil every time I repot, or can I reuse the old soil?
Always use fresh soil when repotting. Old soil has typically lost much of its structure and nutrient content, and may carry pest eggs or fungal spores accumulated over time. Fresh soil gives the plant the best possible start in its new pot.
Is it normal for a plant to droop right after repotting?
Yes, mild drooping for a few days is a normal stress response as roots adjust to disturbance and new soil. Persistent drooping beyond a week or two, especially combined with yellowing or soft stems, suggests overwatering in the new pot rather than normal repotting stress.
Can I repot a plant that's currently flowering?
It’s better to wait until flowering finishes if possible. Repotting redirects the plant’s energy toward root recovery, which can cause flowers or buds to drop prematurely. If the plant is severely root-bound and struggling, repotting anyway is still better than leaving it stressed indefinitely.
What's the difference between repotting and just topping up soil?
Repotting moves the entire plant and root system into a new container, addressing root-bound conditions and refreshing all the soil. Top-dressing simply adds fresh soil or compost to the surface of an existing pot, which replenishes some nutrients but doesn’t address a genuinely outgrown container.
Do I need to use a pot with drainage holes when repotting?
Strongly recommended for nearly every houseplant. Drainage holes let excess water escape rather than pooling at the bottom of the pot, where it can suffocate roots and lead to rot. A decorative pot without drainage can still work as an outer cover, as long as the actual growing pot inside it has proper drainage.
Related Articles in Our Plant Care Guide
Final Thoughts
We hope this gives you a process that takes the guesswork — and the dread — out of repotting day. Most of what goes wrong traces back to one of a few specific mistakes, and now you know exactly which ones to watch for.
For care of specific plants after repotting, our plant care guides cover the rest.
Share this post with a fellow plant parent who’s been putting off a repot — and let us know in the comments which plant you’re tackling next. Happy growing!
