Every time you grow a delicious heirloom tomato, you’re holding next year’s seeds in your hand.
Saving tomato seeds takes about 20 minutes of active work spread over 4–5 days, costs nothing, and gives you an unlimited supply of your favorite varieties. Once you’ve done it once, you’ll wonder why you ever bought tomato seeds.
The key is the fermentation method — a brief controlled fermentation that removes the gel coat surrounding each tomato seed.
This gel coat inhibits germination. Skip it (as many simplified guides suggest) and your germination rates will be significantly lower. Do it right and you’ll get germination rates above 90%.
How to Save Tomato Seeds: Save seeds from ripe, open-pollinated or heirloom tomatoes only (not hybrids — seeds won’t breed true). Ferment the seeds in water for 3–5 days, rinse thoroughly, dry completely on a paper plate for 1–2 weeks, and store in a cool, dark, dry location in labelled envelopes. Properly dried tomato seeds last 4–6 years.
⚠️ Only save from heirloom or open-pollinated varieties
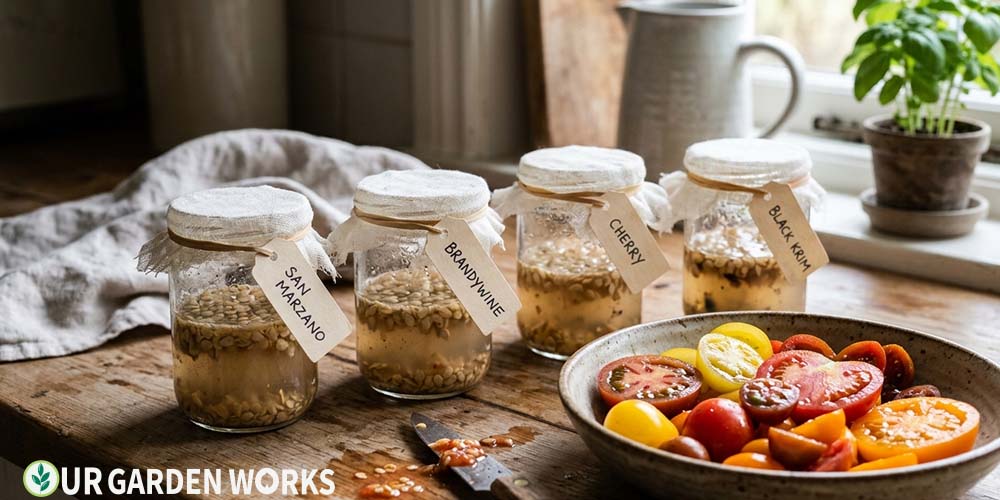
Seeds saved from hybrid tomatoes won’t breed true — the next generation will revert toward one of the parent varieties and produce inconsistent results. Only save seeds from heirloom or open-pollinated varieties. Look for “OP” or “heirloom” on seed packets. Varieties like Brandywine, Cherokee Purple, Black Krim, Roma, and San Marzano are all open-pollinated.
Step 1 — Choose Your Seed Tomato
What to Look For
- Choose the best tomato from the best plant — the one with the most vigour, best disease resistance, and best fruit. You’re selecting for the traits you want to perpetuate.
- The tomato must be fully ripe — slightly overripe is even better. Seeds inside an underripe tomato aren’t fully mature and may not germinate.
- Select from a plant that hasn’t shown disease or significant pest damage. You’re selecting for resilience.
- If possible, choose a tomato from the middle of the harvest season rather than the first or last fruit — these are often the most typical expression of the variety.
Step 2 — Extract and Ferment the Seeds
Materials
- Ripe tomato
- Small glass jar or cup per variety
- Knife and spoon
- Labels (mark every jar immediately)
- Cheesecloth or fine mesh strainer
- Paper plates for drying
Directions
- Cut the tomato in half across the equator (not stem to blossom end). Squeeze or spoon the seed cavities into a small glass jar — you want the seeds along with all the surrounding gel and juice.
- Add an equal amount of water to the jar. Stir.
- Label the jar immediately with the variety name and date.
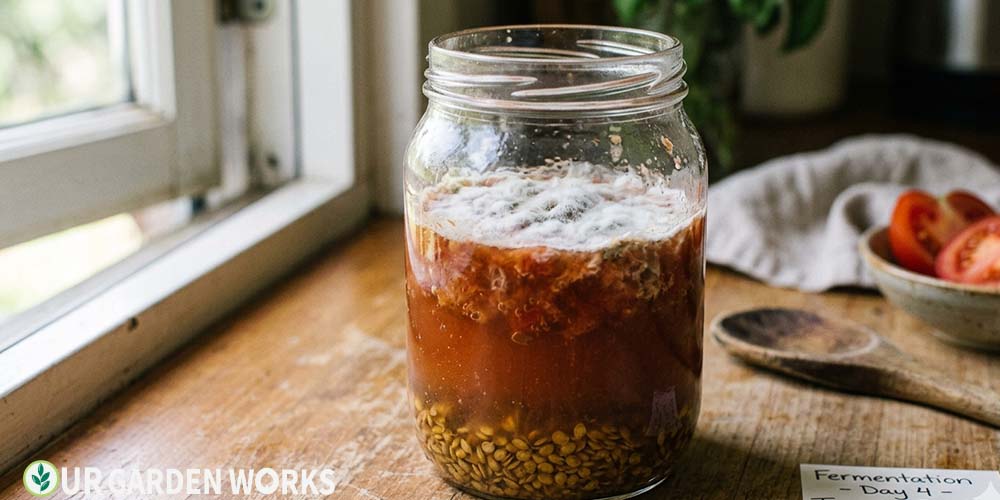
- Cover loosely with plastic wrap or a lid left ajar — you want some airflow but not fruit flies. Place in a warm spot (70–75°F) out of direct sun.
- Stir once daily. Over 3–5 days, you’ll see a layer of mold forming on the surface. This is correct — the fermentation is working. The gel coat is being broken down by naturally occurring fungi and bacteria.
- Viable seeds sink to the bottom. Non-viable seeds, debris, and the gel coat float to the top with the mold layer.
- After 3–5 days (no more — over-fermentation damages seeds), carefully pour off the floating mold and debris, leaving the viable seeds at the bottom.
Step 3 — Rinse and Dry
Directions
- Pour the seed slurry through a fine mesh strainer. Rinse under cold running water while rubbing the seeds gently with your fingers — this removes remaining gel and debris.
- Spread the clean seeds in a single layer on a labelled paper plate. Do not use paper towels — seeds stick and you’ll tear them trying to remove them.
- Place in a warm, well-ventilated location out of direct sun. Stir the seeds daily to prevent clumping.
- Dry for a minimum of 1 week — 2 weeks is better. The seeds are fully dry when they don’t stick together and snap cleanly when bent (not bend — snap).
- Do not use a dehydrator or oven — temperatures above 95°F damage seed viability.
Step 4 — Store Your Seeds
Store dried seeds in small paper envelopes or small glass jars with tight lids. Include a silica gel desiccant packet if storing for more than one season. Label with variety name, date saved, and location where the plant was grown.
Store in a cool, dark, dry location: a basement, refrigerator (in an airtight container to prevent moisture), or cool pantry. Properly dried and stored tomato seeds remain viable for 4–6 years.
Frequently Asked Questions
Can I skip the fermentation step?
You can — seeds saved without fermentation will germinate, but at a significantly lower rate. The gel coat contains germination inhibitors, and fermentation is the most effective way to remove it completely. If you’re saving seeds from a single rare variety, fermentation is worth the extra days.
How do I know if my saved seeds are still viable?
Do a germination test: place 10 seeds on a damp paper towel, fold, and keep in a warm spot for 7–10 days. Count how many germinate. 70%+ germination = seeds are fine. 50–70% = plant more seeds per cell. Below 50% = buy fresh seeds.
Will saved seeds produce the exact same tomato next year?
If saved from open-pollinated or heirloom varieties: yes, with slight natural variation that is part of what makes heirlooms interesting. If saved from hybrid varieties: no — the offspring will be unpredictable. This is why we only save from heirlooms.
🥬 Related Articles in Our Vegetable Gardening Guide
Final Thoughts
We hope this guide means you never have to buy your favorite tomato seeds again. Seed saving is one of those skills that connects you to hundreds of years of gardening tradition — and it’s genuinely satisfying. For all our vegetable growing guides, our vegetable gardening guide links to everything.
Share this post with a fellow gardener who’s ready to get growing — and let us know in the comments which variety you’re saving seeds from this year. Happy growing!