

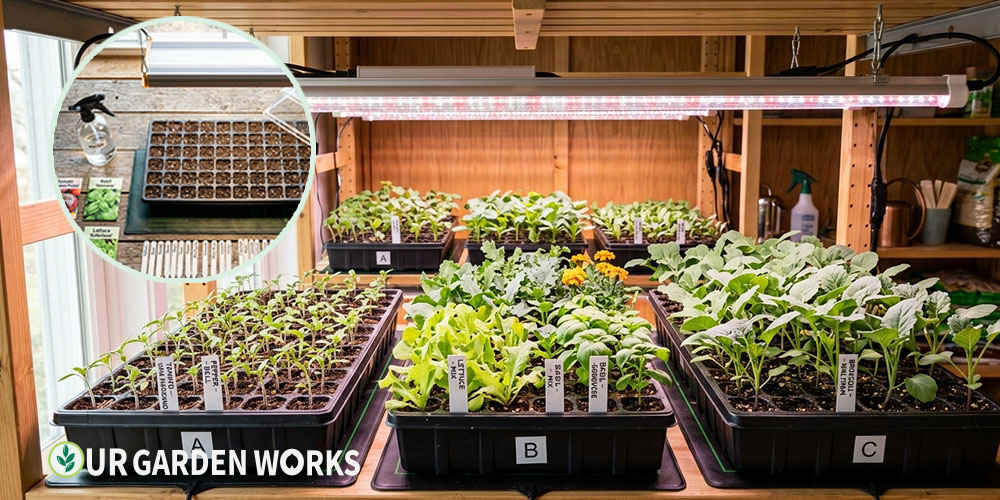
Starting seeds indoors is one of those skills that pays you back every single season. You get access to hundreds of varieties your local garden center never stocks. You save significant money — a $4 seed packet versus $4–5 per transplant. And you get to start the gardening season weeks before outdoor conditions allow.
The first season starting seeds feels slightly overwhelming — there’s timing to figure out, equipment to choose, and a succession of tasks over 6–8 weeks.
By the second season it becomes one of the most enjoyable parts of gardening. This guide walks you through every step.
Quick Answer: Start most vegetable seeds 6–8 weeks before your last frost date. Use seed-starting mix (not potting soil), provide 14–16 hours of light daily under a grow light, keep soil consistently moist with a spray bottle, and harden off for 7–10 days before transplanting outdoors.
What You Need Before You Start
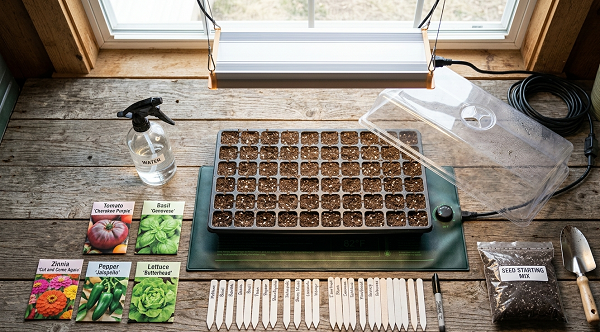
Seed-Starting Equipment
- Seedling trays or cell packs: 72-cell trays for small seeds; 4-inch pots for larger seeds like squash, cucumbers, and melons
- Seed-starting mix: Not regular potting soil — seed-starting mix is finely textured and sterile, preventing damping off. See our seed-starting mix vs potting mix guide.
- Grow light: This is the single most important investment. A south-facing window is usually not enough — most windows produce leggy seedlings. A basic LED grow light ($30–60) is the difference between strong compact seedlings and pale, stretched ones.
- Heat mat (optional but valuable): Soil temperature of 70–80°F significantly improves germination speed and rate for most vegetables. A basic seedling heat mat runs $20–30.
- Humidity dome: A clear plastic cover for the tray that holds moisture during germination. Remove immediately when seedlings emerge.
- Spray bottle: For gentle top-watering of small seedlings without displacing seeds.
- Labels: Mark every tray and cell — seedlings all look identical for weeks.
Step 1 — Timing: When to Start What
The most common seed-starting mistake is starting too early. A 12-week-old tomato seedling forced to stay in a small cell waiting for outdoor conditions becomes root-bound, stressed, and slow to establish after transplanting. A 7-week-old seedling planted at the right time will outgrow it in two weeks.
| Crop | Start Indoors | Transplant Outside |
|---|---|---|
| Tomatoes, peppers, eggplant | 6–8 weeks before last frost | 2 weeks after last frost |
| Broccoli, cabbage, kale | 4–6 weeks before last frost | 2–4 weeks before last frost |
| Lettuce, spinach | 4–6 weeks before last frost | 4 weeks before last frost |
| Cucumbers, squash, melons | 3–4 weeks before transplant | When soil reaches 70°F |
| Basil | 6 weeks before last frost | 2 weeks after last frost |
| Direct-sow only (beans, carrots, beets) | Do not start indoors | Direct sow when conditions are right |
Step 2 — Sowing Seeds
Directions
- Moisten your seed-starting mix before filling trays — it should feel like a wrung-out sponge. Dry mix in filled trays is almost impossible to moisten evenly after the fact.
- Fill cells to within ¼ inch of the top and firm gently. No air pockets.
- Read your seed packet for the correct planting depth. Most vegetable seeds: 2–3× the seed diameter. Tiny seeds (basil, lettuce): sow on the surface and barely cover.
- Plant 2 seeds per cell — insurance against germination failure. You’ll thin to one seedling later.
- Label every cell immediately. Not later. Now.
- Mist the surface gently with a spray bottle until evenly moist.
- Cover with the humidity dome and place on a heat mat in a warm location. Seeds don’t need light yet — they need warmth.
Step 3 — Germination
Check trays daily. Keep the surface moist — a dry surface halts germination in progress. The moment you see the first loop of stem breaking through the soil surface, remove the dome and move the tray immediately under your grow light. This is the most commonly missed timing — gardeners wait until seedlings are standing up before moving to light. By then, etiolation (stretching toward any available light source) has already begun.
Germination times by crop: Tomatoes 5–10 days; peppers 7–14 days; lettuce 2–5 days; broccoli 3–6 days; basil 5–7 days; cucumbers 3–7 days.
Step 4 — Caring for Seedlings Under Lights
Light: 14–16 hours per day under grow lights. Set a timer — consistency matters more than duration. Position the light 2–4 inches above the tops of seedlings. As seedlings grow, raise the light to maintain that distance.
Watering: Keep soil consistently moist but not wet. Bottom-watering (setting trays in a shallow dish of water for 20–30 minutes) produces stronger, deeper roots than top watering and is the preferred method once seedlings are established.
Thinning: When seedlings develop their first true leaves (the second set — the first set are seed leaves), snip the weaker seedling in each cell at soil level. Don’t pull — root disturbance can damage the keeper. One seedling per cell from this point forward.
Fertilizing: Start at quarter-strength liquid fertilizer when true leaves appear. Seed-starting mix has no nutrients — seedlings exhaust what’s in the seed within 2 weeks and need feeding. Full-strength at this stage burns seedlings.
Potting up: When seedlings are 3–4 inches tall with 2 sets of true leaves, move them to 3–4 inch pots. Tomatoes can be buried deep — plant up to the lowest set of leaves.
Step 5 — Hardening Off
Hardening off is the 7–10 day process of gradually introducing indoor seedlings to outdoor conditions — wind, direct sun, temperature fluctuations. Skip it and you’ll get transplant shock. Follow it and your seedlings will look just as good after transplanting as they did indoors.
7-Day Hardening Schedule
- Days 1–2: 1–2 hours in sheltered shade. Back inside before evening.
- Days 3–4: 3–4 hours, slightly brighter spot. Watch for wilting.
- Days 5–6: 5–6 hours with some morning sun.
- Day 7: Full day outside. Bring in only if frost is forecast.
- Day 8+: Leave out overnight when nights stay above 50°F (for frost-sensitive crops).
Frequently Asked Questions
Can I start seeds in regular potting soil?
Technically yes, but results will be worse. Potting soil is too coarse for small seeds and often too dense for tender seedling roots. It also isn’t sterile — it can introduce damping off fungus. Seed-starting mix is specifically formulated for germination and early root development. See our seed-starting mix guide for a full comparison.
Why are my seedlings leggy and pale?
Insufficient light. This is the most common seed-starting problem. A south window provides 4–6 hours of usable light in winter — not enough for compact seedlings. Add a grow light positioned 2–3 inches above the seedlings for 14–16 hours daily. Leggy seedlings can sometimes be saved by potting them up and burying part of the stem (works especially well for tomatoes).
My seedlings are falling over at the soil line — what's happening?
Damping off — a fungal disease that attacks the stem at soil level. It’s caused by overwatering, poor airflow, or non-sterile growing medium. Remove affected seedlings immediately (the fungus spreads). Allow soil to dry slightly between waterings and ensure good airflow around trays. Prevention: use sterile seed-starting mix, don’t overwater, and run a small fan on low near your trays.
Related Articles in Seed Starting Guide
Final Thoughts
We hope this guide makes your first (or next) seed-starting season your best one yet. The grow light is the single most important upgrade — everything else is detail.
Also, check out our seed starting guides hub – A hub link to all seed starting articles.
Share this post with a fellow gardener who’s ready to get growing — and let us know in the comments which crops you’re starting from seed this year and your setup. Happy growing!
