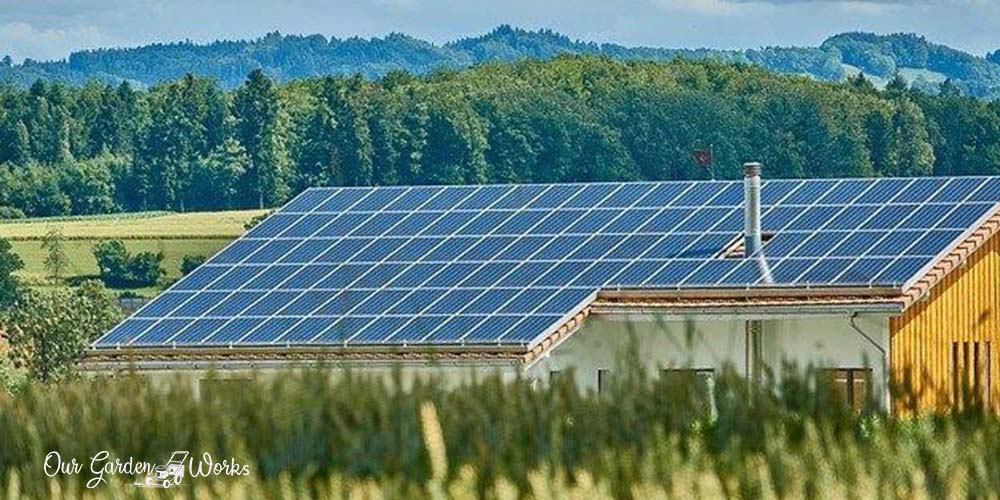
Renewable energy has been a buzz in recent years due to the continuous rise of oil products and climate change.
Many businesses are now transitioning to solar power due to its long-term benefit on costs and the environment. As a gardener, learning how to heat a greenhouse with solar panels can be a whole game-changer.
In this post, we will share a simple solar system setup that you can use to heat a tiny greenhouse.
In your pursuit of a cheaper and more sustainable way to continue growing through the cold season, we will also provide some ready-to-use kits to make your transition easier and faster.
However, before we strike at the root of our topic, it’s crucial to have a background on how solar-powered systems work.
How Solar System Works?
A solar system is a renewable energy system where sunlight is converted into electrical energy.
One of the common knowledge when it comes to a solar system is its solar panels. They capture the energy in sunlight and transfer it to an inverter to generate electricity for your consumption.
Without the sun, the solar system cannot produce electricity. So, for household and greenhouse use, the converted solar energy is stored in batteries or thermal mass for later consumption.
Thermal mass is an object or material that absorbs heat during the day and releases the hot or warm temperature at night.
It is usually a component in a passive solar design where there is no equipment used to sustain the electricity. Instead, thermal mass is used to keep a facility warm like water tanks.
According to a study, the combination of the solar system and thermal mass is an efficient solution.
Aside from using the solar system to power the fans and heat the greenhouse, thermal mass in the lower part or ground of the greenhouse can regulate the cold areas and efficiently cover everything with heat.
Types of Solar System Setup
The solar panel and inverters that you see in solar systems are part of an active solar system. It is a setup wherein solar energy from solar panels is used to heat a thermal mass, liquid, and air in a greenhouse or any building for later use.
For greenhouse heating, you have three options in using an active solar system with an off-grid setup, which includes a solar water heater and ventilation heating using fans through the DC (power produced from the inverter).
To further understand how the solar system works, here are the two setups common in powering up households and greenhouses.
Off-Grid Solar System Setup
An off-grid solar system is a setup wherein the solar energy collected from the solar panels is stored in a battery for later use. It is commonly found in homesteads and gardens since it is easy to assemble and a complete set of this setup is already available in the market.
Off-grid solar systems can power simple appliances like laptop chargers, small fans, and lights.
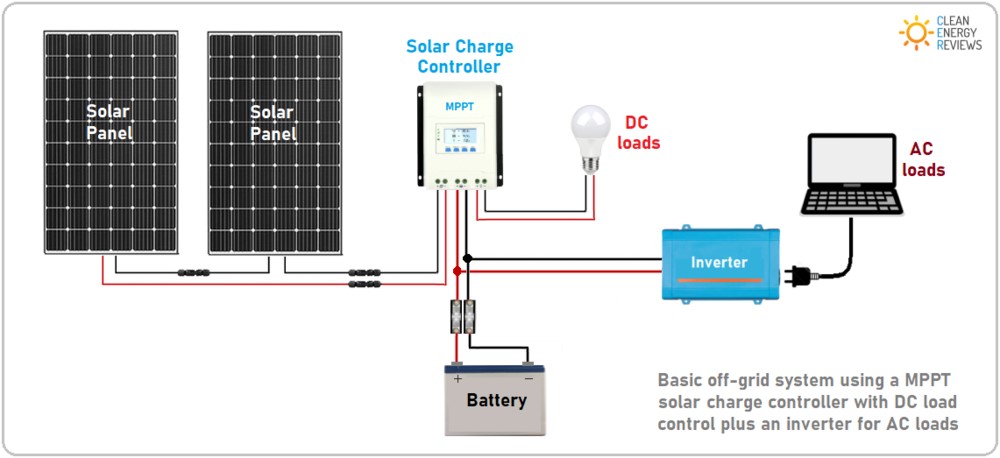
The components of a simple off-grid solar system include:
(1) Solar panels: These are the panels that collect the solar energy that will run through the system. It has three types which include monocrystalline, polycrystalline, and thin-film solar panels.
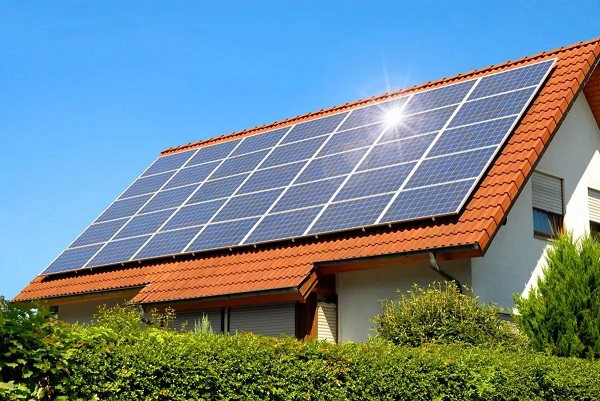
A typical and simple off-grid setup can power up small devices using a 100-watt polycrystalline solar panel. It is usually connected to a charge controller to help regulate and monitor the amount of energy that goes into the battery and prevent it from frying up.
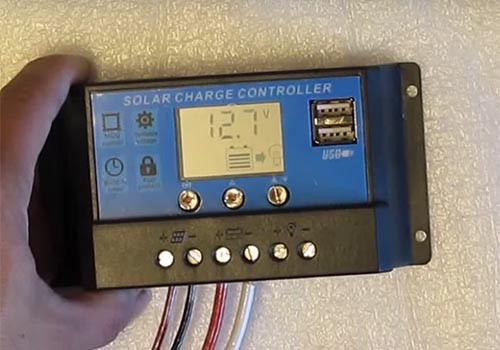
(2) Charge controller: A small digital device that helps monitor the charge that goes into the battery from the solar panels. A typical solar system setup or solar kit is connected to the battery, solar panels, and DC appliances like lights.
(3) Battery: The battery is where the solar energy is stored from the solar panels. A 100-Ah 12V deep-cycle battery would be enough for a simple greenhouse setup that involves ventilation heating. It can power up fans to spread the warm air in your greenhouse.
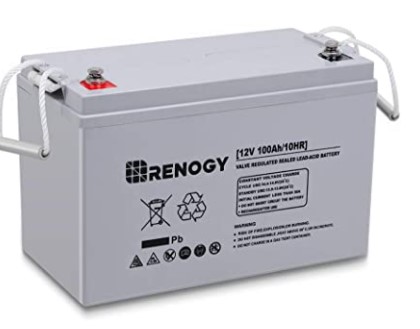
However, if the demand that you need to heat your greenhouse exceeds its limitations, you may add another battery and solar panels.
(4) Power inverter: The component that helps convert the solar into amperes that are used to power up simple appliances like fans and those with plugs.
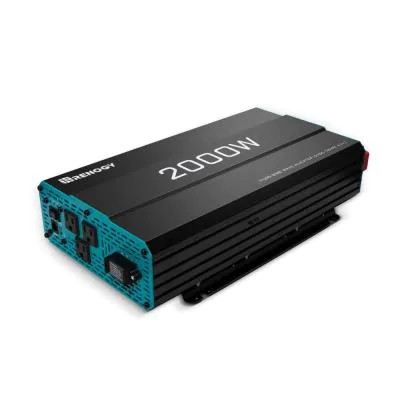
In a simple setup, a 2000-watt power inverter can power up 175 to 200-amp appliances like chargers.
Grid-Type Solar System Setup
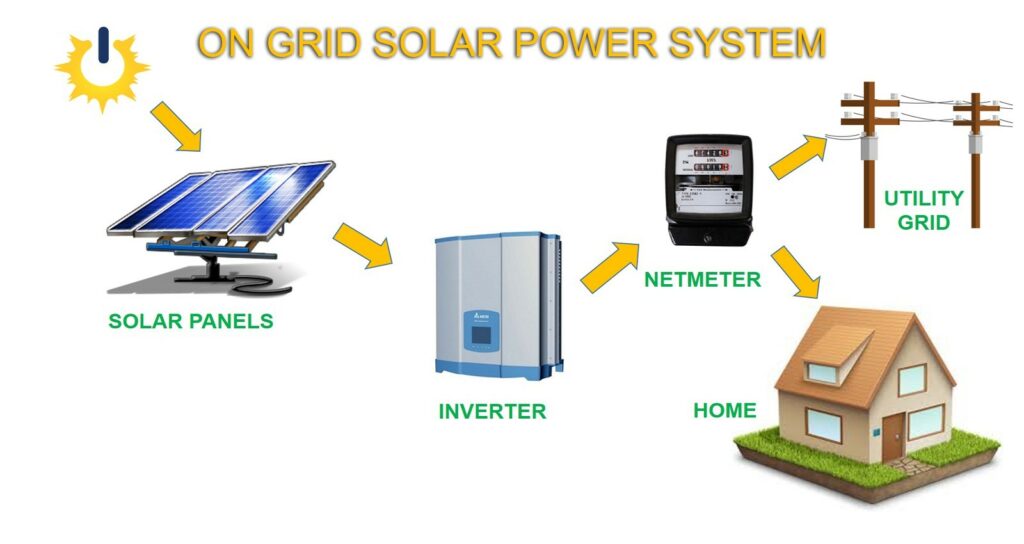
An on-grid setup is a solar-powered system where you are connected to your utility line.
It produces electricity based on the converted energy from the inverter and solar panels. The consumption and extra energy produced by your solar system are registered to your electric meter. The power remains on because it transitions to your mainline utility if the sun is inadequate in providing enough energy to power up your home or greenhouse.
In some cases, the utility company can buy the extra energy produced by your solar system and deduct it from your monthly dues.
The downside of this setup is when there’s no power from your grid or main power line, the solar system also doesn’t work since it does not have enough batteries to sustain energy demand. Its typical components are:
- Solar panels
- AC/DC inverter
- Net meter
- Backup batteries
- Electricity grid
Today, there is a hybrid-grid setup wherein on-grid solar systems have batteries for emergency use. However, these setups require registration from your electricity provider or a grid line.
An on-grid solar system is NOT usually recommended in heating small greenhouses simply because it costs a lot. Unless your whole house is on-grid, it may not be a practical option.
How To Heat A Greenhouse With Solar Panels?
Now that you have an idea of how the solar system works, it’s time to set up your greenhouse heating system.
We will be sharing two simple off-grid solar system setups suitable for small greenhouses. These include:
Materials To Build A Simple Solar System For a Greenhouse
Since solar renewable energy is readily available in the market, you now have two options in having one.
You can either buy a complete set or a solar kit which is a one-time investment or buy each component from different sources and assemble DIY-style.
To make it easier for you to find the resources, we listed the best resources for both options below:
Solar Power System Kits
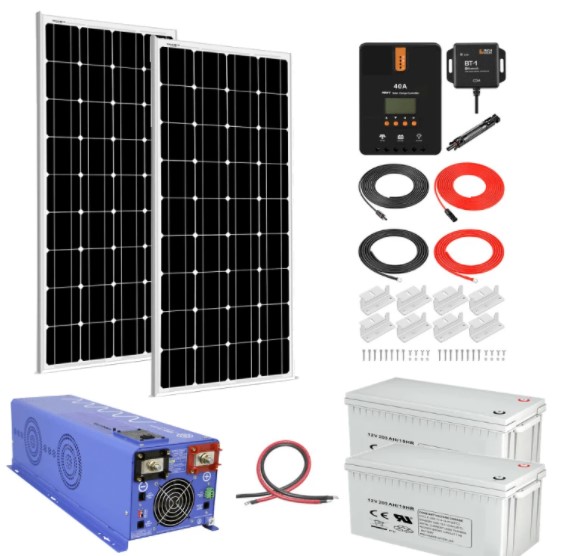
Solar system kits are the most beginner-friendly options that can help you build your solar system at home. They are ideal for those gardeners who are not tech-savvy.
Solar kits usually come with instructions and are easy to assemble. The only catch is they usually cost more than doing DIY using different brands.
Here are some of the good options to try:
- ECO-WORTHY 25 Watts 12V Off-Grid Solar Panel SAE Connector Kit
- ShopSolarKits Complete Off-Grid Solar System with battery and inverter
- SOLPERKSolar Panel Kit without battery and inverter
- WEIZE 200 Watt 12 Volt Solar Panel Starter Kit (no battery and inverter)
DIY Solar System
If you want to save and learn firsthand how to assemble a solar system here are the materials you’ll need:
Polycrystalline solar panels
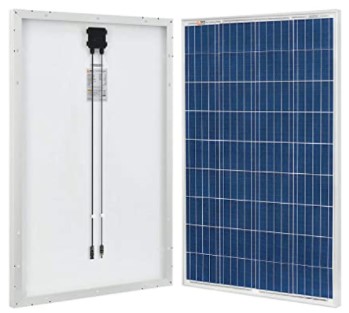
- RICH SOLAR 100 Watt 12 Volt Polycrystalline Solar Panel
- HQST 100 Watt Polycrystalline 12V Solar Panel with Compact Design
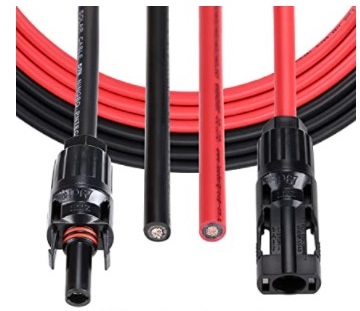
Solar panel cables
Charge controller
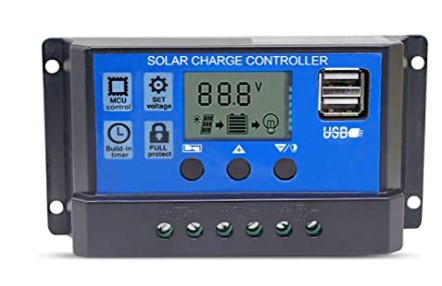
- 20A Solar Charge Controller Solar Panel Battery Intelligent Regulator
- Renogy Wanderer 10 Amp 12V/24V Solar Charge Controller Regulator
Inverter
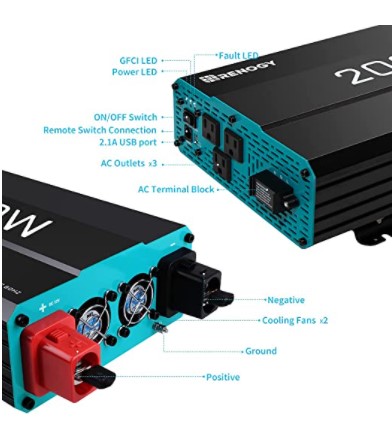
- Renogy 2000W Pure Sine Wave Inverter 12V DC to 120V AC Converter
- FOVAL 150W Power Inverter DC 12V to 110V AC Converter with 3.1A Dual USB Car Charger
Battery to inverter cable
- 4.5FT Battery Charger Cable Car Alligator Clips Cigarette Lighter Male Plug Adapter Kit
- POWISER 25 Feet SAE to SAE Extension Cable
Solar battery
- ECO-WORTHY 12V 10Ah LiFePO4 Lithium Iron Phosphate Deep Cycle Rechargeable Battery
- Mighty Max Battery 12V 100Ah SLA AGM Battery for Off-Grid
- Renogy Deep Cycle Hybrid Gel 12 Volt 100Ah Battery
- Mighty Max Battery 12V 18AH SLA AGM Rechargeable Deep Cycle Battery
- Weize 12V 12AH Sealed Lead Acid (SLA) AGM Deep Cycle Rechargeable Battery
- ExpertPower EXP12180 12V 18Ah Lead Acid Battery
- ExpertPower Standard 12V 7AH Rechargeable SLA Battery
Optional:
- BALDR Portable Power Station 330W, Portable Solar Generators for home use, Emergency Lithium Battery
Note: The term Ah in batteries means Amperes per hour which pertains to the charge that the battery can release every hour. It will be the basis of the amount of energy output that you can expect from the battery.
Setting Up The Solar System
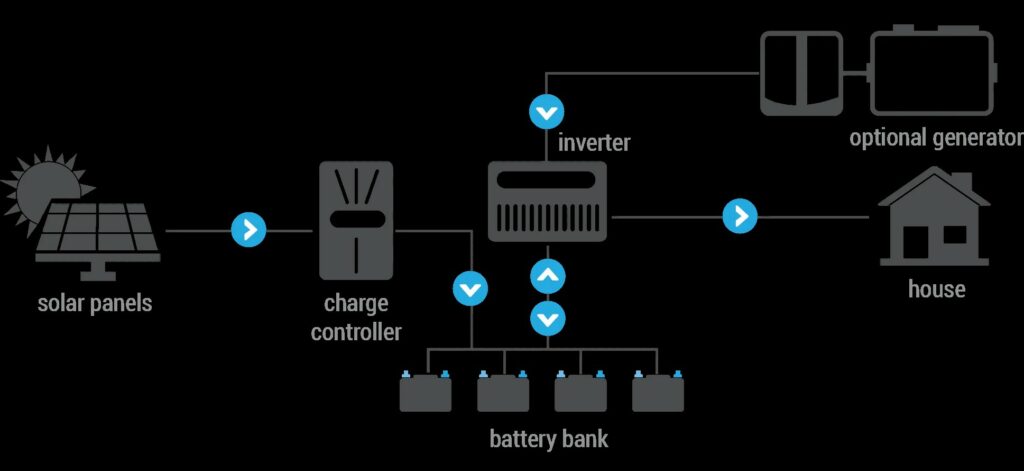
Either you opt for a solar kit or choose the DIY approach, the procedure in setting it up remains the same. Here’s how:
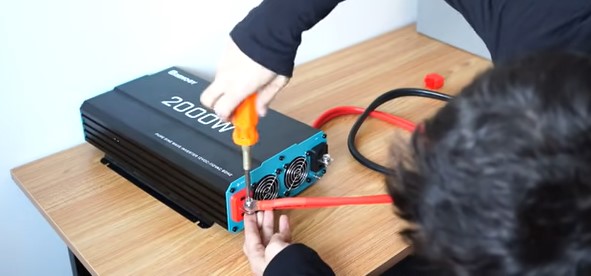
Step 1: Let’s first connect the components of the system before setting up the energy source to prevent any damage to the parts. Start by linking the inverter to the battery using the positive and negative cables connected respectively.
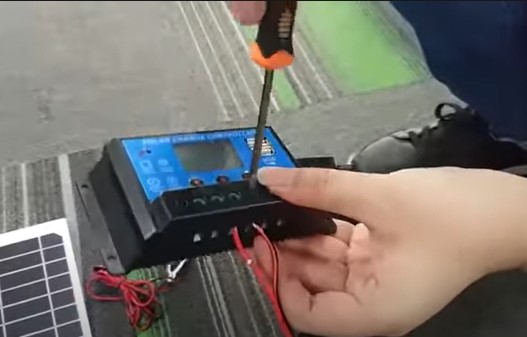
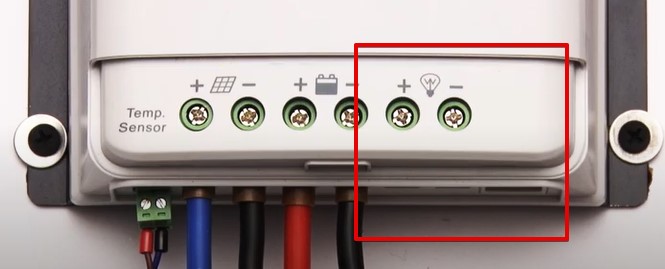
Step 2: Next, connect the battery to the charge controller. Gently strip the ends of the cable connecting to the charge controller so you can screw them in. You will notice that the LED screen of the charge controller will show the current charge of the battery.
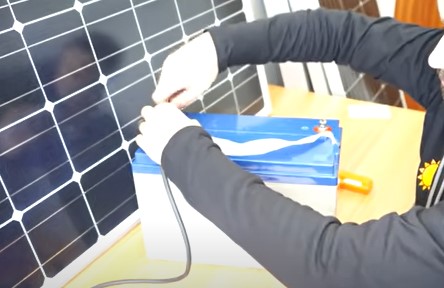
Step 3: Now, let’s link the power source to the system. Connect the solar panel to the charge controller using the cables. Make sure to match the positive and negative indications between the solar panel and the charge controller.
Step 4: Test the connections but try out the system. Here are some tests that you need to try:
(a) If your battery has an initial charge you may try to turn on the inverter to check if it’s running. You’ll hear the inverter running if the connection is working properly.
(b) Check the initial charge in the charge controller. Then, place the solar panel facing the sun and see if the numbers in the charge controller have changed. Once it changes, that means the solar panels are already charging your battery.
(c) While the inverter is on, try out plugging an AC appliance with the inverter like a cellphone charger.
(d) Lastly, try connecting a DC appliance to the charge controller like a DC light or fan. Once everything that you connect to the system turns on, you’ve successfully assembled your first solar system and are ready for assembling the heating appliances!
Solar-Powered Heater For Heating Water or Air
For small greenhouse setups, you may install a heating fan connected to your inverter to help heat the air or water that runs throughout the greenhouse.
In this guide, we will use a small heating fan to heat your greenhouse.
Note: This setup is directly connected to solar power and not connected to an inverter, charge controller, and battery.
Here are the materials you’ll need:
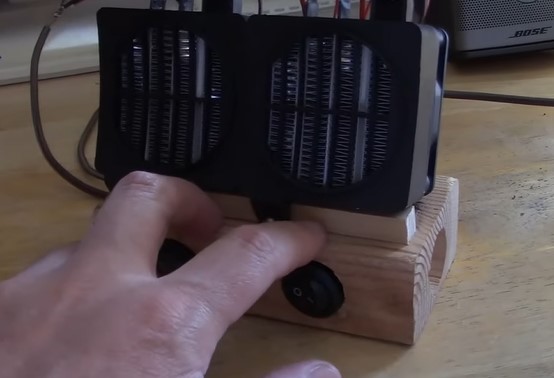
Materials:
- 2 100-watt solar panel
- 1 or 2 pcs. 12 V Fan Air Heater for Small Room Space (100W)
- Screwdriver
- Pliers
- Electrical tape
- Extension wires for the heater
- Soldering iron
- Rosen core
- Old extension cable
- Wood mount
- Toggle switch (APIELE ON-Off 2 Position Rocker Toggle Switch)
Directions:
(1) Glue the two heaters together side by side with the wires facing the top. The front three thick wires are for the heater and the thin wires behind are for the fan.
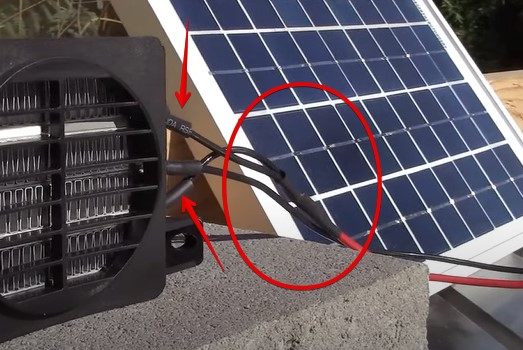
Prepare them by connecting the top and bottom wire for the heater and extending it with a red wire. Do this to both heaters to connect them to the switch.
(2) Solder the spare extension cord to the offside of the switch and connect its other end to the solar panels.
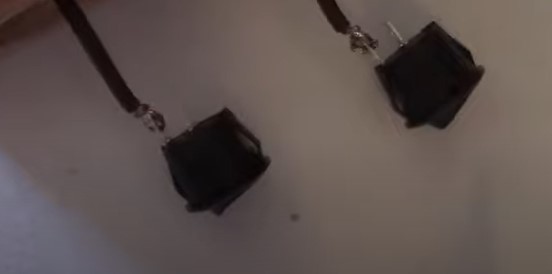
(3) Then, solder the red wire from the fan and the red wire from the heater on the other side of the switch.
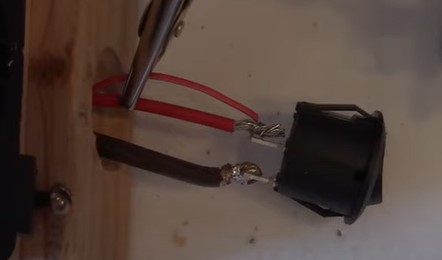
(4) The red wire is the positive charge from the solar panel while the black is the negative charge.
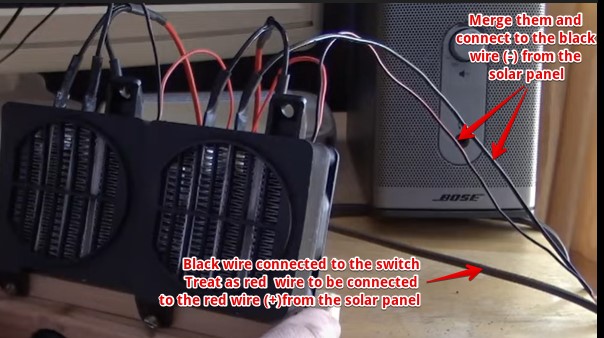
Now, connect the black wire connected to switch to the red wire from the solar panel. Then, merge the black wire of the fan and heater into one using a spare wire and connect it to the negative wire or black wire.
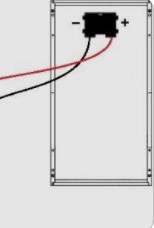
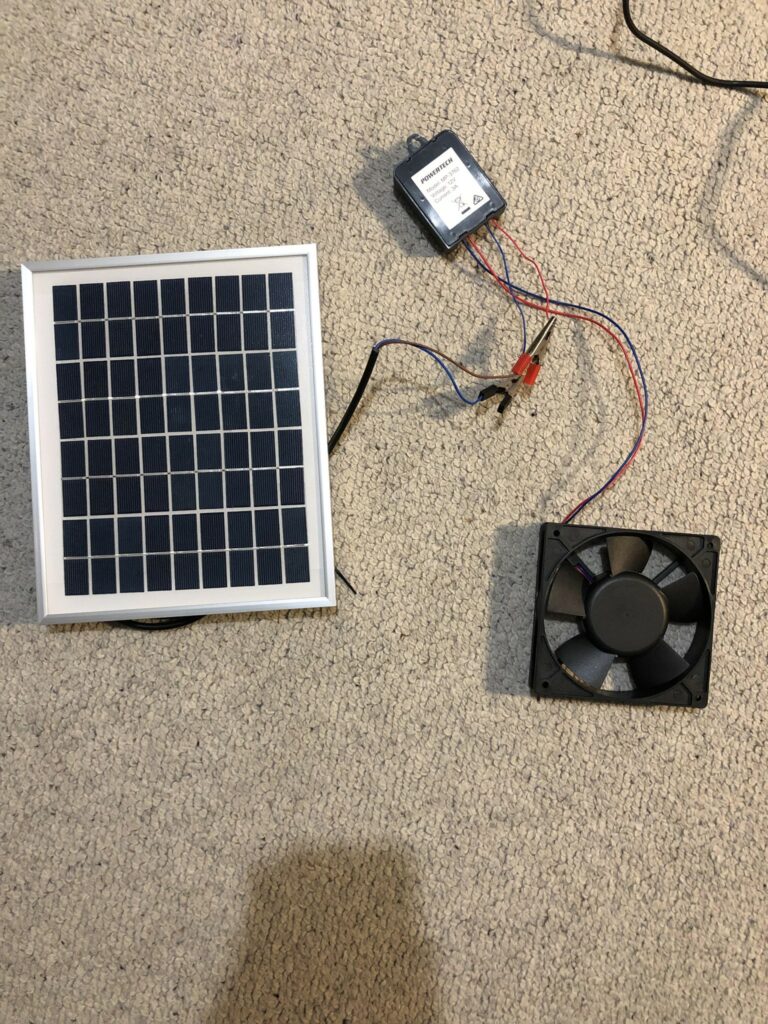
(5) Voila! Try out your new solar-powered heaters by turning the switches on and off. Remember each heat should be connected to one solar panel. Now, plan how you can set it up in your greenhouse, preferably in the areas with cold drafts.
If you wish to get the charge or energy from a storage battery, you can connect a DC regulator or charge controller to the battery. Then, connect the fan to the charge controller.
Fireplace Insert With Heat Extender Using Fans
Another practical option in heating a greenhouse using solar energy is finding another heat source aside from heaters.
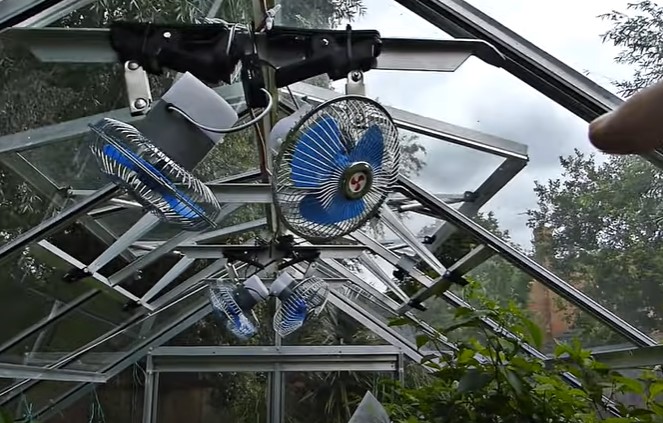
In this setup, we will use a wood-burning insert as the heat source and utilize solar-powered fans to regulate the heat in the greenhouse from the top to the ground.
Materials:
- Screwdriver
- Pliers
- Electrical tape
- 2 to 3 12V AC Fan
- 2 to 3 Temperature-sensitive switches (DuctStat Temperature Sensitive Switch)
- Extension outlet
- Extension wires for the fans
- Solar system setup
- Wood-burning insert (Vogelzang Plate Steel Wood Burning Insert with Blower)
- Aynaxcol 4 Blades Heat Powered Stove Fan
Directions:
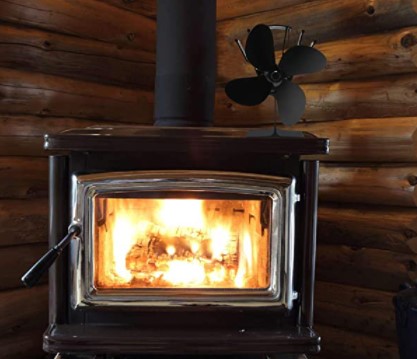
(1) In this setup, we suggest placing a wood-burning insert if you’re in a location with freezing temperatures.
Then, place a heat-powered stove fan on top of the wood-burning insert to distribute the heat throughout the greenhouse. Also, you may set up your off-grid solar system beforehand as mentioned above in this post.
(2) Then, with a running solar system, connect an outlet extension to the inverter and connect the temperature-sensitive switches. These switches have a sensor that only turns on an appliance connected to it when it reaches a specific temperature. It helps ensure that the fans will only run when needed. Place the switches near the location of your fans.
(3) Next, set up the fans around your greenhouse and plug them in the temperature-sensitive switch next to it. If you’re going to use more than one fan, you may add another battery to help sustain the energy demand.
(4) To check if the heat is distributed well, place a temperature monitor on top of the greenhouse and below.
Final Thoughts
We hope that this post has been helpful and informative for your pursuit of learning how to heat a greenhouse with solar panels.
The setup may look intimidating at first. However, once you get used to the parts needed, it will be easy for you to set it up on your own.
If you have successfully set up your solar system through our guide, please don’t forget to share it with your friends.
Also, let us know in the comments about your experience and the new things you discovered along the way. We hope you’ll stay warm and dry this upcoming cold season!
