

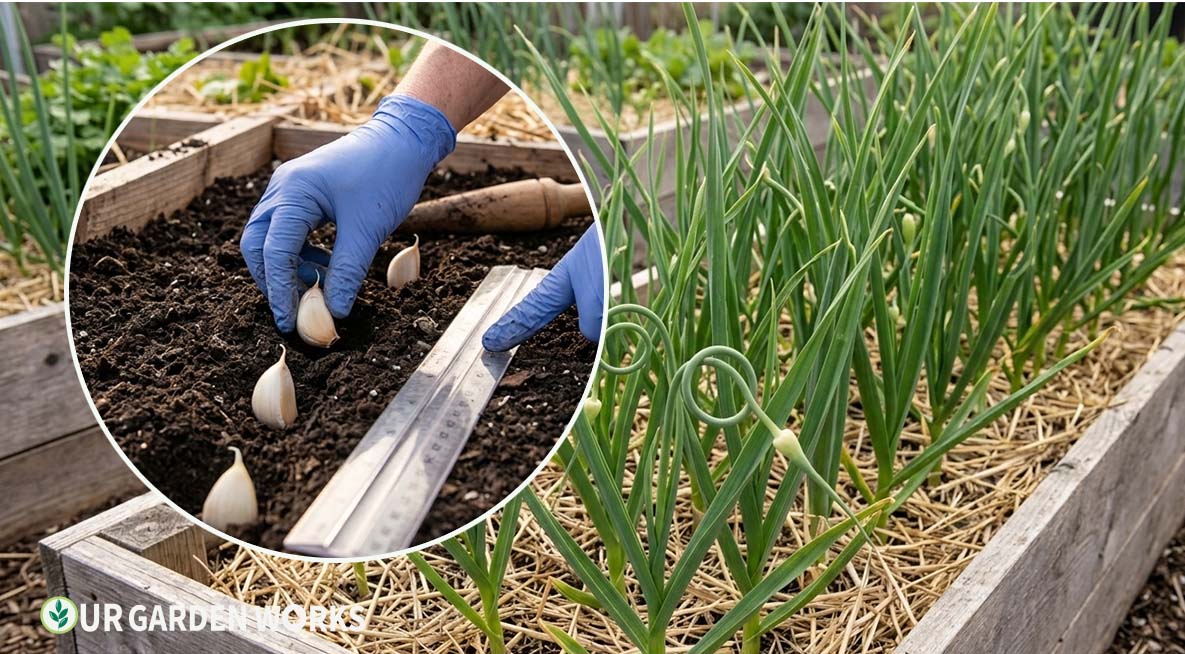
Garlic is one of the most satisfying crops to grow because the timeline is so different from everything else in the garden.
You plant it in fall, forget about it through winter, watch it shoot up in spring, harvest in early summer, and then enjoy home-cured garlic that tastes completely different from anything you’ve bought. The papery, dry, shelf-stable bulbs from the garden have flavor intensity that supermarket garlic simply doesn’t have.
It’s also one of the lowest-maintenance crops you’ll grow. Plant in fall, mulch, wait, harvest in June. That’s essentially the whole process — with a few technique details that make the difference between small bulbs and large, well-cured ones.
Quick Guide: Plant garlic cloves in fall, 4–6 weeks before the ground freezes, pointy end up, 2 inches deep, 6 inches apart. Hardneck varieties produce the best flavor; softneck varieties store longer. Harvest when 5–6 lower leaves have died back. Cure in a warm, airy space for 3–4 weeks before storing.
Why Garlic’s Growing Calendar Is Unlike Anything Else You Grow
Almost every other vegetable in the garden follows a familiar rhythm: plant in spring, tend through summer, harvest before fall. Garlic flips that entirely, and understanding why helps explain some of its more unusual requirements.
The plant needs an extended period of cold — a process called vernalization — to trigger proper bulb formation. Skip that cold period, as happens with spring-planted garlic, and the plant often produces a single undivided round rather than the multi-clove bulb you’re used to seeing.
This means garlic spends roughly eight or nine months in the ground from planting to harvest, the vast majority of that time completely dormant or growing so slowly above ground that there’s genuinely very little for you to do.
For gardeners who enjoy having a low-effort crop quietly working away in the background while their attention goes to more demanding summer vegetables, garlic fills that role better than almost anything else available.
Hardneck vs. Softneck Garlic — Choose First
| Type | Best Varieties | Best For | Storage |
|---|---|---|---|
| Hardneck | Rocambole, Porcelain, Purple Stripe, Chesnok Red | Best flavor, produces scapes | 4–6 months |
| Softneck | Silverskin, Artichoke, California Early | Longest storage, braiding | 9–12 months |
Hardneck garlic has complex, rich flavor and also gives you garlic scapes — a delicious spring vegetable. Softneck is milder and stores much longer.
Most home gardeners plant both: hardneck for kitchen flavor and softneck for the winter supply. Buy seed garlic from a reputable source rather than grocery store garlic — named varieties offer significantly better results.
How to Grow Garlic: Step by Step
Step 1 — Plant in Fall (The Non-Negotiable Timing)
Garlic must be planted in fall. It needs a cold period (vernalization) to trigger bulb formation — without it, you get rounds (single unseparated bulbs) instead of proper segmented bulbs. For most of the US, plant in October or early November — 4–6 weeks before the ground freezes solid.
Materials
- Seed garlic bulbs (not grocery store garlic)
- Compost, slow-release fertilizer
- Mulch (straw, 4–6 inches deep)
Directions
- Prepare the bed by working in 2–3 inches of compost. Garlic is a medium feeder — good soil at planting carries it through most of the season.
- Break bulbs into individual cloves right before planting. Don’t separate them weeks ahead — the protective wrapper that keeps cloves moist starts drying out once exposed.
- Plant each clove pointy end up, 2 inches deep, 6 inches apart in rows 10–12 inches apart.
- Cover the bed with 4–6 inches of straw mulch immediately after planting. This insulates the soil, moderates freeze-thaw cycles that heave bulbs, and dramatically reduces spring weed pressure.
- Water once if soil is dry. Garlic doesn’t need much water in fall — it’s just establishing roots before dormancy.
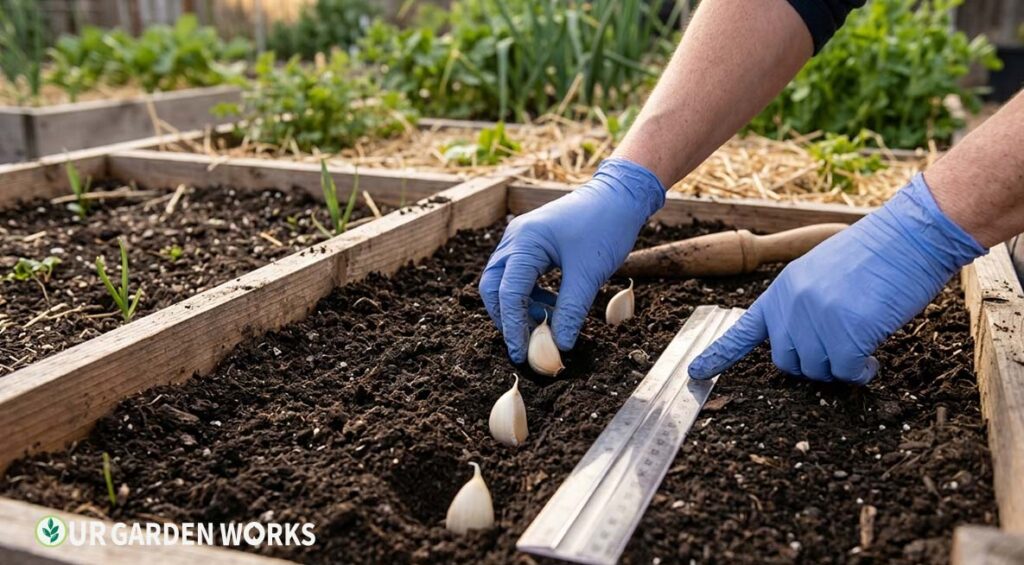
For the complete guide to fall garlic planting timing and regional schedules, see our how to plant garlic in the fall guide, and for the exact planting depth by zone, see our how deep to plant garlic guide.
Step 2 — Spring Care and Scape Removal
Pull back mulch slightly in spring when shoots emerge. Green shoots will push through mulch on their own, but a heavy layer can slow them down. Leave the mulch in place for weed suppression.
Watering: 1 inch per week through spring as bulbs are actively developing. Stop watering completely 2 weeks before harvest — dry soil at harvest allows the wrapper to cure properly on the bulb.
Fertilize: One application of balanced fertilizer in early spring when plants are 4–6 inches tall. Stop all fertilizing by late spring — feeding late pushes green growth when the plant should be directing energy into the bulb.
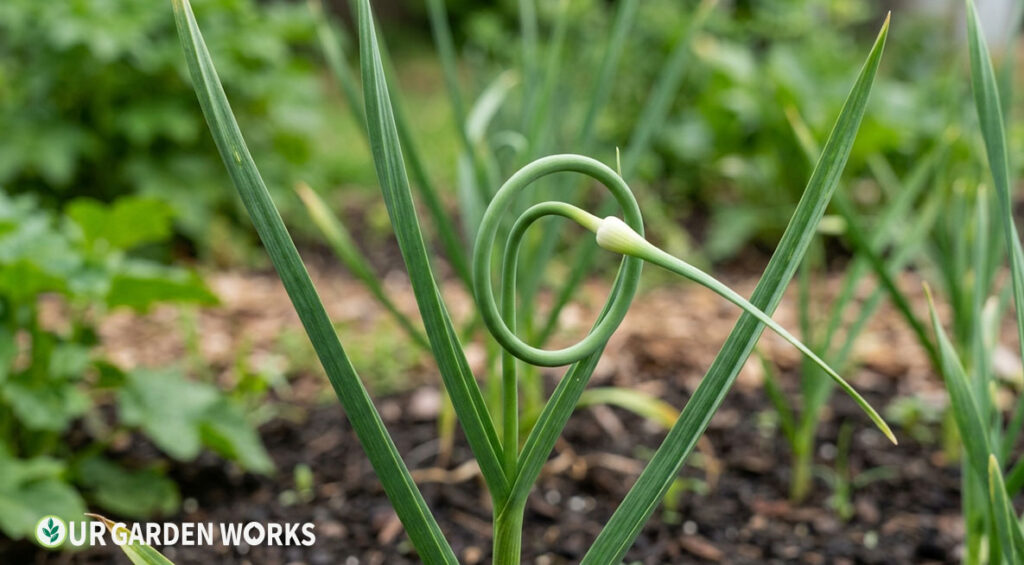
Remove scapes (hardneck only): Garlic scapes are the curling green flower stalks that emerge from hardneck varieties in early summer. Remove them when they’ve made one curl — snap or cut at the base of the scape where it emerges from the leaves. Removing scapes redirects the plant’s energy into bulb development, producing larger bulbs. The scapes themselves are delicious — use them like garlic in cooking.
Step 3 — Harvesting Garlic (Timing Is Everything)
Harvest timing is the skill that separates small, poorly wrapped bulbs from large, beautifully cured ones. The key: count the leaves. Each green leaf on the plant corresponds to a wrapper layer on the bulb.
You want to harvest when 5–6 lower leaves have died back (turned brown) while 5–6 upper leaves are still green. This gives you enough wrapper layers for the bulb to cure properly without waiting so long that the wrappers deteriorate underground.
For the complete harvest timing guide, see our when to harvest garlic guide.
How to Harvest
- Loosen soil with a garden fork 6 inches from the bulb. Never pull garlic by the tops — the stem snaps and the bulb is left underground.
- Lift the loosened bulb gently by inserting the fork at an angle under the bulb.
- Brush off excess soil with your hands. Don’t wash — moisture at this stage delays curing.
Step 4 — Curing and Storage
Curing is what transforms freshly harvested garlic into shelf-stable, papery-wrapped bulbs. Hang harvested bulbs in bunches of 10–12 in a warm (75–80°F), dry, well-ventilated space — a covered porch, shed, or garage.
After 3–4 weeks, the tops will be completely dry, the outer wrapper will be papery, and the roots will be dry and brittle. Trim the roots and tops, and store in a cool, dark, dry location with good airflow — a mesh bag works perfectly. Properly cured hardneck garlic stores for 4–6 months; softneck for 9–12 months.
⚠️ Don’t rush curing
It’s tempting to trim and store garlic as soon as it’s harvested, but skipping or shortening the curing period produces bulbs that go soft and sprout within weeks rather than months. The slow drying process is what actually creates the papery wrapper and shelf stability you’re after — there’s no shortcut that gets you the same storage life.
Frequently Asked Questions
Can I plant garlic from the grocery store?
Technically yes, but we don’t recommend it. Grocery store garlic is often treated to inhibit sprouting, may carry diseases, and the varieties grown for commercial storage aren’t the most flavorful. Seed garlic from garden suppliers costs very little more and produces dramatically better results with named, disease-free varieties.
What if I missed fall planting?
Plant as early as possible in spring, but expect smaller bulbs — garlic planted in spring doesn’t get the cold period needed for full bulb development. Spring-planted garlic often produces rounds instead of segmented bulbs. In Zone 7 and warmer, winter planting (January–February) can work as a compromise.
How many cloves should I plant?
Each clove produces one bulb. A 4×4 foot bed planted 6 inches apart in both directions holds approximately 64 cloves = 64 bulbs. A family of four typically uses 1–2 bulbs per week, so 50–80 bulbs covers most of the year.
Should I save some of my harvest to replant as next year's seed garlic?
Yes — this is a great practice once you’ve grown a variety you like. Set aside your largest, healthiest bulbs at harvest specifically for replanting rather than eating. Garlic grown from your own saved seed gradually adapts to your specific soil and climate over a few seasons, often outperforming freshly purchased seed garlic of the same variety after two or three generations.
🥬 Related Articles in Our Vegetable Gardening Guide
Final Thoughts
We hope this guide has made growing your own garlic feel completely achievable — because it is. Plant it once in fall and it practically takes care of itself through winter. The cured bulbs you pull out in June taste so far beyond anything you can buy that it genuinely changes how you cook.
For all our vegetable growing guides, our vegetable gardening guide links to everything.
Share this post with a fellow gardener who’s ready to grow their own — and let us know in the comments which garlic variety you’re trying first this fall. Happy growing!
